Why Is Paint Not Sticking to Wall? Fix It
Paint is not sticking to a wall because the coating cannot form a reliable bond with the surface or the existing paint layer. The usual causes are grease, dust, chalking, moisture, excessive gloss, incompatible coatings, uncured filler, or incorrect drying conditions. The lasting fix is to remove failed paint, clean, dry, test, prime, and repaint.
Key Facts at a Glance
- Moisture is the first problem to rule out: paint applied over a damp wall commonly blisters, bubbles, or peels again.
- Glossy paint needs abrasion or a bonding primer: a smooth enamel surface provides little texture for mechanical adhesion.
- Latex paint should not be applied directly over unprepared oil-based paint: use a compatible bonding primer after cleaning and scuff-sanding.
- A wall must be clean, dry, sound, and suitably dull before painting: Benjamin Moore technical guidance summarizes the preparation rule as “clean, dry and dull.”
- Typical DIY repair materials cost $25-$75: severe staining, masonry repairs, or professional labor can increase the total substantially.
- A paint film can feel dry before it has cured: many acrylic latex coatings need approximately 21-30 days to reach full hardness.
Why Is Paint Not Sticking to Wall?
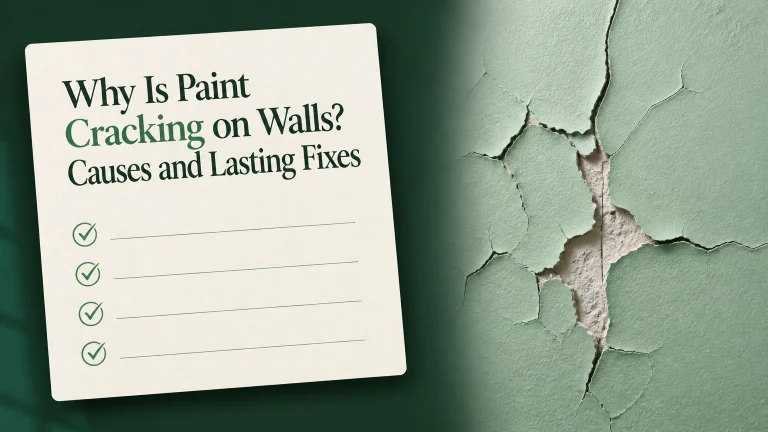
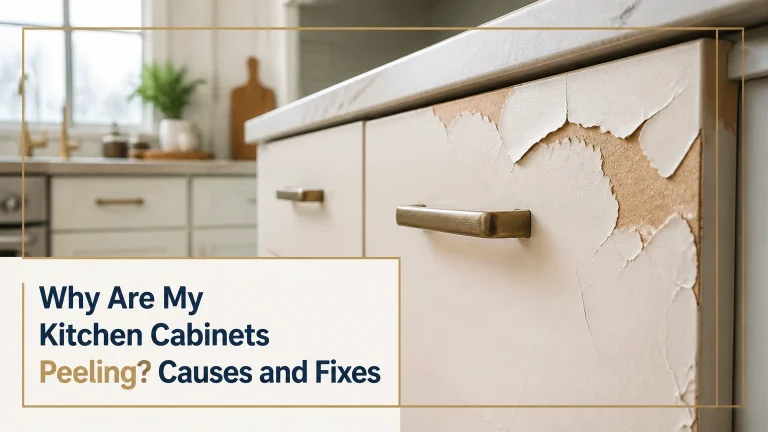
Paint usually fails when contamination, moisture, surface smoothness, or coating incompatibility prevents the wet paint film from contacting and bonding to a stable substrate. Peeling in large sheets often indicates poor intercoat adhesion, while bubbles and blisters more strongly suggest moisture, heat, or trapped solvent beneath the film.
Paint adhesion has two practical components. Mechanical adhesion occurs when liquid coating enters tiny pores and surface scratches, then hardens in place. Chemical or intercoat adhesion occurs when the binder in a new coating wets and interacts with the existing surface sufficiently to form a durable film.
A wall can look clean while still carrying invisible cooking oil, soap residue, nicotine, furniture polish, sanding dust, or drywall compound. Those materials create a weak boundary layer. The new paint adheres to the contaminant rather than to the wall.
What Does the Failure Pattern Reveal?
The shape and texture of failed paint provide an initial diagnosis, but no single appearance proves the cause. A tape test, moisture check, and solvent test produce more reliable evidence before repair begins.
| Failure appearance | Most likely cause | Confirming check | First response |
|---|---|---|---|
| Large sheets peel from smooth wall | Gloss, poor cleaning, incompatible coating | Adhesion tape test | Scrape, scuff-sand, clean, bond-prime |
| Small flakes expose powdery surface | Chalking or weak old paint | Rub with dark cloth | Remove residue and prime |
| Raised bubbles or blisters | Moisture, heat, trapped solvent | Moisture meter or leak inspection | Stop painting and correct water source |
| Cracks form in a rigid network | Thick film, aging, movement | Inspect multiple layers | Remove unstable coating and patch |
| Paint wipes off when rubbed | Uncured coating or contamination | Finger-rub test after label dry time | Allow cure, clean, or remove failed film |
| New coat separates at roller passes | Overworking or recoating too soon | Observe soft, tacky film | Stop rolling and follow recoat time |
How Can You Identify the Exact Cause?
You can narrow down paint adhesion failure in about 15-30 minutes by using four simple checks: a rub test, tape test, moisture inspection, and solvent test. These checks do not replace professional investigation, but they distinguish surface contamination, weak existing paint, moisture, and oil-based coatings.
- Perform a rub test. Wipe the wall with a clean, dark cloth. White powder indicates chalking, while a slippery or oily feel indicates grease, wax, or polish.
- Perform a crosshatch tape test. Cut a small grid through the paint surface with a sharp utility knife, apply firm low-tack tape, press it down, and pull it off at a 180-degree angle. If squares detach, the coating is unstable.
- Check for moisture. A pin or pinless moisture meter gives a comparative reading. A reading below 12% is a commonly used practical target for many interior paint applications, but the paint manufacturer’s substrate limit takes priority.
- Test suspected oil paint. Rub a hidden area with denatured alcohol on a cloth. If the coating softens or transfers, it may be latex or acrylic. If it remains hard, test a separate spot with a small amount of acetone only when the surface and ventilation permit; solvent tests are suggestive, not definitive.
- Inspect the opposite side of the wall. Plumbing fixtures, exterior cracks, roof edges, cold corners, and unvented bathrooms can reveal the moisture source.
Do not rely on color, age, or a previous owner’s description to identify oil-based paint. A compatibility primer and a small test patch are safer than guessing.
Is Moisture Causing the Paint Failure?
Moisture is the likely cause when paint bubbles, blisters, develops brown stains, or repeatedly fails in the same location. Water can come from plumbing leaks, roof intrusion, foundation pressure, exterior cracks, condensation, or vapor movement through masonry, and a new coat cannot permanently seal an active source.
Bathrooms and exterior-facing corners are common trouble spots because warm humid air condenses on cold surfaces. Basement walls and ground-level masonry can develop efflorescence, which appears as white crystalline salt deposits. Those salts are carried toward the surface by water and can disrupt both the paint film and the masonry substrate.
| Moisture source | Typical location | Visual clue | Required correction |
|---|---|---|---|
| Plumbing leak | Below sink, behind shower, near supply line | Localized brown or yellow stain | Repair plumbing and dry cavity |
| Condensation | Bathroom ceiling, cold exterior corner | Black spotting or recurring dampness | Ventilate, heat, insulate, remove mold safely |
| Roof or flashing leak | Upper wall and ceiling edge | Stain enlarges after rain | Repair roof or flashing |
| Rising damp | Basement or lower masonry | Horizontal peeling band | Address drainage, waterproofing, or capillary moisture |
| Hydrostatic pressure | Below-grade concrete or block | Blisters and white salts | Manage exterior water and pressure |
| Efflorescence | Brick, stucco, concrete | White powder or crystals | Remove salts, resolve water entry, use masonry system |
Drying time depends on material thickness, ventilation, temperature, and water volume. A washed interior wall may need 24-48 hours, while wet plaster, concrete, or drywall can require several days or replacement. A moisture meter reading that remains high after ventilation means painting should stop.
Is the Existing Paint Too Glossy?
Old glossy paint can prevent a new coating from gripping because its dense, smooth film has limited texture and may have low surface energy. Semi-gloss and high-gloss enamel should normally be cleaned and scuff-sanded, or coated with a manufacturer-approved bonding primer, before applying wall paint.
Use 120- to 180-grit abrasive paper for most interior painted walls. The goal is to remove shine and create a uniform dull profile, not to strip every square inch to bare substrate. Sanding dust must then be vacuumed and wiped away because dust creates the same weak boundary layer as grease.
| Existing surface | Preparation | Recommended primer | Suitable topcoat |
|---|---|---|---|
| Flat latex paint | Clean, lightly sand damaged areas | Acrylic primer | Acrylic latex |
| Semi-gloss latex | Degrease and scuff-sand | Acrylic bonding primer | Acrylic latex or acrylic enamel |
| High-gloss alkyd enamel | Degrease, sand, adhesion-test | Bonding primer rated for alkyd | Compatible acrylic or alkyd |
| Powdery chalking paint | Remove all loose powder | Penetrating or masonry primer | Exterior acrylic or masonry coating |
| Bare drywall | Remove dust and seal joints | Drywall or PVA primer | Interior acrylic latex |
| Old oil-based paint | Clean, sand, test patch | Bonding primer for oil-to-water transition | Compatible latex topcoat |
Liquid deglossers can help on intricate trim, but they do not remove grease, repair loose paint, or correct moisture. Follow the product’s dwell time and ventilation requirements.
Is Old Paint Incompatible With the New Paint?
Old paint becomes incompatible when the new coating cannot adequately wet, grip, or remain flexible over the previous film. The most common interior example is water-based latex applied over glossy oil-based alkyd without cleaning, abrasion, and a bonding primer.
Oil and latex are not automatically incompatible. A properly prepared, sound oil-based film can often accept a waterborne topcoat when the primer manufacturer specifically allows that transition. The problem is direct application over a slick, contaminated, or poorly cured surface.
Which Primer Should You Use?
The correct primer depends on the substrate and the contaminant, not simply on whether the wall is indoors or outdoors. Acrylic primer suits clean porous drywall, bonding primer suits slick surfaces, alkyd blocks many stains, and shellac-based primer handles severe odor and bleed-through.
| Primer chemistry | Typical price per gallon | Best application | Dry or recoat range | Main limitation |
|---|---|---|---|---|
| Water-based acrylic | $25-$55 | Drywall, plaster, routine repainting | 1-4 hours | Limited severe stain blocking |
| High-adhesion bonding | $35-$70 | Gloss, tile, alkyd, dense enamel | 1-4 hours | Needs sound, clean substrate |
| Oil-based alkyd | $35-$65 | Water stains, wood tannins, smoke marks | 8-24 hours | Odor, VOCs, mineral-spirit cleanup |
| Shellac-based | $50-$80 | Smoke odor, knots, severe bleed-through | 30-60 minutes | Flammable, brittle, fast application |
| Masonry acrylic | $30-$65 | Concrete, block, stucco, mineral surfaces | 2-6 hours | Does not solve active water entry |
A premium primer cannot rescue loose paint, wet drywall, crumbling plaster, or grease that remains on the wall. Primer bridges a compatibility problem after preparation; it is not a substitute for preparation.
How Do You Fix Peeling Paint?
Fix peeling paint by removing every unstable layer, smoothing the transition, cleaning the substrate, correcting moisture, applying the right primer, and using thin topcoats. A typical small interior repair takes 1-2 days of active and drying time, with approximately $25-$75 in materials.
Before You Start
| Requirement | Typical specification | Why it matters |
|---|---|---|
| Active labor | 2-5 hours for one damaged area | Covers scraping, sanding, cleaning, and coating |
| Drying time | 24-48 hours after washing | Prevents moisture entrapment |
| Basic materials | Scraper, 120-grit paper, cleaner, primer, paint | Supports the complete repair sequence |
| Protective equipment | Gloves, eye protection, N95 or equivalent dust mask | Limits chemical and dust exposure |
| Typical DIY cost | $25-$75 | Varies by primer and repair size |
| Prerequisite | Leak corrected and substrate sound | Prevents repeat failure |
Step 1: Remove Loose Paint
Scrape all blistered, flaking, cracked, and hollow-sounding paint with a flexible putty knife. Extend the repair until the remaining coating is firmly attached, then feather the edges so the transition cannot be felt with a fingertip.
You will know this step worked when firm hand pressure and light scraping no longer lift additional flakes. Do not force a scraper into sound drywall paper, because torn paper creates a larger priming and patching problem.
Step 2: Sand the Surface
Sand the exposed edges with 120-grit paper and dull glossy areas with 120- to 180-grit paper. Use a sanding sponge on corners and profiles, then vacuum and wipe away all dust with a clean damp cloth.
The correct finish is uniformly dull and smooth, not polished. A common mistake is sanding without cleaning afterward; the primer then bonds to loose abrasive dust rather than the wall.
Step 3: Wash Away Contamination
Wash greasy or dirty walls with a suitable household degreaser or a TSP substitute. Traditional trisodium phosphate is effective but alkaline, so wear gloves and eye protection, protect floors, and follow the label dilution rather than increasing concentration.
Rinse with clean water when the cleaner requires rinsing. The wall is ready for the next step when the cloth no longer picks up residue and the surface has no slippery film.
Step 4: Let the Wall Dry Completely
Dry the wall for at least 24-48 hours after washing under ordinary indoor conditions. Increase the drying period for plaster, masonry, cool rooms, high humidity, or any wall affected by a leak.
Use ventilation and controlled heat, but do not aim a high-temperature heater directly at wet paint or filler. Rapid surface drying can trap moisture below the film.
Step 5: Patch and Seal Repairs
Fill shallow gouges and nail holes with a compatible patching compound, allow it to dry according to thickness, and sand it flush. Prime bare drywall paper, porous plaster, and repaired areas because unsealed patches absorb paint at a different rate and can weaken the finish.
Use a stain-blocking primer for water marks, nicotine, smoke, or tannin bleed. Persistent brown staining after one coat usually requires a second coat or a different chemistry, not thicker topcoat paint.
Step 6: Apply the Correct Primer
Roll or brush one even coat of primer over the repair and any incompatible or glossy surrounding surface. Maintain the manufacturer’s spread rate, because overextending primer creates a thin film with reduced hiding and weaker film formation.
You will know the primer is ready when it is uniformly dry, no longer tacky, and resistant to light rubbing. Respect the listed recoat window; “dry to touch” is not always “ready to topcoat.”
Step 7: Apply Two Controlled Topcoats
Apply two thin, even coats of compatible wall paint, using the recommended roller nap and maintaining a wet edge. Let the first coat reach its stated recoat time before applying the second, even if the color appears covered.
Stop working an area once the paint begins to set. Repeated rolling over half-dry paint can tear the developing polymer film and create lap marks, weak spots, and uneven sheen.
Which Conditions Are Safe for Painting?
Water-based interior paint generally performs best between 50°F and 90°F, with ventilation and relative humidity below approximately 85%, but the product label remains the controlling specification. Surface temperature, airflow, and dew-point risk matter more than room temperature alone on exterior walls.
| Condition | Practical target | Risk outside target | Corrective action |
|---|---|---|---|
| Air temperature | 50°F-90°F | Slow cure or flash drying | Heat or cool room gradually |
| Relative humidity | Below 85%, preferably 40%-60% | Slow drying and trapped moisture | Ventilate and dehumidify |
| Wall moisture | Below 12% typical interior target | Blistering and peeling | Find source and dry substrate |
| Recoat interval | 1-4 hours for many acrylics | Solvent or water entrapment | Follow product label |
| Full acrylic cure | 21-30 days typical | Early scuffing or blocking | Clean gently during cure |
| Direct sunlight | Avoid during application | Uneven drying and lap marks | Shade the surface |
Painting in direct summer sunlight can dry the surface faster than the underlying film. Painting below the product’s minimum temperature can prevent proper coalescence, leaving a soft or powdery coating.
What Changes in Bathrooms and Kitchens?
Bathroom and kitchen walls need stronger cleaning and moisture control because soap film, cooking grease, steam, and condensation attack adhesion more often than ordinary living-room contamination. Use a washable acrylic coating only after degreasing, drying, and correcting ventilation or water intrusion.
Bathroom bubbling near a shower may indicate water entering through failed caulk, grout, plumbing, or wallboard. Paint formulated for bathrooms will not repair a saturated substrate. Kitchen paint that peels behind a range hood usually points to aerosolized grease and insufficient extraction.
For mold, do not encapsulate active growth with primer. Address the water source, clean according to EPA guidance for the size and material involved, and replace porous drywall when contamination has penetrated deeply.
What Should You Do With Plaster, Drywall, and Masonry?
Substrate selection changes the repair sequence because drywall paper, plaster, concrete, and stucco absorb primer differently and respond differently to moisture. Bare drywall needs sealing, plaster needs adequate curing and stability, and masonry needs a coating system that tolerates alkalinity and vapor movement.
| Substrate | Common adhesion problem | Preparation | Primer or sealer |
|---|---|---|---|
| New drywall | Porous paper and joint compound | Remove dust and sand ridges | Drywall/PVA primer |
| Old plaster | Powdering, movement, moisture | Scrape, consolidate, repair cracks | Acrylic or penetrating sealer |
| Concrete block | Alkalinity and vapor | Remove salts and loose coating | Masonry acrylic primer |
| Stucco | Efflorescence and cracks | Brush salts, repair water entry | Masonry conditioner |
| Painted wood paneling | Gloss and tannins | Degrease and scuff-sand | Bonding or alkyd primer |
| Ceramic tile | Nonporous glazed surface | Degrease and abrade | Tile-rated bonding primer |
Never paint over efflorescence until the moisture route has been corrected. Brushing away the visible salts without stopping water movement usually produces another failure.
Why Did Fresh Paint Peel Immediately?
Fresh paint that peels within hours or days usually sits on contamination, a glossy coating, wet filler, or a weak old layer. Immediate failure is less consistent with ordinary paint aging and more consistent with a preparation, compatibility, or environmental error.
| Immediate failure | Likely mistake | Recovery |
|---|---|---|
| Paint lifts with tape | Unstable old coating | Remove back to sound paint |
| Roller pulls wet sheets | Surface contamination or wet primer | Stop, clean, and allow full dry time |
| Bubbling in sunlight | Heat or moisture | Shade, dry, and investigate water |
| Peeling over patch | Unprimed or uncured filler | Remove loose coat, seal patch |
| Soft coating after 24 hours | Low temperature or high humidity | Improve conditions and extend cure |
| Craters or fisheyes | Silicone, wax, or polish | Strip contamination and use compatible primer |
One counterintuitive rule matters: adding more coats does not strengthen a weak foundation. A thick coating can increase internal stress and make peeling more severe.
Common Mistakes and How to Fix Them
Painting Over Damp Walls
Failure: Moisture pressure pushes the film outward or prevents proper curing.
Fix: Repair the leak, improve ventilation, remove damaged drywall when necessary, and confirm the wall has dried before priming.
Skipping the Cleaning Step
Failure: Sanding may dull a surface but leave grease, soap, or nicotine behind.
Fix: Degrease first, rinse when required, dry fully, then sand and vacuum.
Using Regular Primer on a Slick Surface
Failure: A general-purpose acrylic primer may not bond reliably to hard enamel or tile.
Fix: Select a bonding primer whose technical data specifically names the existing coating or substrate.
Recoating by Clock Alone
Failure: A room at 55°F and 75% humidity may need longer than a label’s ideal-condition recoat time.
Fix: Check tack, temperature, airflow, and the product’s minimum recoat interval.
Overworking Half-Dry Paint
Failure: Repeated brush or roller passes disturb the forming film.
Fix: Work in manageable sections and leave the surface alone once it begins to drag.
How Much Does Repair Cost and How Long Does It Take?
A small DIY interior adhesion repair typically costs $25-$75 and requires 1-2 calendar days because cleaning, primer, and paint need drying time. Professional repair commonly costs $200-$800 for a localized wall, while widespread moisture damage, lead abatement, or masonry work can exceed $1,000.
| Repair scope | DIY materials | Calendar time | Typical professional price |
|---|---|---|---|
| Small patch, under 10 sq. ft. | $25-$45 | 1-2 days | $150-$300 |
| One damaged wall | $45-$100 | 2-3 days | $300-$800 |
| Kitchen or bathroom wall | $60-$150 | 2-4 days | $400-$1,000 |
| Basement masonry section | $75-$200 | 3-7 days | $600-$1,500 |
| Lead-paint-controlled work | Not a casual DIY job | Project-specific | $1,000 or more typical |
Prices vary by region, access, coating layers, and whether a contractor must repair the moisture source. Material prices above are typical U.S. retail ranges, not fixed national rates.
When Should You Stop and Hire a Professional?
Hire a professional when the wall remains wet, mold covers a substantial area, paint may contain lead, plaster is structurally loose, or failure extends across multiple rooms. Homes built before 1978 may contain lead-based paint, and sanding or scraping can release hazardous dust.
The U.S. Environmental Protection Agency’s Renovation, Repair and Painting Rule applies to many paid renovation projects in pre-1978 housing and child-occupied facilities. Lead-safe work requires containment, cleaning controls, and certified practices that ordinary repainting does not provide.
A contractor should also investigate recurring exterior or basement failure with moisture mapping, infrared inspection, drainage evaluation, or destructive testing when appropriate. Cosmetic repainting is not a water-management strategy.
FAQ
Can I Paint Directly Over Peeling Paint?
No. Remove all loose and hollow-sounding paint first, then sand the edges, clean the wall, patch defects, and prime exposed or incompatible areas. Painting over peeling layers only transfers the weak bond to the new coating, so the fresh finish can detach in large sheets.
Can I Paint Over Glossy Walls Without Sanding?
Sometimes, but sanding is the safer method. A bonding primer labeled for glossy surfaces can improve adhesion, yet the wall still needs degreasing and an adhesion test. Sanding with 120- to 180-grit paper removes shine and gives the primer a more reliable mechanical profile.
How Long Should I Wait Before Painting a Washed Wall?
Wait at least 24-48 hours after washing an ordinary interior wall, then verify that the surface is dry and free from cool damp areas. Plaster, concrete, high humidity, and previous leaks require longer. Moisture-meter readings and the coating manufacturer’s substrate limit take priority over a fixed waiting period.
Will More Paint Stop Peeling?
No. Additional paint cannot stabilize a contaminated, damp, glossy, or failing substrate. More layers can increase film thickness and internal stress, which may accelerate peeling. The durable sequence is removal, cleaning, drying, surface repair, suitable primer, and controlled topcoats.
Is TSP Necessary Before Painting?
TSP is not necessary for every wall, but a cleaner is necessary when dust, grease, smoke, wax, or soap residue is present. A TSP substitute is often adequate for routine interior cleaning. Follow the label, protect skin and eyes, rinse when directed, and never mix cleaners.
Why Does Paint Stick in One Area but Not Another?
Paint can adhere in one area and fail elsewhere because contamination, gloss, moisture, or patching material varies across the wall. Kitchen zones, bathroom corners, repaired holes, and areas behind furniture often have different surface conditions. Compare the successful and failed areas with a rub test and tape test.
The Bottom Line
Why is paint not sticking to wall surfaces? The coating is usually bonding to contamination, moisture, gloss, an incompatible layer, or unstable old paint instead of a clean, sound substrate. Diagnose the failure pattern, correct water problems, remove loose coating, clean and sand, let the wall dry, use a substrate-specific primer, and apply thin coats within the label’s temperature and recoat limits. A repair that follows that sequence can restore adhesion, while painting over the original cause usually makes the failure return.