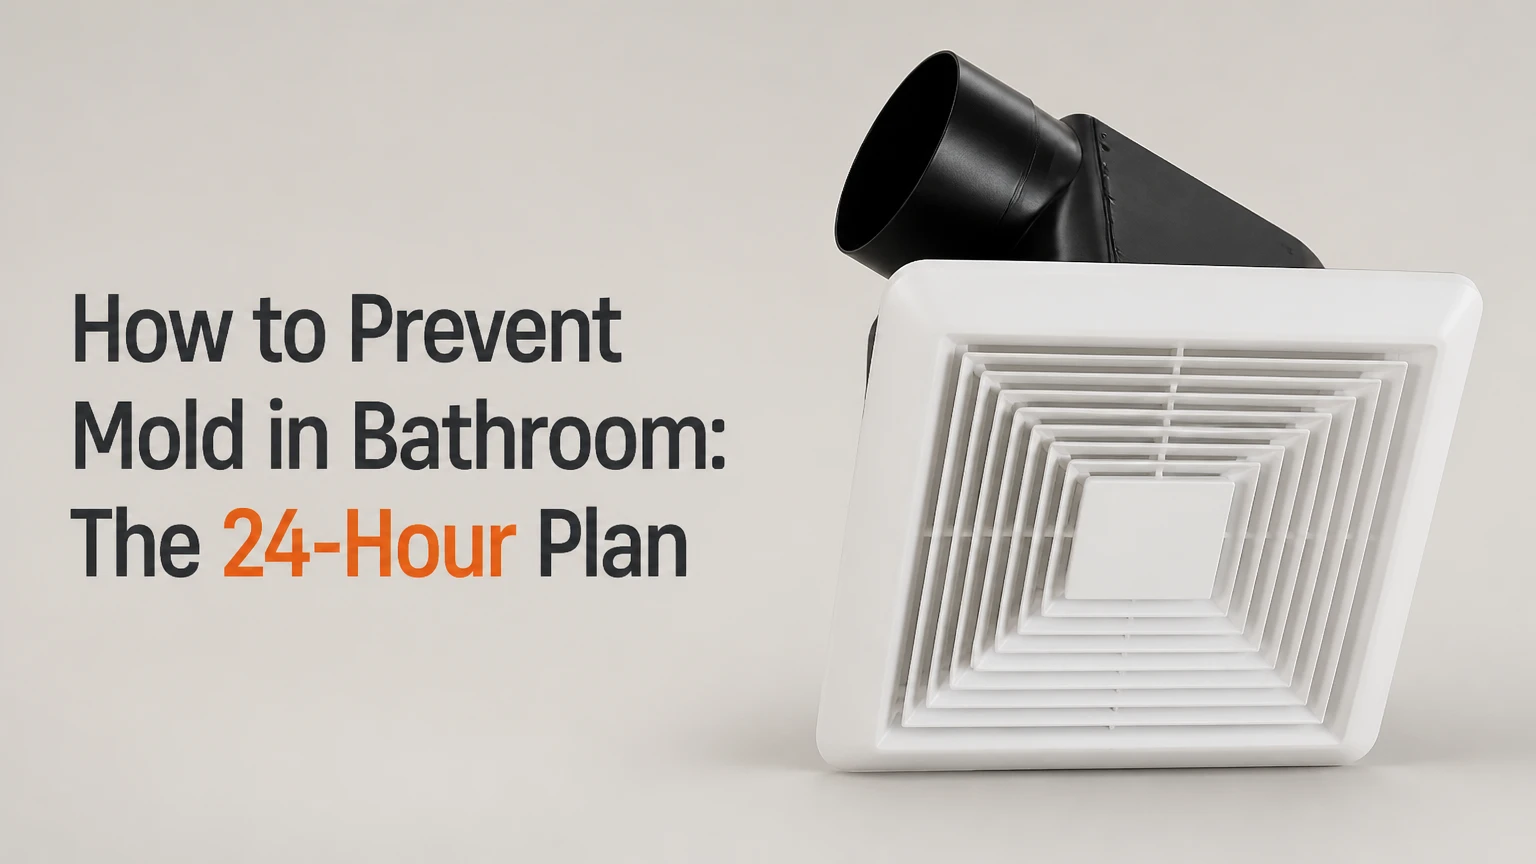
How to Prevent Mold in Bathroom: The 24-Hour Plan
To prevent mold in a bathroom, remove moisture quickly, exhaust humid air outdoors, keep relative humidity below 60%, and repair leaks before surfaces remain wet for 24-48 hours. Run the exhaust fan during bathing and for 20-30 minutes afterward, squeegee shower surfaces, dry fabrics, and replace water-damaged porous materials.
Key Facts at a Glance
Bathroom mold prevention depends more on moisture control than on the mold species or color.
Keep indoor relative humidity at 30-50% when practical, and investigate readings that remain above 60%.
A bathroom exhaust fan must discharge outdoors, not into an attic, wall cavity, or crawl space.
Dry shower walls, grout, caulk, mats, and curtains after use instead of relying on disinfectant alone.
Mold that returns in one location usually indicates a leak, condensation point, or wet porous material.
Mold covering more than about 10 square feet, or involving HVAC systems or extensive water damage, may require professional remediation.
Why Bathroom Mold Grows
Bathroom mold grows when airborne fungal spores encounter persistent moisture and an organic food source such as drywall paper, dust, wood, soap residue, or fabric. Spores are common indoors, so prevention focuses on shortening the time that surfaces stay damp rather than trying to eliminate spores from the air.
The Environmental Protection Agency states, “The key to mold control is moisture control.” That principle explains why a strong exhaust fan usually prevents more regrowth than a stronger bathroom cleaner. Warm, humid air condenses on cool ceilings, walls, mirrors, and plumbing surfaces, while leaks add liquid water that can penetrate materials.
Mold can begin colonizing damp materials quickly, although the exact growth rate depends on temperature, material, airflow, and water availability. The practical rule is simple: dry wet building materials within 24-48 hours whenever possible, and investigate any surface that repeatedly becomes wet.
What Conditions Does Mold Need?
Mold needs spores, moisture, nutrients, and a suitable temperature. Spores are unavoidable, and normal bathroom temperatures often support growth, so homeowners can make the largest difference by controlling water and organic residue.
| Growth condition | Bathroom example | Practical control |
|---|---|---|
| Spores | Airborne particles settling on grout | Remove settled dust and residue |
| Moisture | Shower spray, condensation, plumbing leaks | Vent, squeegee, dry, and repair |
| Nutrients | Drywall paper, soap scum, skin oils | Clean residue and replace damaged materials |
| Suitable temperature | Typical indoor range of 60-85°F | Control moisture instead of cooling the room |
How to Prevent Mold in Bathroom: Follow These Steps
A reliable bathroom mold prevention routine takes about 2 minutes after each shower, 15-20 minutes weekly, and 1-3 hours for equipment or caulk maintenance. Moisture removal determines success: cleaning cannot compensate for a fan that exhausts poorly or a leak hidden behind a wall.
Before You Start
Gather the equipment before changing your routine. A $10-$25 digital hygrometer is often more useful than guessing from a fogged mirror because it shows whether humidity remains elevated after bathing.
| Item | Typical USA quantity or specification | Typical cost |
|---|---|---|
| Digital hygrometer | 1 unit, 30-90% RH display | $10-$25 |
| Shower squeegee | 1, 8-12-inch blade | $8-$20 |
| Microfiber cloths | 3-6 washable cloths | $8-$18 |
| Neutral bathroom cleaner | 1 spray bottle, 24-32 ounces | $4-$10 |
| Exhaust fan timer | 1 switch compatible with circuit | $15-$40 |
| Mildew-resistant silicone caulk | 1 tube, 9-10 fluid ounces | $8-$18 |
Turn off power before servicing a fan, follow cleaner labels, and never mix bleach with ammonia, acids, vinegar, or other cleaning products.
Step 1: Measure Humidity
Place a hygrometer away from the shower stream, preferably near the bathroom door or on an interior shelf. Record the bathroom’s dry baseline, the humidity during bathing, and the reading 20-30 minutes after the fan has run.
Aim for 30-50% RH in the home, while treating sustained readings above 60% as a moisture-control problem. A brief spike during a hot shower is expected; humidity that stays above 60% long after bathing indicates insufficient ventilation, excessive water evaporation, poor air circulation, or a hidden source.
You’ll know it worked when: post-shower RH trends toward the pre-shower baseline within about 30-60 minutes.
Common mistake: placing the hygrometer directly beside the shower, where splash and steam produce misleading readings.
Step 2: Run the Exhaust Fan Correctly
Turn on the exhaust fan before or at the start of every shower. Leave it running for 20-30 minutes after bathing, or longer if the hygrometer remains above 60% RH.
The fan must vent through a sealed, insulated duct to the exterior. Discharging humid air into an attic transfers the mold risk from the bathroom to roof sheathing, insulation, and framing. Building-code requirements vary by jurisdiction, so a licensed electrician or HVAC professional should verify new installations and duct routing.
For bathrooms up to 100 square feet, a commonly used sizing rule is approximately 1 CFM per square foot, although duct length, elbows, grille resistance, and ceiling height affect actual performance.
| Bathroom area | Minimum planning rule | Practical fan range | Typical use |
|---|---|---|---|
| 40 sq. ft. | 40 CFM | 50-70 CFM | Small half or compact full bath |
| 60 sq. ft. | 60 CFM | 60-80 CFM | Standard tub bathroom |
| 80 sq. ft. | 80 CFM | 80-100 CFM | Larger shower room |
| 100 sq. ft. | 100 CFM | 100-120 CFM | Large full bathroom |
You’ll know it worked when: a single tissue sheet is held against the fan grille while the fan operates, and the mirror clears progressively instead of remaining fully fogged.
Common mistake: assuming noise equals airflow. A loud fan with a blocked grille, crushed duct, stuck exterior flap, or long restrictive duct may remove less moisture than a quieter, correctly installed unit.
Step 3: Remove Water From Shower Surfaces
Use a squeegee on glass, tile, acrylic, and shower walls after every shower. Push water toward the drain, then wipe horizontal ledges, tub rims, niches, and the bottom edge of the door where water commonly remains trapped.
Spread the shower curtain fully open so both sides can dry. Leave the bathroom door open after the fan cycle if doing so will not create a safety or privacy problem.
You’ll know it worked when: no beads of water remain on the lower wall, caulk joint, or tub ledge five minutes after wiping.
Common mistake: squeegeeing only the glass. Mold often begins on neglected corners, silicone seams, shampoo ledges, and the underside of fixtures.
Step 4: Keep Fabrics and Flooring Dry
Hang bath mats so air reaches both sides, and launder them weekly or sooner when they remain damp. Wash fabric shower curtains according to their care labels, and replace liners that retain a persistent odor or show embedded growth.
Do not leave towels in a heap on the bathroom floor. A damp cotton towel, bath mat, or fabric hamper can maintain a small humid zone even when the room’s air humidity appears acceptable.
You’ll know it worked when: mats and towels feel dry within several hours, with no sour odor or darkening at the edges.
Common mistake: placing a thick rubber-backed mat over a floor that cannot dry underneath. Choose a washable mat and hang it after use.
Step 5: Clean Residue Before It Accumulates
Clean soap scum, skin oils, hair, and dust from tile, grout, fixtures, and corners at least weekly. Organic residue supplies nutrients and also holds moisture against the surface, particularly around shower products and drain assemblies.
Use a product compatible with the material, rinse where the label requires, and dry the area. Disinfectant is not a substitute for removing the moisture source. Bleach can lighten surface staining on nonporous tile, but it cannot reliably remove mold roots from porous drywall, wood, or deteriorated caulk.
You’ll know it worked when: grout feels clean rather than greasy, and water no longer clings to a thick film of soap residue.
Common mistake: spraying cleaner onto active mold while leaving the surface wet. Cleaning must be followed by drying and root-cause correction.
Step 6: Maintain Caulk, Grout, and Paint
Inspect silicone caulk around tubs, shower pans, sinks, and wall joints each month. Replace caulk that is cracked, separated, peeling, or persistently black beneath the surface; clean and dry the joint fully before applying new bathroom-rated 100% silicone.
Seal porous cementitious grout according to the product instructions, commonly every 1-2 years in a heavily used shower. Grout sealer reduces water absorption but does not make grout waterproof, and it cannot repair movement, missing grout, or a failed shower waterproofing system.
Use bathroom-rated, moisture-resistant paint on sound, dry walls and ceilings. Do not paint over active mold or damp drywall.
| Surface | Inspection interval | Preventive action | Replacement trigger |
|---|---|---|---|
| Silicone caulk | Monthly | Clean and keep dry | Cracks, gaps, peeling, embedded growth |
| Cement grout | Monthly | Clean and seal every 1-2 years | Missing, crumbling, or deeply colonized grout |
| Painted drywall | Monthly | Ventilate and wipe condensation | Swelling, soft spots, bubbling, recurring stains |
| Bath mat | Weekly | Launder and hang dry | Persistent odor, discoloration, or damaged backing |
| Shower curtain liner | Monthly | Wash and dry fully | Embedded growth or brittle plastic |
Which Prevention Method Works Best?
The best first investment is source ventilation, followed by a hygrometer and moisture repairs. A dehumidifier helps when the room lacks effective exhaust or sits in a damp basement, while paint and sealers protect sound surfaces but cannot solve leaks or trapped water.
| Method | Typical USA cost | Best condition | Main limitation |
|---|---|---|---|
| Exhaust fan repair or replacement | $150-$600 installed | Shower humidity at the source | Needs exterior ducting and electrical work |
| Portable dehumidifier | $50-$250 | Windowless or basement bathroom | Collects water and does not remove hidden leaks |
| Humidity-sensing fan | $150-$500 installed | Shared or frequently used bathroom | Sensor placement and calibration affect cycling |
| Mildew-resistant paint | $35-$80 per gallon | Dry, sound walls and ceilings | Cannot treat active or deep mold |
| Silicone caulk | $8-$18 per tube | Tub and shower joints | Requires complete removal of failed caulk |
| Grout sealer | $15-$40 per container | Porous cement grout | Does not waterproof a failed shower assembly |
A compressor dehumidifier generally performs efficiently in warmer rooms, while a desiccant model can work better in cooler spaces. Neither device should discharge into the bathroom without a plan for drainage and air circulation.
EPA guidance also emphasizes fixing leaks and drying wet materials promptly. The limitation is important: no coating, cleaner, or appliance can permanently prevent mold when water enters a wall cavity or ceiling.
Is a Dehumidifier Better Than a Bathroom Fan?
A bathroom fan is better for shower-generated moisture because it removes humid air near its source. A dehumidifier is useful when outdoor ventilation is unavailable, outdoor air is already humid, or the bathroom is in a basement, but it requires tank emptying or a drain hose and adds heat to the room.
Use both only when the fan does not control RH by itself. A fan that vents outdoors provides source control; a dehumidifier mainly manages the remaining room air.
What Mold Color and Location Can Tell You
Mold color does not identify species or toxicity. Black, green, pink, white, and brown growth can occur in several species, and visual identification cannot determine health risk or the depth of contamination.
| Location or appearance | More likely moisture pattern | Correct response |
|---|---|---|
| Black spots on silicone | Persistent wetness and residue | Replace failed caulk after drying |
| Gray or dark grout | Staining, biofilm, or embedded growth | Clean, dry, inspect, and regrout if needed |
| Green or white drywall patch | Water-damaged porous material | Find leak and assess material replacement |
| Pink film on a wet seam | Surface bacterial or fungal growth | Clean residue, dry seam, improve airflow |
| Ceiling discoloration | Leak or condensation | Inspect above ceiling and insulation |
| Musty odor without visible growth | Hidden damp material | Check cavities, plumbing, and ventilation |
Why Does Mold Keep Returning to One Spot?
Mold that returns in the same place usually indicates an unresolved moisture source rather than an unusually aggressive species. Check plumbing above, shower plumbing, roof penetrations, failed caulk, cold exterior corners, and fan ducting before repeating surface cleaning.
Ceiling mold deserves special attention. A roof or upstairs plumbing leak can wet drywall from above, while inadequate attic insulation can create a cold ceiling surface where humid bathroom air condenses. Recurring staining, soft drywall, peeling paint, or a musty odor warrants a building inspection.
A practical diagnostic sequence is:
- Photograph the area and mark its size.
- Check the ceiling or wall after a shower and after rain.
- Inspect the opposite side of the wall for plumbing or dampness.
- Measure RH before bathing and 30 minutes afterward.
- Confirm fan airflow and exterior discharge.
- Probe only where safe, because damaged drywall can conceal electrical wiring or plumbing.
Do not cut into a wall casually. Call a qualified professional when water damage is extensive, hidden, or near electrical systems.
Common Mistakes and How to Fix Them
| Mistake | Why it fails | Recovery action | Prevention rule |
|---|---|---|---|
| Venting a fan into an attic | Moisture condenses on cold framing | Reroute duct outdoors | Verify exterior termination |
| Turning off the fan immediately | Wet surfaces remain humid | Extend run time 20-30 minutes | Install a timer switch |
| Painting over mold | Growth remains beneath coating | Clean or replace affected material | Paint only dry, sound surfaces |
| Using bleach on drywall | Liquid cannot reach deep porous growth | Remove damaged porous material | Use material-appropriate remediation |
| Leaving wet mats flat | Trapped water receives little airflow | Wash, dry, or replace mat | Hang after every use |
| Ignoring recurring stains | Root cause remains active | Inspect leaks and condensation | Track location and timing |
The most common practitioner error is treating visible mold as the entire problem. A clean-looking ceiling can still contain wet insulation, and a brightened grout line can still sit beside a failed shower waterproofing layer.
Another counterintuitive rule is that a slightly open window is not always helpful. In a humid U.S. coastal climate, opening the window can bring in more moisture; use outdoor humidity and weather conditions to decide whether window ventilation improves or worsens indoor RH.
When Should You Call a Mold Professional?
Call a qualified mold remediation professional when visible mold exceeds approximately 10 square feet, contamination involves HVAC equipment, sewage or floodwater, multiple rooms, or materials that cannot be dried promptly. People with asthma, severe allergies, immune suppression, or chronic lung disease should avoid disturbing substantial mold and consult a healthcare professional about exposure concerns.
EPA’s homeowner guidance uses the 10-square-foot threshold as a practical point for considering professional help, although local rules, building conditions, and occupant health can change the decision. Ask for a moisture-source diagnosis, containment plan, material-disposal method, and post-remediation documentation rather than paying for an unexplained “air test” alone.
Small areas on nonporous tile or intact silicone may be manageable with label-directed cleaning and protective equipment. Porous drywall, insulation, ceiling tile, carpet, and swollen wood often require removal because surface wiping cannot reliably eliminate embedded contamination.
Plans for Renters, Homeowners, and Renovations
Renters should use non-invasive controls first: run the existing fan, use a hygrometer, hang mats and curtains to dry, wipe shower surfaces, and report leaks in writing with dated photographs. A portable dehumidifier can help, but landlords must address water intrusion, failed ventilation, and damaged building materials.
Budget-conscious homeowners can gain substantial control with a $10-$25 hygrometer, an $8-$20 squeegee, a $15-$40 timer switch, and prompt caulk replacement. These small interventions often outperform buying specialty “mold-proof” products before correcting airflow.
During renovation, prioritize a correctly ducted, low-noise fan, accessible cleaning surfaces, adequate insulation at cold exterior walls, and sound shower waterproofing. Porcelain tile and epoxy grout resist absorption better than many porous materials, but installation defects can still allow water behind the assembly.
| User situation | First purchase or action | Expected project range | Do not overlook |
|---|---|---|---|
| Renter, no fan | Hygrometer and drying routine | $20-$100 | Report leaks and poor ventilation |
| Homeowner, working fan | Timer switch and squeegee | $25-$70 | Confirm duct exits outdoors |
| Basement bathroom | Dehumidifier with drain option | $100-$300 | Control whole-basement humidity |
| Renovation project | Exterior-ducted humidity-sensing fan | $300-$900 installed | Waterproof shower enclosure correctly |
| Recurring ceiling mold | Moisture inspection | $150-$600 typical inspection | Check attic, roof, and plumbing |
FAQ
Can I Prevent Bathroom Mold Without an Exhaust Fan?
You can reduce bathroom mold without an exhaust fan by opening a window when outdoor air is drier, keeping the door open after bathing, squeegeeing surfaces, and using a dehumidifier. These measures are less reliable than an exterior-ducted fan, particularly in windowless bathrooms or humid climates, so persistent RH above 60% requires an upgrade or building repair.
How Often Should I Clean a Mold-Prone Shower?
Clean a mold-prone shower weekly, with quick removal of standing water after every use. Wash bath mats weekly, inspect caulk monthly, and reseal porous grout according to the sealer label, often every 1-2 years. Increase cleaning frequency when several people use the shower daily or soap residue remains visible.
Does Vinegar Prevent Mold Better Than Bleach?
Neither vinegar nor bleach prevents mold when moisture remains. Bleach may lighten surface growth on nonporous tile, but it is unsuitable for deep growth in drywall and can create hazardous fumes when mixed with other cleaners. A moisture-control routine, material-appropriate cleaning, and replacement of damaged porous materials provide more durable prevention.
Should I Use Mold-Resistant Drywall in a Bathroom?
Mold-resistant drywall can reduce risk in suitable wall locations, but it is not waterproof and cannot compensate for failed shower membranes, plumbing leaks, or poor ventilation. Use approved moisture-resistant assemblies where required, keep board edges and penetrations protected, and follow local building codes for shower and tub surrounds.
Why Does My Bathroom Smell Musty After Cleaning?
A musty bathroom odor after cleaning often comes from damp caulk, grout, bath mats, drains, wall cavities, or poorly ventilated fan ducts. Dry fabrics, clean the drain area, measure RH, and inspect recurring stains. If the odor persists without visible growth, investigate concealed water damage rather than applying more fragrance or disinfectant.
The Bottom Line
To prevent mold in bathroom spaces, control moisture at its source: run a properly ducted exhaust fan during bathing and for 20-30 minutes afterward, keep RH near 30-50%, remove standing water, dry fabrics, and repair leaks immediately. Cleaners, sealers, and mold-resistant paint support that system, but none replaces ventilation and dry building materials.