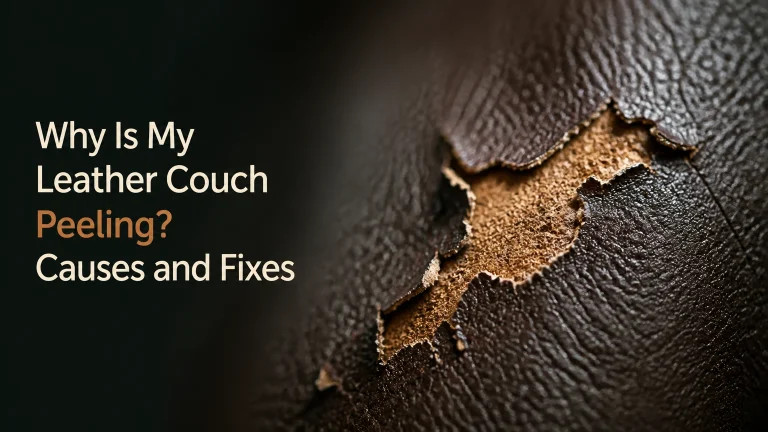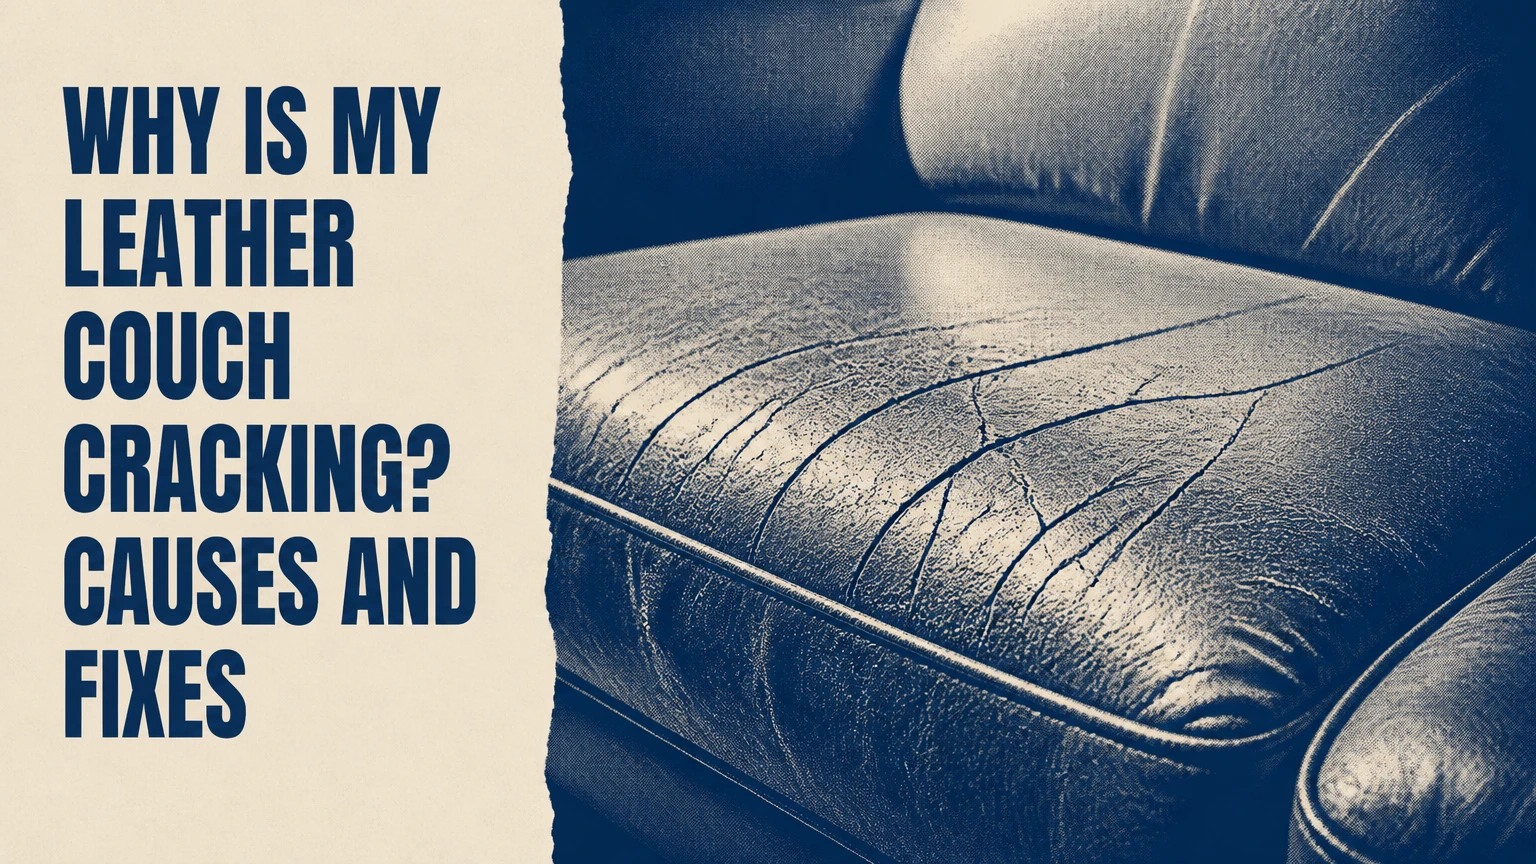
Why Is My Leather Couch Cracking? Causes and Fixes
A leather couch cracks when its surface finish or leather fibers lose flexibility and then split under bending, friction, heat, sunlight, or repeated seating. The most common cause is dry, degraded material, but peeling often indicates bonded leather, polyurethane, or vinyl rather than a failure of high-quality hide.
Key Facts at a Glance
- Genuine leather usually develops surface fissures from finish wear, dryness, abrasion, or ultraviolet exposure.
- Bonded leather and faux leather commonly peel because a polyurethane or vinyl film separates from its backing.
- Leather conditioner can soften dry leather, but it cannot rebuild missing fibers or permanently close deep cracks.
- A home relative humidity of approximately 40%-60% is a practical target for furniture near normal indoor temperatures.
- Test every cleaner and conditioner on an unseen area for 24 hours before treating visible upholstery.
- Repair is usually practical when the backing remains strong and damage is localized; replacement becomes more sensible when multiple panels are delaminating.
Why Is My Leather Couch Cracking?
Leather couch cracking begins when repeated flexing exceeds the flexibility of the hide or its surface coating. Dry conditions, direct sun, nearby heat, body oils, abrasive dust, harsh cleaners, and ordinary seating pressure can remove lubrication or weaken the finish, after which small fissures enlarge with every compression cycle.
Leather contains interwoven collagen fibers. Tanning and finishing make those fibers flexible and protect the surface, but upholstery still moves whenever a person sits, stands, slides, or stretches across a cushion. A finish that has become brittle cannot accommodate that movement.
The visible line may therefore be a failure of the coating rather than a split through the hide. That distinction determines whether conditioning, recoloring, patching, or reupholstery is appropriate.
What happens inside the upholstery?
| Degradation stage | Material change | Visible symptom | Best response |
|---|---|---|---|
| Early dryness | Lubrication and flexibility decline | Matte, stiff, rough surface | Clean gently and condition after testing |
| Finish fatigue | Pigment or polyurethane develops micro-fissures | Fine lines in high-flex areas | Stop abrasion and assess coating type |
| Surface failure | Finish separates or flakes | Color loss, cracking, small flakes | Binder, filler, and color repair may help |
| Structural failure | Hide or backing splits | Gaps, exposed fibers, torn seams | Patch, panel replacement, or reupholstery |
| Delamination | PU or vinyl film separates from backing | Large peeling sheets | Replacement of the affected covering |
A counterintuitive point matters here: adding oil does not automatically restore leather. Conditioner can improve flexibility at the surface, while it cannot replace collagen, reverse ultraviolet oxidation, or reattach a detached polyurethane film.
Is the Couch Actually Leather?
A couch that cracks in large flakes or peels like a thin sheet is often bonded leather, bicast leather, polyurethane, or vinyl. Genuine finished leather more commonly shows irregular lines, color wear, scuffing, or exposed fibrous material rather than uniform plastic-like peeling.
Inspect an inconspicuous underside, the back edge, or the area beneath a removable cushion. Look for a consistent grain print, a fabric backing, a fuzzy split layer, or a thin film that lifts separately from the substrate.
| Covering type | Construction clue | Typical failure pattern | Repair outlook |
|---|---|---|---|
| Aniline leather | Open, natural grain with little pigment | Darkening, stains, dryness, scratches | Conditioning and restoration can work |
| Semi-aniline leather | Light pigment with transparent finish | Moderate scuffs and fine surface cracks | Local recoloring is often feasible |
| Pigmented leather | Opaque protective color coat | Finish cracks, abrasion, color loss | Repairable when the hide remains sound |
| Bonded leather | Leather fibers bonded to fabric or PU | Peeling film and widespread flaking | Panel replacement usually outlasts coating |
| Bicast leather | Split leather with glossy PU layer | Glossy surface cracks and delaminates | Limited repair, often replacement |
| Faux leather or vinyl | Synthetic film over textile or foam | Uniform peeling, splitting, or bubbling | Vinyl repair may be temporary |
Furniture labels can be imprecise. “Leather match” often means leather on the seating surfaces and synthetic material on sides, backs, or panels, so a crack pattern limited to the exterior sides may identify a different covering from the seat.
How can you identify the finish safely?
Use three non-destructive checks. First, compare sheen: aniline is usually matte and visibly varied, while pigmented upholstery has more uniform color. Second, inspect the grain under magnification. Third, place one drop of water in a hidden location and observe it for several minutes, because absorbency can indicate an open finish, although a coating, topcoat, or prior conditioner can invalidate the result.
Do not cut the couch or use solvents as an identification test. A furniture restoration professional can identify leather with a small hidden sample and finish inspection when a warranty or expensive repair is involved.
Which Conditions Cause Leather Couch Cracking?
Direct sunlight, concentrated heat, low indoor humidity, abrasive dirt, and repeated high-friction use accelerate leather couch cracking. Environmental damage rarely acts alone; ultraviolet exposure weakens the finish, while sitting and rubbing provide the mechanical stress that turns weakened areas into visible fissures.
| Risk factor | Common location | Mechanism | Practical control |
|---|---|---|---|
| Window sunlight | Arm, back, top edge | UV oxidation and fading | Use shades or move couch from direct rays |
| Heating vent | Lower front or adjacent side | Repeated drying and heating | Keep supply airflow away from upholstery |
| Radiator or fireplace | Nearest arm or side panel | Local heat concentration | Maintain several feet of separation |
| Dust and grit | Seat crease and armrest | Abrasive rubbing during use | Vacuum seams and wipe with microfiber |
| Body oils and sweat | Headrest and seat front | Soil buildup and finish contamination | Clean according to the manufacturer’s instructions |
| Pet claws | Seat and arm surfaces | Puncture and tensile damage | Use covers and trim claws |
| Heavy friction | Favorite seat | Finish wear and flex fatigue | Rotate cushions when construction permits |
The often-repeated claim that a couch placed within 1 meter of a heat source cracks exactly three times faster is not a reliable universal measurement. Room temperature, airflow, finish chemistry, distance, and exposure duration vary too widely. Treat close heat as a serious risk, not as a precise multiplier.
What humidity should a leather couch have?
A 40%-60% relative humidity range is a practical indoor target for leather furniture in the United States. A digital hygrometer provides better guidance than guessing from seasonal weather, but humidity control cannot repair leather that has already lost its finish or has begun peeling.
Very dry winter air can increase stiffness and static dust, especially near forced-air heating. Excessive humidity creates a different problem: mildew risk, slow drying, and a clammy environment. Do not spray water into the leather or place a humidifier directly beside the couch.
How Leather Types Change the Diagnosis
Leather type changes both the likely cause and the correct treatment. Aniline leather absorbs more readily and shows natural variation, while pigmented leather relies on a protective finish; bonded and synthetic coverings often fail through film delamination rather than dry hide.
| Leather category | Surface protection | Care frequency, typical | Main limitation |
|---|---|---|---|
| Aniline | Minimal pigment or clear protection | Condition approximately every 6-12 months if approved | Stains and sunlight show quickly |
| Semi-aniline | Thin pigment and clear coat | Clean as needed, condition approximately every 6-12 months | Finish can still wear through |
| Pigmented | Opaque pigment and protective topcoat | Clean every 3-6 months in heavy-use homes | Coating can crack or abrade |
| Bonded | PU film over reconstituted leather backing | Follow manufacturer instructions, avoid excess products | Film failure is often widespread |
| Bicast | Glossy PU over split leather | Gentle cleaning only | Surface delamination is difficult to reverse |
| Vinyl or PU | Synthetic polymer film | Use a compatible vinyl or PU cleaner | Leather conditioner may cause contamination |
“Full-grain” and “top-grain” describe how the hide was processed, not a guarantee that the couch will never crack. A high-quality hide can still suffer finish damage, neglect, sun exposure, or bad cleaning, while a protected lower-cost leather can remain serviceable for many years in moderate use.
What Should You Do First?
Stop the damaging condition before applying a product. Photograph the area, identify whether the surface is leather or synthetic, check the manufacturer’s care label, and test a compatible product on a hidden section for 24 hours.
Use this triage sequence:
- Stop direct sunlight and heat. Close blinds during strong sun and redirect heating airflow.
- Remove dry grit. Vacuum seams with a soft brush attachment, then wipe with a clean, barely damp microfiber cloth.
- Inspect the damage. Flex the material gently and determine whether lines remain shallow or expose backing.
- Check for transfer. If color comes off on a white cloth, stop aggressive cleaning and seek finish-specific advice.
- Record the pattern. Cracks on one sun-facing arm suggest environmental damage; cracks on every seat suggest material or finish failure.
- Pause before conditioning. Do not apply any product to peeling synthetic film, wet leather, mold, or a surface with unknown coating compatibility.
A useful practitioner rule is simple: if a product makes a hidden area darker, tacky, glossy, or softer only temporarily, it has changed the appearance without proving that it repaired the material.
Can Conditioner Repair Existing Cracks?
Leather conditioner can reduce dryness and improve flexibility around early surface lines, but conditioner cannot restore missing leather, seal an open split, or reattach peeling polyurethane. Conditioning is appropriate only when the upholstery is genuine leather, structurally intact, and compatible with the product.
Apply a small amount with a soft cloth rather than saturating the cushion. Allow the product to absorb according to its label, then remove residue so dust does not accumulate in the grain. Repeated heavy applications can leave a greasy film, darken aniline leather, or interfere with later recoloring.
Do not use olive oil, coconut oil, petroleum jelly, furniture polish, rubbing alcohol, window cleaner, or concentrated dish detergent. Cooking oils can oxidize and become sticky or rancid; solvents can strip pigment and topcoats.
How Do You Repair Surface Cracks?
Surface cracks can be repaired when the backing remains intact and the finish failure is localized. The usual process takes 2-6 hours of active and drying time, costs approximately $25-$75 for a consumer kit in the United States, and succeeds or fails largely on color matching and thin application.
Step 1: Clean and dry the area
Use a manufacturer-approved leather cleaner or a small amount of mild leather cleaner on a cloth. Remove residue with a separate lightly damp cloth, then allow the surface to dry completely, often 30-60 minutes in normal indoor conditions.
Checkpoint: The area feels clean, dry, and free of greasy residue.
Common mistake: Scrubbing aggressively, which enlarges loose finish around every crack.
Step 2: Remove loose coating
Trim only clearly detached flakes with small scissors. Do not pull attached finish or sand deeply into the hide, because removing sound material makes the repair larger and weaker.
Checkpoint: The damaged edge lies flat without a raised flap.
Common mistake: Using coarse sandpaper that creates a visible depression.
Step 3: Apply flexible binder or filler
Choose a product labeled for leather or vinyl according to the covering type. Spread several thin coats, allowing approximately 20-30 minutes between coats unless the manufacturer specifies otherwise.
Checkpoint: The crack is level enough that a fingertip does not catch on it.
Common mistake: Applying one thick layer, which becomes stiff and may split again under seating pressure.
Step 4: Match the color
Test colorant on a hidden panel. Apply thin coats with a sponge or airbrush, extending slightly beyond the repair so the transition is gradual.
Checkpoint: The repaired zone matches under daylight and indoor lighting.
Common mistake: Matching only under warm lamps, which can reveal a strong mismatch near a window.
Step 5: Seal and cure
Apply the compatible protective topcoat when the colorant is fully dry. Keep the couch unused for the label’s curing period, commonly 24-48 hours.
Checkpoint: The surface is dry, flexible, and not tacky after curing.
Common mistake: Sitting on the repair before the coating has hardened.
Repair suitability by damage
| Damage condition | DIY suitability | Materials | Expected result |
|---|---|---|---|
| Hairline finish lines | High | Cleaner, conditioner, colorant | Improved appearance, not invisible restoration |
| Cracks under 1/8 inch | Moderate to high | Binder, flexible filler, pigment | Localized cosmetic repair |
| Split exposing backing | Moderate | Sub-patch, filler, colorant | Functional repair with visible texture difference |
| Torn seam | Low to moderate | Upholstery thread or panel repair | Better handled by an upholsterer |
| Peeling over several panels | Low | Replacement covering | Coating products rarely provide durable results |
| Crumbling foam or webbing | Low | New foam, webbing, upholstery labor | Structural restoration required |
When Is Professional Repair Worthwhile?
Professional repair is worthwhile when the couch has valuable hide, matching panels are available, damage affects a load-bearing seam, or more than one large area is failing. A specialist can identify the finish, stabilize backing, mix color, and replace a panel without creating a hard, obvious patch.
DIY repair is a poor choice for extensive peeling, heavily cracked seat decks, badly faded aniline leather, mold, smoke contamination, or a couch with failing foam. Cosmetic filler cannot solve collapsed cushioning or a weakened support system.
Typical USA repair costs
| Service | Typical USA price | Timeframe | Best use |
|---|---|---|---|
| Cleaning and conditioning visit | $100-$250 | 1-3 hours | Soil, dryness, light maintenance |
| Small crack recoloring | $150-$400 | Same day to 2 days | One localized seat or arm |
| Tear or sub-patch repair | $250-$700 | 1-3 days | Limited structural damage |
| Single panel replacement | $500-$1,200 | 3-10 days | Good couch with one failed panel |
| Full reupholstery | $1,500-$5,000+ | 2-8 weeks | Quality frame and widespread cover failure |
| Replacement couch | $800-$4,000+ | Immediate to several weeks | Multiple failing panels or poor frame |
These are typical consumer ranges, not quotes. Metropolitan labor rates, leather grade, cushion count, transport, foam replacement, and matching requirements can change the final price substantially.
Repair, Reupholstery, or Replacement?
Repair is usually the best economic choice for isolated cosmetic cracks on a structurally sound couch. Reupholstery makes more sense when the frame and cushions are high quality but the covering is failing across several panels; replacement is rational when the frame, foam, and covering are all deteriorated.
| Decision factor | Spot repair | Reupholstery | Replacement |
|---|---|---|---|
| Damage area | Under 10% of cover | 30%-100% of cover | 30%-100% plus structural wear |
| Typical cost | $25-$700 | $1,500-$5,000+ | $800-$4,000+ |
| Project time | 1-48 hours | 2-8 weeks | Same day to several weeks |
| Frame condition | Sound | Excellent | Unknown or poor acceptable |
| Finish consistency | Local variation possible | New uniform covering | New uniform covering |
| Best financial case | Valuable couch, small defect | Premium frame and cushions | Low-cost bonded couch with widespread peeling |
The lowest price is not always the lowest total cost. A $50 coating kit applied to a peeling bonded-leather sofa may fail within months, whereas replacing one panel can preserve the frame for years.
How Can You Prevent More Cracking?
Prevention requires controlling exposure, soil, friction, and product choice rather than repeatedly soaking the upholstery. Keep the couch away from direct sun and concentrated heat, remove abrasive grit, follow the manufacturer’s cleaning instructions, and condition only when the leather type permits it.
Use a hygrometer during dry winter months. Rotate removable cushions every few weeks if the manufacturer allows it, keep sharp pet claws away from seating surfaces, and avoid sitting on an armrest because concentrated stress damages both cover and internal support.
| Maintenance action | Frequency | Quantity or setting | Why it helps |
|---|---|---|---|
| Vacuum seams | Weekly | Soft brush attachment | Removes abrasive grit |
| Dust visible panels | Weekly | Dry microfiber cloth | Limits friction and soil |
| Clean high-contact areas | Every 3-6 months | Product label quantity | Removes oils and residue |
| Condition genuine leather | Every 6-12 months | Thin, tested application | Supports flexibility without saturation |
| Check humidity | Weekly in dry season | 40%-60% RH target | Identifies excessively dry air |
| Inspect sunlight exposure | Monthly | Check fading and heat | Catches UV damage early |
Do not assume more conditioner produces more protection. Upholstery specialists commonly prefer thin applications with full drying because residue can attract grit and create uneven gloss.
Warranty and New-Couch Situations
Cracking within the first year or two deserves a warranty review, especially when the couch was sold as genuine leather and the finish is peeling across matching panels. Keep the receipt, product description, photographs, care records, and purchase date before attempting a repair.
Many warranties exclude misuse, sunlight, improper cleaning, pets, and normal wear. A widespread, uniform failure can still indicate a material or finish defect, so contact the retailer before applying conditioner, filler, dye, or adhesive.
| Situation | First action | Avoid | Likely next step |
|---|---|---|---|
| New couch, widespread peeling | Contact retailer | DIY recoloring | Warranty inspection |
| One old, dry arm | Photograph and test cleaner | Solvents | Local restoration |
| Seat cracks with collapsed foam | Inspect cushion core | Surface filler alone | Upholstery estimate |
| Sun-facing panel fades and cracks | Move couch, document damage | Continued exposure | Finish restoration |
| Pet puncture near seam | Stabilize loose material | Pulling the tear | Patch or seam repair |
| Musty or moldy upholstery | Isolate furniture | Wet cleaning indoors | Professional assessment |
When Should You Stop Repairing?
Stop repairing when the covering flakes across several cushions, the backing crumbles, the seams repeatedly reopen, or the frame and foam have also deteriorated. A cosmetic repair cannot make a chemically degraded synthetic film durable again.
A practical inspection includes sitting on each cushion, checking frame movement, opening zippers where possible, and examining the underside. If the couch sags, squeaks, smells musty, and peels in multiple places, replacement usually provides a better result than progressive patching.
Frequently Asked Questions
Can dry air alone crack a leather couch?
Dry air can contribute to stiffness and finish failure, but dry air alone is rarely the only cause. Sunlight, heat, abrasion, product residue, and repeated flexing usually combine with low humidity. Maintain approximately 40%-60% relative humidity, then address the surface type and exposure pattern rather than relying on a humidifier alone.
Why is my leather couch cracking only on the seat?
Seat-only cracking usually results from concentrated flexing, friction, body oils, and greater daily use. A seat may also have a different leather-match material from the couch sides. Compare the damaged area with an underside panel, inspect for peeling film, and check whether cushion foam or webbing has begun collapsing.
Can I use shoe polish on a cracked couch?
Shoe polish is not a reliable leather couch repair product because its waxes and pigments may transfer to clothing, produce uneven sheen, or interfere with flexible upholstery coatings. Use a colorant and protective finish formulated for furniture leather or vinyl after testing compatibility in a hidden area.
Does petroleum jelly stop leather from cracking?
Petroleum jelly may temporarily make a surface feel slick, but it does not restore damaged collagen or repair a cracked polyurethane finish. Residue can attract grit, darken porous leather, and complicate later restoration. Use only a manufacturer-approved furniture product in a thin application.
Is bonded leather worth repairing?
Bonded leather is worth repairing when damage is small and the underlying furniture is otherwise excellent, but widespread peeling is rarely a durable DIY project. Request a panel-replacement estimate first. If several cushions and arms are delaminating, compare that price with a replacement couch before purchasing repair coatings.
How long can a repaired leather couch last?
A localized repair on sound leather can last several years with controlled sunlight, gentle cleaning, and normal use, but no fixed lifespan applies to every repair. Filler on a flexing seat, a mismatched coating, degraded bonded leather, or damaged foam will shorten durability substantially.
The Bottom Line
Why is my leather couch cracking? The answer is usually a combination of finish or fiber dryness, environmental exposure, abrasion, and repeated flexing, with bonded leather and faux leather adding a separate peeling mechanism. Identify the covering first, stop heat and sunlight, test compatible care products, and reserve filler for localized damage with sound backing. When several panels are peeling or the couch has structural wear, compare professional panel replacement or reupholstery with replacement rather than repeatedly conditioning the surface.