How to Tell if Drywall Has Water Damage: Signs and Next Steps
Drywall has water damage when its gypsum core or paper facing shows moisture-related staining, swelling, softening, separation, or mold growth. Check for expanding yellow-brown marks, rippled paint, bubbling, musty odors, and spongy areas, then verify suspected moisture with a meter and trace the leak before repairing the wall.
Key facts at a glance
A dry stain does not prove that the leak has stopped; intermittent plumbing, roof, window, and HVAC leaks can leave old-looking marks.
Soft, crumbly, swollen, sagging, or delaminated drywall usually requires section replacement rather than cosmetic patching.
The U.S. Environmental Protection Agency advises drying wet materials within 24-48 hours when possible because mold can begin growing after prolonged dampness.
A moisture-meter reading is meaningful only when compared with an unaffected area and interpreted according to the meter manufacturer’s instructions.
The often-repeated 17% figure is not a universal pass-fail moisture limit for drywall.
Fixing the water source, drying the cavity, and checking insulation must happen before new drywall is installed.
What Water Damage Does to Drywall
Drywall combines a porous gypsum plaster core with paper surfaces, so liquid water can move beyond the visible mark. The paper may discolor first, while the gypsum core absorbs moisture, loses strength, and eventually separates from the facing.
Water often travels sideways along framing, upward through porous materials, or downward from a ceiling before appearing at the point of least resistance. A stain’s position therefore may not identify the leak directly above it. Plumbing penetrations, roof flashing, window openings, exterior cracks, washing-machine hoses, and air-conditioning condensate lines are common sources in U.S. homes.
The damage mechanism matters because paint can dry before the wall cavity does. A surface that feels normal may conceal damp insulation, wet framing, or mold on the back of the board. Conversely, a brown ring can remain after the drywall has fully dried.
How quickly does drywall become damaged?
Drywall can show surface staining within hours, while serious loss of strength may take longer depending on water volume, temperature, ventilation, and exposure duration. Mold timing is also variable. EPA guidance commonly uses 24-48 hours as the period in which wet materials should be dried whenever feasible, not as a guaranteed moment when mold starts or a universal replacement deadline.
Drywall exposed to clean water from a supply line may be salvageable if it remains firm and dries quickly. Drywall exposed to sewage, floodwater, or contaminated water presents a different health and cleanup problem. Porous materials contaminated by Category 3 water commonly require removal by trained remediation personnel.
What Does Water-Damaged Drywall Look Like?
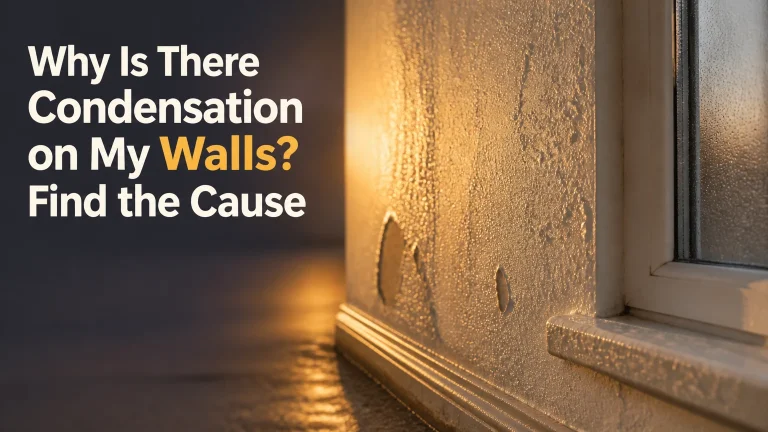
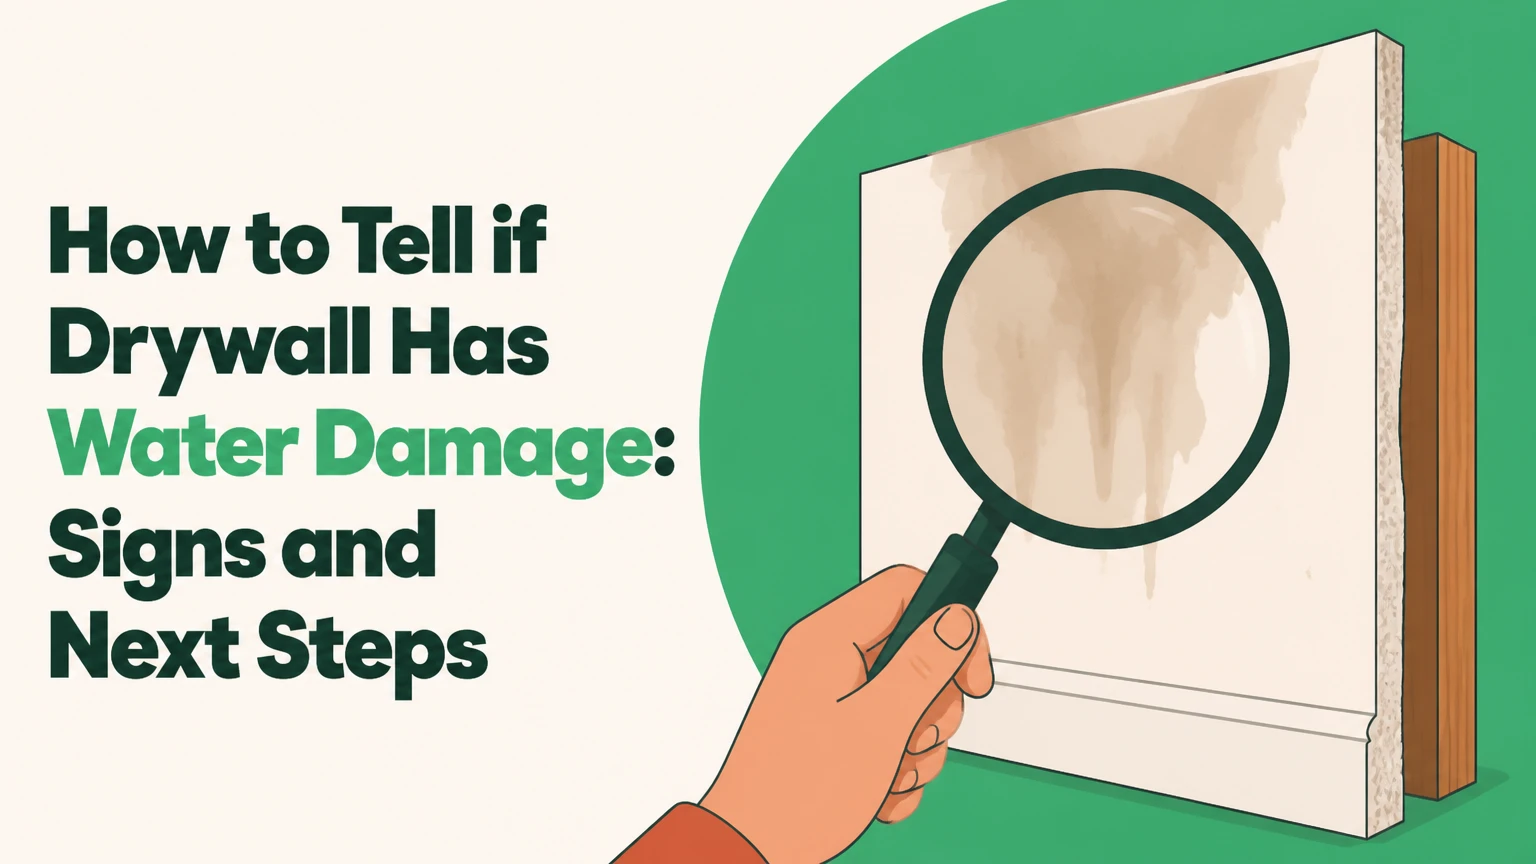
Water-damaged drywall commonly shows yellow, tan, brown, or gray discoloration; circular or irregular tide marks; bubbled paint; peeling joint tape; swollen seams; surface ripples; or localized sagging. The strongest diagnosis combines appearance with touch, odor, moisture readings, and evidence about the water source.
A flashlight held almost parallel to the wall makes shallow ripples, raised seams, and paint blisters easier to see. Inspect baseboards, inside corners, ceiling penetrations, window trim, and the wall below bathrooms because these locations often reveal migration before the middle of a painted surface does.
| Sign | What it may indicate | Recommended response |
|---|---|---|
| Yellow-brown ring, 6-24 inches wide | Former or active leak | Test moisture and inspect above the mark |
| Peeling tape at a 4-foot seam | Joint compound or paper delamination | Check the entire seam and cavity |
| Soft area larger than 12 inches | Saturated gypsum core | Stop pressing and plan controlled removal |
| Sagging ceiling section, 2-6 feet across | Water accumulation above board | Keep people out and call a professional |
| Musty odor near a wall | Hidden damp material or microbial growth | Investigate cavity and humidity source |
| White, green, gray, or black spotting | Possible mold or surface contamination | Do not disturb extensively; assess moisture and exposure |
A black mark is not automatically a particular species of mold, and color alone cannot determine toxicity. Mold identification by appearance is unreliable. The actionable facts are moisture, extent, material type, and whether occupants have respiratory sensitivity.
How to Inspect Drywall for Water Damage
Inspect drywall in a sequence that begins with safety and low-impact observation, then moves to moisture testing and limited opening only when necessary. A basic inspection takes 20-45 minutes for one room, excluding leak tracing and professional drying.
Before you start
| Item | Typical specification | Typical USA cost |
|---|---|---|
| Flashlight | 500-1,000 lumens, adjustable beam | $15-$45 |
| Hygrometer | Digital indoor humidity meter, 20%-95% RH range | $10-$30 |
| Pinless moisture meter | Wood and building-material modes | $35-$150 |
| Nitrile gloves and eye protection | Disposable gloves, sealed safety glasses | $8-$25 |
| Utility knife and probe | Retractable blade, insulated handle | $10-$25 |
| Camera or phone | Timestamped photos, wide and close views | Existing device |
Turn off electricity if water is near outlets, switches, light fixtures, or electrical equipment. Do not enter a room with a bulging ceiling, active water near energized wiring, sewage contamination, or an unstable wall.
Step 1: Map the visible evidence
Photograph every stain, blister, seam, baseboard, and nearby fixture before touching the wall. Record the date, approximate dimensions, weather conditions, and whether the mark has expanded.
Look above the damage, not only beside it. On a ceiling, inspect roof penetrations, bathroom fans, plumbing fixtures, attic insulation, and ductwork. On an exterior wall, examine window flashing, siding joints, gutters, and downspouts.
You’ll know this worked when: the photographs and notes show the damage boundary and plausible water paths.
Common mistake: cleaning or painting the mark before documenting its original size.
Step 2: Compare the area with unaffected drywall
Use the back of your fingers first, then apply only light pressure to a suspected area. Compare the same height and finish on a nearby wall that has no visible damage.
Healthy drywall feels firm and remains dimensionally stable. Wet or weakened drywall may feel cool, soft, swollen, spongy, or hollow around a detached paper layer. A probe should not be pushed into a ceiling or a visibly bulging section.
You’ll know this worked when: the suspected area has a clear firmness difference from the control area.
Common mistake: pressing repeatedly on soft gypsum, which enlarges the damaged section and spreads loose paper.
Step 3: Measure moisture against a control area
Place a pinless meter on the suspected area and record the reading, then test at least three unaffected locations made from similar material. Move the meter in a grid about 6-12 inches apart to identify the wet boundary.
Pinless meters can respond to metal studs, corner bead, foil-backed insulation, wiring, salts, and changes in material density. Pin-type meters provide localized readings but puncture the finish and may miss moisture outside the two pin locations.
Do not treat 17% as a universal drywall limit. That number is frequently associated with wood moisture guidance, while drywall meters use different scales, material modes, and reference standards. A persistently higher reading than the control area, combined with physical damage, is more useful than one isolated number.
You’ll know this worked when: readings form a repeatable pattern that identifies a wet or suspicious zone.
Common mistake: testing only the stain and assuming a low reading proves the cavity is dry.
Step 4: Determine whether the leak is active
Repeat the same measurements after several hours and after the suspected source has been used. Check water meters, plumbing joints, attic areas, HVAC drain pans, and the exterior after rain.
An expanding stain, fresh damp edge, rising meter reading, or new bubbling indicates active or recurring moisture. A dry center with a damp perimeter can also indicate a leak that recently stopped or is moving through the cavity.
| Observation | Likely source | Useful confirmation |
|---|---|---|
| Damage below a bathroom | Supply, drain, tub, or shower leak | Run fixtures while inspecting below |
| Ceiling mark after rain | Roof, flashing, chimney, or gutter issue | Inspect attic during or after rainfall |
| Wall stain near a window | Failed seal, flashing, or condensation | Check trim, exterior caulk, and humidity |
| Damage beside HVAC equipment | Condensate or duct condensation | Inspect drain pan, trap, and insulation |
| Baseboard swelling | Slab, appliance, plumbing, or floodwater | Test flooring and lower wall together |
| Mark that grows intermittently | Hidden pipe or weather-dependent breach | Compare readings after use or rain |
You’ll know this worked when: a source is confirmed, ruled out, or referred to a plumber, roofer, or HVAC technician.
Common mistake: repairing the drywall while leaving the leak unresolved.
Step 5: Inspect the cavity only when evidence justifies it
A small inspection opening can confirm wet insulation, mold, or a damp back surface, but opening drywall creates dust and may contact wiring or plumbing. Use a stud finder and check both sides of the wall before cutting.
For a controlled inspection, remove a small section near the lowest or wettest point, wear eye protection and an appropriate respirator, and stop immediately if you encounter sewage, extensive mold, damaged wiring, or structural deterioration. Larger openings should be planned around studs so replacement can be fastened securely.
You’ll know this worked when: the back of the drywall, insulation, and framing are visibly dry or their condition is documented.
Common mistake: drilling several random holes that fail to reveal the leak and complicate repair.
Step 6: Dry and recheck the materials
Use air movement and dehumidification after the water source is controlled. Keep indoor relative humidity near 30%-50% when practical, but do not assume room air readings prove the wall cavity is dry.
Drying time varies from roughly 24 hours for a small surface event to several days for saturated board, insulation, or framing. Professionals may use air movers, dehumidifiers, containment, and repeated moisture readings rather than relying on a fixed clock.
You’ll know this worked when: readings approach the unaffected control area, the cavity has no damp odor, and the board remains firm and dimensionally stable.
Common mistake: stopping fans because the paint feels dry.
Which Detection Tool Should You Use?
A visual inspection is the correct first tool, while a pinless moisture meter is usually the most practical homeowner upgrade. Thermal imaging can locate temperature patterns associated with moisture, but a camera does not directly measure water and cannot replace moisture readings or source investigation.
| Tool | Typical USA price | Best use | Main limitation |
|---|---|---|---|
| Flashlight and touch | $15-$45 | Surface staining and texture | Cannot detect concealed moisture |
| Pinless meter | $35-$150 | Non-destructive area scanning | Metal and density can cause false readings |
| Pin-type meter | $25-$100 | Localized depth comparison | Leaves 1-2 small holes per test |
| Thermal camera | $200-$3,000 | Large-area temperature mapping | Requires interpretation and stable conditions |
| Borescope | $40-$250 | Viewing a prepared cavity | Requires an opening or access path |
| Hygrometer | $10-$30 | Room humidity and condensation risk | Does not measure wall moisture |
A thermal camera is particularly weak for slowly equalized moisture, insulated cavities, sunny exterior walls, and rooms with strong temperature gradients. It can help locate a pattern, but the pattern requires confirmation.
Should You Dry, Patch, or Replace the Drywall?
Dry and preserve drywall only when the board remains firm, flat, clean, and structurally intact after exposure to a limited amount of clean water. Replace drywall when the gypsum is soft or crumbly, the paper has delaminated, the board has swollen, mold contamination is extensive, or contaminated water has penetrated the material.
Cutting out a damaged section is usually more reliable than sealing a weakened surface beneath primer. Replacement should extend beyond visibly compromised material to firm edges, include inspection of insulation and framing, and address the leak before closure.
| Condition | Dry and keep | Patch or seal | Replace section |
|---|---|---|---|
| Clean water exposure under 24 hours | Often possible | Only after drying | If board softens |
| Firm board with one dry stain | Yes | Stain-blocking primer | No, unless damage recurs |
| Peeling paper under 2 square feet | No | Small patch after removal | Usually localized replacement |
| Swelling over 1/8 inch | No | Cosmetic patch will fail | Yes |
| Sewage or floodwater contact | No | No surface-only repair | Professional removal |
| Mold over a small cleanable area | Case-specific | Follow EPA guidance | Replace porous board if extensive |
| Sagging ceiling | No | No | Immediate safety assessment |
Stain-blocking primer can cover a fully dry, structurally sound mark after the source is fixed. Water-based paint alone often allows tannin-like discoloration to bleed through again. Primer does not disinfect a cavity or restore softened gypsum.
How Much Does Water-Damaged Drywall Repair Cost?
Typical U.S. costs range from about $150-$350 for a basic inspection, $100-$300 for a small patch, and $500-$2,500 for larger removal and replacement, while emergency extraction and drying can add $500-$1,500 or more. Local labor, access, contamination, insulation, and the leak source drive the final invoice.
These are planning ranges, not national price guarantees. A ceiling opening above a staircase, a multi-room loss, asbestos-containing materials in an older home, or structural framing damage can raise costs substantially.
| Work item | Typical U.S. range | Typical duration | Main price variable |
|---|---|---|---|
| Moisture inspection | $150-$350 | 1-2 hours | Travel and diagnostic scope |
| Small drywall patch | $100-$300 | 3-6 hours | Finish matching and access |
| Drying equipment | $500-$1,500 | 2-4 days | Equipment count and affected volume |
| Section replacement | $500-$2,500 | 1-3 days | Area, ceiling height, insulation |
| Mold assessment | $300-$800 | 2-4 hours | Sampling and laboratory requests |
| Plumbing or roof repair | $200-$2,000+ | 1 hour to several days | Source complexity |
Insurance documentation should include photographs, moisture readings, dates, contractor reports, damaged-material samples when appropriate, and receipts for emergency work. Coverage often depends on whether the event was sudden and accidental or resulted from long-term maintenance failure.
What Are the Most Common Inspection Mistakes?
The most damaging mistake is treating visible drywall as the entire problem. Water can remain in insulation, framing, flooring, cabinets, and ceiling cavities after the exposed face appears dry.
Painting before drying
Primer and paint hide evidence but do not remove moisture. Wait until the source is fixed and readings are comparable with unaffected areas.
Using one moisture reading
A single number has little diagnostic value without a control reading, repeated measurements, and knowledge of the meter’s material mode. Record patterns instead.
Assuming a dry stain means a safe wall
Old stains can conceal recurring leaks, while a new leak can produce a small mark before the cavity becomes saturated. Test after rain or plumbing use when the source is intermittent.
Removing a ceiling bulge without controlling the area
A water-loaded ceiling can release suddenly. Keep occupants away, isolate electricity when necessary, and use a restoration professional when the bulge is large or near fixtures.
Leaving wet fiberglass insulation in place
Fiberglass does not absorb water like cellulose, but its surrounding paper, dust, framing, and backing can remain wet and reduce drying performance. Inspect and dry the assembly before closing the wall.
Cleaning extensive mold without containment
Small surface areas may be manageable under applicable EPA guidance, but extensive growth, contaminated water, HVAC involvement, or medically vulnerable occupants justify professional assessment. Disturbing mold can spread spores.
What Should Renters, Homeowners, and Managers Do?
Renters should document the condition and notify the landlord in writing before moving or cutting material. Homeowners should control the source, document the loss, and decide whether restoration or replacement is appropriate. Property managers should preserve a dated moisture record and coordinate qualified trades.
| Situation | First action | Avoid | Documentation |
|---|---|---|---|
| Renter with ceiling stain | Notify management immediately | Cutting or painting drywall | Timestamped photos and written notice |
| Homeowner with pipe leak | Shut off water and call plumber | Closing the wall before drying | Source, readings, invoices |
| Roof-related damage | Protect contents and call roofer | Assuming attic insulation is dry | Rain date, roof photos, drying log |
| Property manager | Isolate area and start incident log | Unrecorded cosmetic repair | Pre- and post-drying readings |
| Flood or sewage event | Leave contaminated area and call remediation firm | DIY demolition without protection | Water category, affected rooms, receipts |
When Is Professional Help Necessary?
Professional help is necessary for sewage or floodwater, a sagging ceiling, active water near electricity, extensive mold, repeated hidden leaks, or damage involving structural framing. A licensed plumber, roofer, HVAC technician, or water-restoration contractor should handle the source that matches the evidence.
A professional inspection is also sensible when meter readings remain elevated after several days of controlled drying, when the affected area exceeds roughly 10-20 square feet, or when insulation and multiple rooms are involved. Those conditions increase the chance of concealed damage and incomplete drying.
Frequently Asked Questions
Can drywall be water-damaged without a visible stain?
Yes. Drywall can remain damp behind paint, trim, cabinets, insulation, or wallpaper while the front surface looks normal. Musty odor, elevated meter readings, swollen baseboards, recurring condensation, and unexplained paint failure justify further inspection. Hidden moisture is especially common after slow plumbing leaks and roof leaks that follow framing.
Is a brown ceiling stain always an active leak?
No. A brown ceiling stain can be an old, fully dry event, but appearance cannot prove that the leak stopped. Measure the area, inspect the attic or plumbing above, and repeat checks after rainfall or fixture use. A growing edge, fresh discoloration, or rising moisture reading indicates recurrence.
How long should wet drywall dry before painting?
Small, clean-water exposure may dry in about 24-48 hours, while saturated drywall, insulation, and framing can require several days. Paint only after the source is repaired, the board is firm, the cavity is dry, and readings are close to an unaffected control area. Painting sooner can trap moisture and hide recurring damage.
Can I use bleach on moldy drywall?
Bleach is not a dependable solution for porous drywall because it may not penetrate the gypsum and can add liquid to the assembly. Remove or professionally remediate extensively affected porous material according to EPA guidance, while addressing the moisture source. Never mix bleach with ammonia or acidic cleaners.
Does water-resistant drywall prevent water damage?
No. Moisture-resistant gypsum board slows moisture absorption in selected locations but is not waterproof. It can still swell, weaken, and support mold when water reaches its paper, cut edges, fasteners, or cavity. Shower assemblies require a properly designed waterproof system, not drywall alone.
Will homeowners insurance pay for damaged drywall?
Coverage varies by policy and cause. Sudden accidental events such as a burst supply pipe may be treated differently from gradual seepage, neglected maintenance, or repeated flooding. Photograph the damage before demolition, mitigate further loss, retain invoices, and ask the insurer how emergency drying should be authorized.
The Bottom Line
To tell if drywall has water damage, combine visible signs with firmness, odor, moisture-meter comparisons, source tracing, and a cautious cavity inspection. A dry stain may need only stain-blocking primer, but swollen, soft, delaminated, mold-contaminated, or sewage-exposed drywall generally needs removal after the leak is fixed and surrounding materials are assessed.
Use the same decision sequence every time: make the area safe, document the evidence, identify the source, measure against unaffected drywall, dry the assembly, and recheck it. If you are still asking how to tell if drywall has water damage after the surface looks dry, the next useful evidence is usually a control reading and an inspection of the wall or ceiling cavity.