How to Clean Wood Kitchen Cabinets Without Damage
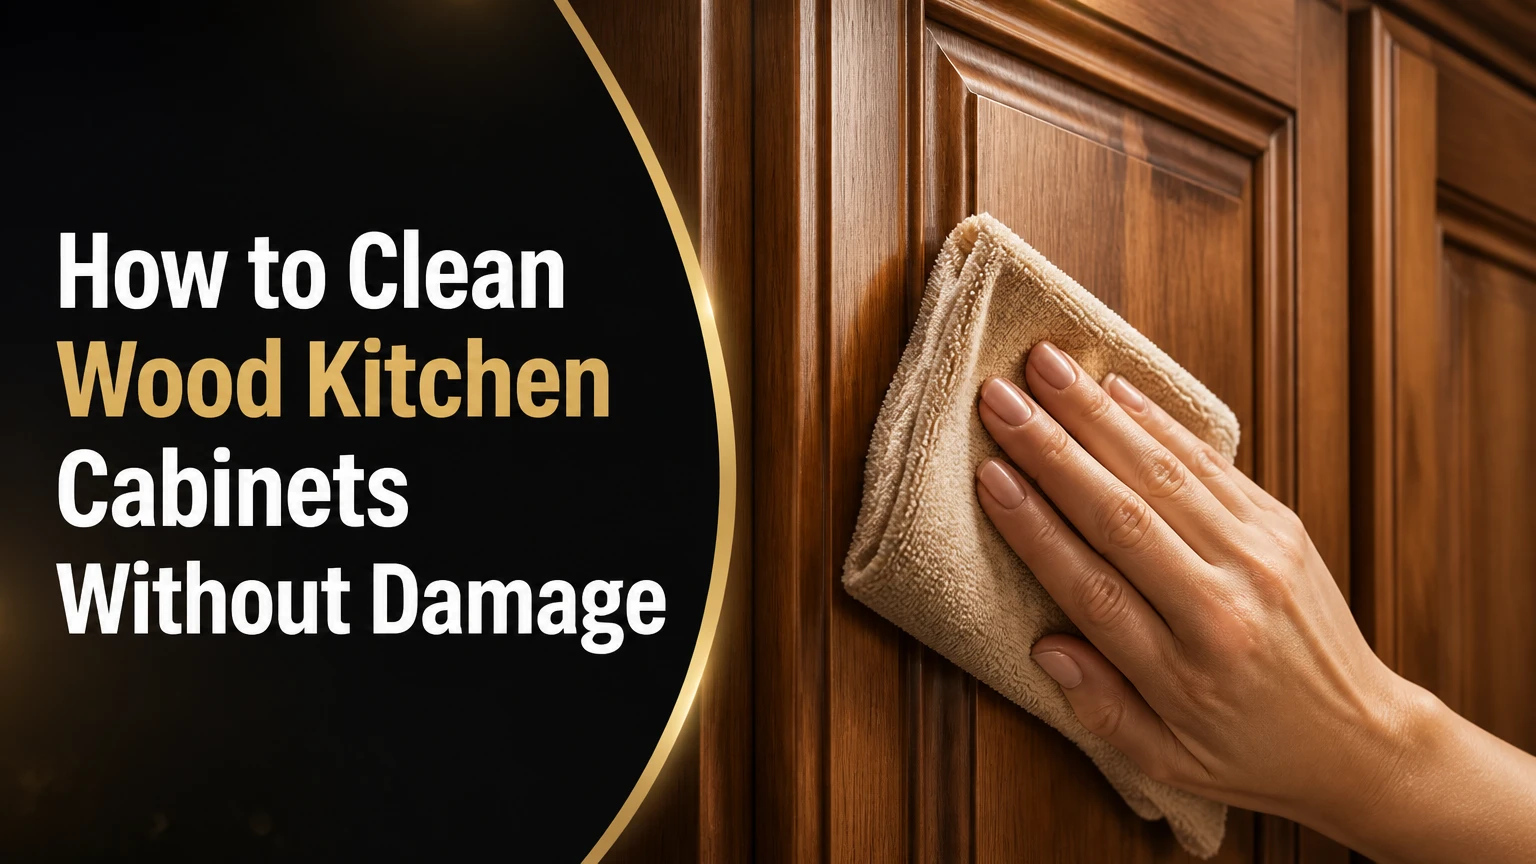
To clean wood kitchen cabinets safely, remove loose dust, wipe with a barely damp microfiber cloth and diluted mild dish soap, rinse away residue, and dry immediately. The safest routine uses 2-3 drops of soap in 1 cup of warm water, a hidden-area test, and no soaking, abrasives, bleach, ammonia, steam, or aggressive scraping.
Key Facts / At a Glance
Mild dish soap diluted in warm water is the safest starting cleaner for most factory-finished wood cabinets.
Use a damp cloth, not a wet one; standing water can swell joints, damage veneer edges, and cloud some finishes.
Clean in the direction of the grain, then dry cabinet doors, frames, corners, and hardware surrounds immediately.
Test every unfamiliar cleaner inside a door and wait until the test area dries before treating visible surfaces.
Vinegar is not a universal wood-cabinet cleaner because acid can dull wax, oil, shellac, and some delicate coatings.
Typical routine cleaning takes 10-20 minutes; a heavily greasy kitchen may require 45-90 minutes and several mild passes.
What Wood Cabinet Cleaning Actually Removes
Wood cabinet cleaning removes dust, airborne cooking oil, fingerprints, food splashes, dried starch, and residue from previous cleaning products. Cleaning does not repair peeled finish, restore missing stain, reverse swollen veneer, or refinish a surface that has been chemically stripped.
Kitchen grease becomes difficult when airborne oil combines with dust and cooking vapor. A surfactant, such as the detergent in mild dish soap, surrounds oily soil so water can carry it away. Warm water softens the film, while a microfiber cloth provides contact without the cutting action of a scouring pad.
The Centers for Disease Control and Prevention defines cleaning as removing “dirt, impurities, and contaminants” from surfaces. Cabinet cleaning is therefore different from disinfecting: household cabinetry usually needs soil removal, while food-contact sanitation belongs on counters and other surfaces designed for that purpose.
Cleaning, Polishing, Sanitizing, and Stripping
These terms describe different jobs. Polishing adds a product or sheen, sanitizing reduces microorganisms under specified conditions, and stripping removes finish or coating; confusing them causes many cabinet-care failures.
| Task | Primary objective | Suitable cabinet action | Typical frequency |
|---|---|---|---|
| Routine cleaning | Remove dust and fingerprints | Damp microfiber with diluted soap | 1-7 days |
| Degreasing | Remove bonded cooking film | Several mild soap passes | 2-12 weeks |
| Polishing | Alter sheen or add protection | Finish-approved polish only | 1-4 times yearly |
| Sanitizing | Reduce microbes on suitable surfaces | Product labeled for that surface | As label directs |
| Stripping | Remove old coating | Professional chemical process | During refinishing |
What to Prepare Before Cleaning Wood Cabinets
Gather two or three clean microfiber cloths, a small bowl, mild unscented dish soap, warm water, a soft toothbrush, cotton swabs, and a dry towel. Add a plastic scraper for hardened food, painter’s tape for protecting adjacent surfaces, and a manufacturer-approved cleaner if the cabinet warranty specifies one.
Before-Start Checklist
| Requirement | Typical specification | Why it matters |
|---|---|---|
| Working time | 10-20 minutes for routine cleaning | Prevents solution from drying on panels |
| Deep-clean time | 45-90 minutes for 20-30 doors | Allows repeated light passes |
| Water temperature | Warm, approximately 90-110°F | Softens film without heat damage |
| Soap dilution | 2-3 drops per 1 cup water | Limits residue and finish exposure |
| Cloth moisture | Damp, then thoroughly wrung | Reduces swelling and streaking |
| Typical supply cost | $8-$25 in USA retail prices | Covers soap, cloths, and small tools |
| Difficulty | Easy, except damaged or antique finishes | Finish identification controls risk |
Turn off nearby burners and let cabinet surfaces cool before cleaning. Heat makes grease more fluid, increases streaking, and can cause a damp cloth to dry unevenly.
If a cabinet manufacturer supplied care instructions, follow those instructions first. A warranty document may prohibit vinegar, oil soap, silicone polish, or specific solvents even when those products are commonly recommended online.
How to Clean Wood Kitchen Cabinets Safely
The safest process has seven steps: remove dust, identify the finish, test the solution, wash small sections, detail crevices, remove soap residue, and dry immediately. A typical kitchen requires 15-30 minutes when soil is light, while thick grease usually responds better to two or three controlled passes than one forceful scrub.
Step 1: Clear and Protect the Work Area
Remove items from the cabinet interior if shelves or inside panels need cleaning. Place a towel beneath lower doors, protect countertops from runoff, and keep cabinet doors open only as long as needed.
Clean one door, drawer front, or frame section at a time. Small sections prevent the solution from sitting on wood and make it easier to notice changes in color or sheen.
You will know the step worked when: the work area is accessible and no water can pool beneath the cabinet.
Common mistake: spraying cleaner directly onto a door. Spray can enter hinge cups, seams, and unfinished edges, so apply solution to the cloth instead.
Step 2: Remove Loose Dust
Wipe the cabinet surface with a dry microfiber cloth, moving with the wood grain. Use a clean brush or vacuum with a soft brush attachment around crown molding, hinge plates, and the narrow gap beneath doors.
Dry dusting prevents grit from becoming a slurry that rubs across the finish. Pay particular attention to the cabinet tops above a range, where oil-laden dust can form a gritty film.
You will know the step worked when: the cloth collects dry dust but the surface has no loose particles under your fingertips.
Common mistake: starting with a wet sponge. A sponge can hold grit and spread contaminated water across a larger area.
Step 3: Test the Cleaner on a Hidden Area
Mix 2-3 drops of mild dish soap into 1 cup of warm water. Dip a microfiber corner into the solution, wring it until damp, and test the inside edge of a door or another concealed area.
Allow the test area to dry completely, preferably for 24 hours when the finish is old, waxed, painted, high-gloss, or unknown. Stop if the area becomes lighter, darker, tacky, cloudy, rough, or unusually shiny.
You will know the step worked when: the test patch matches the surrounding finish after drying and does not feel sticky.
Common mistake: judging the result while the wood is wet. Water temporarily changes the apparent color and gloss.
Step 4: Wash With Diluted Mild Soap
Wipe a small section with the damp cloth, following the grain and using light hand pressure. Turn the cloth frequently so removed grease does not return to the surface, and refresh the solution when it becomes visibly cloudy.
For ordinary fingerprints and cooking film, one pass is enough. For sticky buildup, place the damp soapy cloth over the spot for 30-60 seconds, then wipe; controlled contact time softens soil without requiring abrasive pressure.
You will know the step worked when: the surface feels clean and smooth, with no drag from softened grease.
Common mistake: using concentrated dish soap. More detergent does not necessarily clean better, and excess surfactant creates a film that attracts dust.
Step 5: Detail Molding, Seams, and Hardware
Use a soft-bristled toothbrush or cotton swab around trim, hinge perimeters, handle mounts, and recessed panel corners. Keep the tool damp rather than wet, and wipe loosened soil away with a separate microfiber cloth.
Remove hardware only when necessary and label screws by location. Brass, bronze, painted metal, and lacquered hardware can react differently from the surrounding wood, so do not assume a cabinet cleaner is safe for every handle.
You will know the step worked when: dark residue has left the recesses without a wet line along the panel edge.
Common mistake: scrubbing veneer edges or decorative glazing. Repeated brushing can lift fragile edge material or remove highlights from hand-applied finishes.
Step 6: Remove Soap Residue
Use a second cloth dampened with plain warm water and wrung nearly dry. Wipe the cleaned section once, then avoid repeated rinsing that spreads moisture into joints and end-grain areas.
A rinse is especially useful after grease removal because detergent residue can feel tacky after drying. For a lightly dusty door cleaned with almost no soap, a separate rinse may be unnecessary, but the cloth should still leave no visible streak.
You will know the step worked when: the panel has no slippery or hazy feel under a clean fingertip.
Common mistake: rinsing with a dripping cloth. Cabinet frames, door rails, and veneer seams are vulnerable to concentrated moisture.
Step 7: Dry Every Surface
Immediately buff the section with a fresh, dry microfiber cloth. Dry the bottom edges of doors, corners, around hinges, drawer lips, and the joints where stiles meet rails.
Wood and wood-based panels absorb moisture differently across grain directions. Drying is therefore a protection step, not a cosmetic step.
You will know the step worked when: no droplets remain and the cabinet feels dry within seconds of wiping.
Common mistake: letting water air-dry. Evaporation leaves detergent minerals behind and prolongs moisture exposure at seams.
Which Cleaner Is Safest for Wood Cabinets?
Diluted mild dish soap is the best first choice for most sealed, stained, painted, and polyurethane-finished wood cabinets. A pH-neutral, residue-free cleaner approved by the cabinet manufacturer is the better choice for an antique, waxed, shellac-coated, or unknown finish.
| Cleaner or method | Best use | Typical dilution or contact | Main risk |
|---|---|---|---|
| Mild dish soap | Fingerprints and light grease | 2-3 drops per 1 cup water, 30-60 seconds | Residue if overused |
| pH-neutral wood cleaner | Manufacturer-approved finished wood | Label dilution, usually under 2 minutes | Product incompatibility |
| White vinegar | Some durable modern coatings | Prefer 1:3 vinegar-to-water after testing | Dulling wax, oil, shellac, or lacquer |
| Baking soda | Isolated dried food on durable coating | Paste for under 30 seconds, minimal rubbing | Abrasion and sheen change |
| Oil soap | Selected sealed finishes | Label dilution only | Oily or waxy buildup |
| Steam cleaner | No routine cabinet application | Do not use on wood cabinetry | Swelling, delamination, finish failure |
Is Vinegar Safe on Wood Kitchen Cabinets?
Vinegar is safe only when the cabinet finish manufacturer permits it and a hidden-area test shows no change. White vinegar is acidic, so frequent or concentrated use can dull wax, oil, shellac, some lacquer, and certain painted coatings even though it can help loosen mineral residue on durable modern finishes.
Do not treat a 1:1 vinegar-and-water mixture as a universal heavy-grease solution. Grease is primarily oily, while vinegar is not a strong degreaser; diluted detergent usually provides better soil removal with less finish risk.
Can You Use Baking Soda or an Oil Soap?
Baking soda can remove a small amount of dried food from a durable, fully cured finish, but its particles create mild abrasion. Oil soap can clean some sealed wood, yet repeated use may leave an accumulative film that changes gloss and holds dust.
Neither product should be the default routine cleaner. Use the least aggressive chemical and mechanical action that removes the soil, then stop.
Finish-Specific Cabinet Cleaning Rules
The finish, not the species alone, determines cleaning tolerance. Oak, maple, cherry, and walnut may have different grain and stain behavior, but a polyurethane coating and an unsealed wax coating require fundamentally different care.
| Cabinet surface | Preferred method | Avoid | Finish-specific checkpoint |
|---|---|---|---|
| Stained polyurethane wood | Diluted soap and damp microfiber | Solvents and abrasive pads | Finish stays uniform after drying |
| Painted wood | Minimal soap and water | Vinegar, melamine, hard scrubbing | No pigment transfers to cloth |
| High-gloss lacquer | Nearly dry microfiber and approved cleaner | Baking soda, paper towels, steam | No fine swirl marks under side light |
| Waxed or oiled wood | Manufacturer-approved pH-neutral product | Vinegar, detergent overuse, water | Surface remains satin, not tacky |
| Veneer panels | Damp cloth, quick drying | Flooding edges and soaking seams | No lifted or darkened edge |
| Laminate or thermofoil | Soap solution on cloth | Solvents, excess heat, sharp tools | Edges remain firmly bonded |
| Antique or unknown finish | Specialist assessment first | Home acids and polishes | No test is skipped |
Painted cabinets deserve extra restraint because color can transfer when the coating is worn or incompletely cured. High-gloss doors also magnify fine scratches, so use a fresh, soft microfiber cloth and never use a melamine sponge.
Unfinished wood is a separate case. Do not wet-clean unfinished cabinet components without knowing whether the manufacturer expects sanding, oiling, or another treatment; water can raise the grain and create a visible dark patch.
How to Remove Heavy Grease Without Stripping the Finish
Heavy grease usually requires repeated short applications of diluted detergent, not a stronger chemical. Apply the damp soapy cloth for 30-60 seconds, wipe, rinse the cloth, and repeat up to three times before considering a finish-safe commercial degreaser.
Start above and beside the range, then inspect the underside of the hood and the cabinet top. If the grease returns within days, improve ventilation and clean the hood filter because the cabinet may be receiving a continuing oil deposit.
| Grease condition | Treatment | Maximum practical dwell | Stop condition |
|---|---|---|---|
| Light fingerprint film | Damp microfiber with soap | 15 seconds | Surface feels smooth |
| Thin cooking haze | Soapy cloth, then rinse | 30 seconds | Cloth removes yellow residue |
| Sticky handle area | Covered damp cloth | 60 seconds | Tackiness decreases |
| Dried food spot | Plastic scraper after softening | 60 seconds | Spot lifts without force |
| Years-old layered film | Three mild passes, then approved cleaner | 3 minutes total | Finish changes or remains tacky |
| Softened or peeling coating | Stop cleaning | 0 seconds | Call a cabinet professional |
Never use a metal blade, razor, acetone, paint thinner, or undiluted degreaser on a finished wood door. If three mild passes do not change the soil, the remaining material may be degraded finish, old polish, or a coating failure rather than removable grease.
Common Mistakes and How to Fix Them
The most damaging cabinet-cleaning mistakes are excess moisture, excess friction, and untested chemicals. Each mistake can produce a finish problem that looks like dirt, which leads homeowners to scrub harder and increase the damage.
| Mistake | Visible symptom | Immediate response | When to escalate |
|---|---|---|---|
| Soaking the cloth | Swollen edge or dark seam | Dry immediately and stop wet cleaning | Swelling remains after 24 hours |
| Concentrated soap | Sticky or hazy film | Rinse with barely damp water cloth | Film persists after two rinses |
| Steel wool or scouring pad | Fine scratches and dull patch | Stop rubbing; do not polish blindly | Scratches remain when dry |
| Bleach or ammonia | Lightened stain or brittle coating | Wipe with plain water and ventilate | Color or coating loss appears |
| Steam cleaner | Blistered or lifted finish | Stop heat and dry surface | Veneer or coating has delaminated |
| Melamine sponge | Localized lower sheen | Stop abrasion; compare in side light | Visible sheen mismatch remains |
Bleach and ammonia can alter color, weaken some coatings, and create hazardous fumes when mixed with other cleaners. Acetone and nail-polish remover can dissolve or soften finishes rapidly.
A cloudy appearance is not proof that the cabinet needs oil. First remove possible soap residue with a barely damp plain-water cloth and dry it. Applying mineral oil, walnut oil, or beeswax to a modern factory finish can create a new film, and walnut oil also presents an avoidable allergy concern in some households.
How Often Should Wood Cabinets Be Cleaned?
Wipe handles, the area around the range, and visible splashes weekly, or more often in a household that cooks daily. Perform a broader exterior cleaning every 1-3 months and clean cabinet interiors about twice yearly unless spills require immediate attention.
| Cabinet area | Light-use schedule | Heavy-cooking schedule | Recommended action |
|---|---|---|---|
| Handles and pulls | Weekly | 2-3 times weekly | Damp microfiber and diluted soap |
| Range-side doors | Every 2 weeks | Weekly | Short degreasing pass |
| General exterior | Monthly | Every 2-4 weeks | Dust, wash, rinse, dry |
| Cabinet tops | Every 3 months | Monthly | Remove oily dust carefully |
| Interior shelves | Every 6-12 months | Every 3-6 months | Empty, wipe, dry fully |
| Hinges and trim | Every 3-6 months | Monthly | Cotton swab or soft brush |
| Professional condition check | Every 5-10 years | Every 3-5 years | Inspect finish and veneer |
Daily wiping is appropriate for fresh splashes because food residue becomes harder to remove after it dries. Daily full-cabinet washing is unnecessary and can expose the finish to more water and detergent than needed.
Situation-Specific Methods
How Should Renters Clean Cabinets?
Renters should use only diluted mild dish soap, a soft microfiber cloth, and the care method stated in the lease or property manager’s instructions. Photograph a damaged area before cleaning, test inside a door, and avoid vinegar, oil soap, polish, steam, and abrasive sponges that can change sheen.
How Should You Clean Antique or Unfinished Cabinets?
Antique and unfinished cabinets need finish identification before wet cleaning. Shellac, wax, oil, milk paint, and aged varnish can soften or change appearance with water, acid, alcohol, or modern detergents, so a furniture conservator or cabinet restorer should assess valuable surfaces.
How Should You Clean High-Gloss or Recently Painted Cabinets?
Use a nearly dry microfiber cloth and a manufacturer-approved cleaner on high-gloss doors. Recently painted cabinets should remain untouched until the coating has cured according to the paint manufacturer’s stated period, often at least several days and sometimes longer for waterborne or oil-based systems.
How Should You Clean Cabinet Interiors?
Empty one cabinet, vacuum crumbs with a soft attachment, and wipe shelves with the same barely damp cloth method. Dry shelf edges and corners before replacing items, and do not saturate particleboard shelves because swelling may be permanent.
What Do Cabinet Cleaning Problems Mean?
Sticky residue usually indicates incomplete removal of softened grease or excess detergent, not a need for stronger scrubbing. Cloudiness can indicate residue, moisture under a coating, or actual finish damage, while a white ring may be trapped moisture or a damaged topcoat.
| Problem | Likely cause | Safe first response | Do not do |
|---|---|---|---|
| Sticky after cleaning | Soap or softened grease | Plain-water wipe, dry, repeat mild soap | Add oil or wax immediately |
| Yellow film | Cooking grease | Three short soap passes | Use undiluted solvent |
| Cloudy patch | Residue or finish damage | Test plain-water wipe in section | Polish the whole kitchen |
| White water ring | Moisture or topcoat change | Dry and monitor for 24 hours | Rub toothpaste aggressively |
| Dark swollen edge | Water intrusion | Dry and stop wet cleaning | Clamp or sand while damp |
| Peeling veneer | Adhesive or moisture failure | Leave undisturbed | Pull, scrape, or flood it |
| Uneven sheen | Abrasion or polish buildup | Compare under side lighting | Use more abrasive polish |
Petroleum jelly, toothpaste, walnut oil, and similar home remedies are not universal repairs. They may temporarily alter the appearance of a finish while making later professional refinishing more difficult, so use them only when the finish maker or restoration professional specifically approves the treatment.
When Is Professional Refinishing Necessary?
Professional help is appropriate when cleaning exposes bare wood, peeling veneer, bubbling laminate, widespread discoloration, deep water damage, or an unknown valuable finish. Cleaning cannot replace missing lacquer, reattach extensively delaminated veneer, or reproduce a damaged stain reliably.
A cabinet refinisher can determine whether the problem is removable soil, polish buildup, finish failure, or substrate damage. That diagnosis prevents an aggressive cleaning attempt from turning a localized defect into an entire-door replacement.
Typical USA pricing varies by region and cabinet quantity. A cleaning service may charge approximately $150-$400 for a small kitchen, while professional refinishing commonly costs several thousand dollars; obtain a written scope that separates cleaning, repairs, coating, and hardware work.
Typical Cabinet-Cleaning Cost and Time
DIY routine cleaning generally costs $8-$25 for supplies already used around the home. Specialty pH-neutral cleaners may add $10-$25, while professional cleaning and restoration prices vary substantially by cabinet count, access, finish condition, and local labor rates.
| Service or approach | Typical USA cost | Typical duration | Best fit |
|---|---|---|---|
| DIY routine exterior | $0-$10 | 10-20 minutes | Weekly maintenance |
| DIY deep exterior | $8-$25 | 45-90 minutes | 20-30 cabinet fronts |
| Specialty cleaner treatment | $15-$40 | 30-75 minutes | Manufacturer-approved finishes |
| Professional cabinet cleaning | $150-$400 | 2-5 hours | Extensive grease or large kitchen |
| Minor veneer or finish repair | $200-$800 | 1-3 visits | Localized damage |
| Full refinishing | $2,000-$6,000+ | 3-10 days | Worn or failing finish |
These figures are typical planning ranges, not guaranteed quotes. Cabinet height, glazing, crown molding, grease thickness, travel fees, and the need to remove hardware can change the final price.
Expert Rules That Prevent Finish Damage
A barely damp cloth is a measurement, not a mood. Wring the cloth until pressing it in your palm produces no drip. If a visible bead forms on the cabinet, the cloth contains too much water for routine wood cleaning.
Repeated mild passes beat one aggressive pass. A finish can tolerate short, controlled exposure to diluted soap better than prolonged rubbing with a strong degreaser. The practical stop rule is simple: if the soil does not improve after three mild passes, investigate the finish instead of increasing force.
Gloss mismatch reveals damage better than color mismatch. View the door from a low side angle near a window or task light. Fine abrasion, polish buildup, and chemical dulling often appear as a change in reflected light before the cabinet looks visibly discolored.
The cabinet top is a source area, not merely another surface. Thick oily dust above the range can continually redeposit on doors. Cleaning the tops and improving range ventilation can reduce recurring film more effectively than washing door fronts more often.
Frequently Asked Questions
Can I Use Dawn Dish Soap on Wooden Kitchen Cabinets?
You can use a small amount of mild dish soap on most sealed wood cabinets, including many polyurethane-finished doors. Dilute 2-3 drops in 1 cup of warm water, apply it to a wrung-out cloth, rinse away residue, and dry immediately. Do not use concentrated soap or spray the door directly.
Should I Clean Cabinets With a Sponge or Microfiber Cloth?
A microfiber cloth is safer for finished wood because it holds fine soil while creating less concentrated abrasion than a rough sponge. A soft cellulose sponge can work when fully clean and well wrung, but scouring sides, melamine sponges, steel wool, and textured pads can change the cabinet sheen.
Can I Use Murphy Oil Soap on Wood Kitchen Cabinets?
Use Murphy Oil Soap only when the cabinet or finish manufacturer permits it and the label dilution is followed. Oil soaps may leave a residue or change gloss on some modern coatings. Diluted mild dish soap is the safer initial choice when the finish and manufacturer instructions are unknown.
How Do I Clean Grease From Cabinet Doors Without Removing Paint?
Use a barely damp microfiber cloth with 2-3 drops of mild dish soap per cup of warm water. Hold the cloth on the greasy spot for 30-60 seconds, wipe gently, rinse with plain water, and dry. Avoid vinegar, solvents, baking soda, and abrasive sponges until the paint has been tested.
Why Are My Cabinets Still Sticky After Cleaning?
Cabinets remain sticky when detergent residue, softened grease, or old polish has not been fully removed. Wipe a small area with a clean cloth dampened only with warm water, dry it, and repeat the diluted-soap process once. Persistent tackiness can indicate a deteriorating finish that needs professional assessment.
Is It Better to Clean Cabinet Doors on or Off the Hinges?
Clean doors on their hinges for routine maintenance because removal adds handling and alignment risk. Remove doors only for major interior work, hardware cleaning, or repair, and label every hinge and screw location. Keep water away from hinge cups, unfinished edges, and drilled holes.
The Bottom Line
The safest answer to how to clean wood kitchen cabinets is to use the least aggressive method that removes the soil: dry microfiber dusting, diluted mild dish soap, a barely damp cloth, a plain-water wipe when needed, and immediate drying. Test unfamiliar finishes first, avoid universal vinegar or oil recommendations, and stop when cleaning fails to improve a damaged coating.