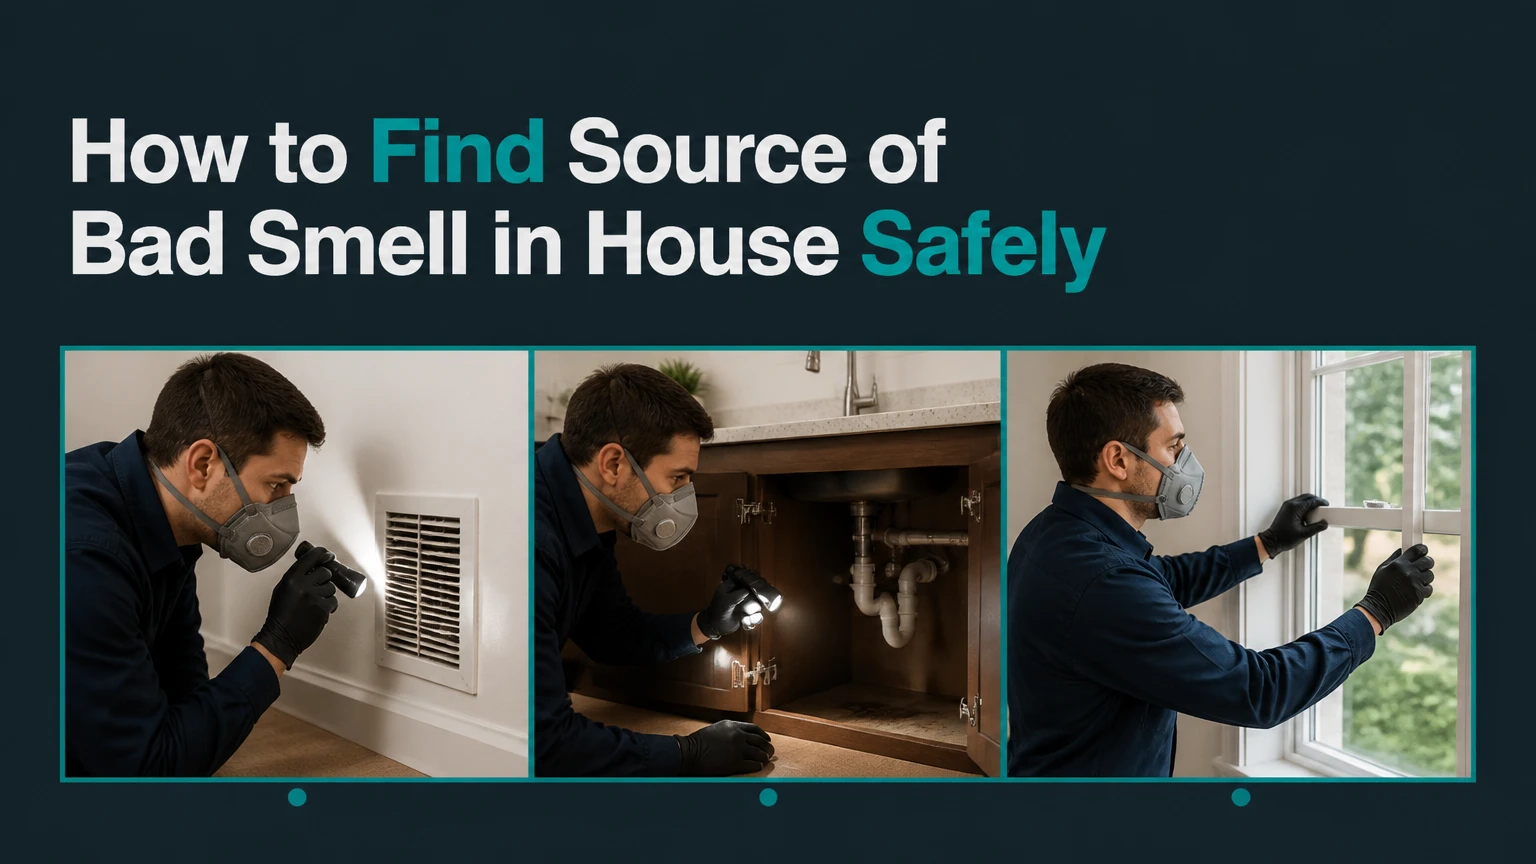
How to Find Source of Bad Smell in House Safely
To find the source of a bad smell in a house, first rule out immediate danger, then reset your sense of smell, isolate rooms, rank odor intensity, and trace airflow toward the strongest point. Match the odor character and trigger to likely sources such as moisture, sewer gas, electrical overheating, pests, appliances, or HVAC components.
Key facts at a glance
A rotten-egg odor indoors can indicate natural gas or sewer gas, and natural gas requires immediate evacuation without operating switches.
A musty odor usually indicates moisture, even when visible mold is absent.
A fishy or melting-plastic odor near an outlet, appliance, or panel can precede an electrical fire.
A room with the strongest smell may be a distribution room, not the original source.
HVAC return openings spread odors farther than supply registers because return air is pulled toward the air handler.
Typical DIY diagnosis costs $0-$60, while professional investigation commonly costs $150-$600 in the USA.
How Do You Find the Source of a Bad Smell in a House?
The most reliable method combines odor tracking, airflow observation, moisture checks, and trigger testing. Complete a first pass in 30-60 minutes, but hidden leaks, pests, and wall cavities can require several days of controlled observations.
Household odors come from airborne chemicals, microbial activity, decomposing material, combustion byproducts, or sewage gases. The nose adapts quickly, so a person who remains indoors may stop noticing an odor that a visitor detects immediately. Fresh-air breaks are therefore part of the diagnostic method, not an optional comfort measure.
A useful rule is to follow the odor gradient, moving from a weaker area toward a stronger area while recording doors, vents, drains, appliances, weather, and operating conditions. Do not assume the strongest-smelling carpet, cabinet, or register is the source. Air pressure can transport an odor from a crawlspace, wall cavity, or plumbing defect into another room.
The U.S. Environmental Protection Agency states, “The key to mold control is moisture control.” That principle applies even when the immediate complaint is smell rather than visible mold. Drying a wet material may stop the odor, but concealed damage still requires inspection.
Before You Start
| Item | Typical requirement | USA cost | Limitation |
|---|---|---|---|
| Fresh-air reset | 15-30 minutes outdoors | $0 | Does not protect against toxic gas |
| Room isolation | 2-3 hours with doors closed | $0 | Avoid isolation if a gas leak is suspected |
| Digital hygrometer | 30-60% relative humidity target | $10-$25 | Measures room air, not wall moisture |
| Pinless moisture meter | Wood and drywall screening | $20-$60 | False readings occur near metal and wiring |
| Disposable gloves and flashlight | Visual inspection | $5-$15 | Gloves do not make mold or wildlife removal safe |
| Paper odor log | Time, location, trigger, intensity | $0-$5 | Requires repeated observations |
Do not begin a room-isolation test if the odor resembles natural gas, smoke, burning insulation, or strong solvent. Leave the property, avoid flames and electrical switches, and call 911 or the gas utility from outside. Never use a household air-quality monitor as proof that a dangerous gas is absent.
Step 1: Describe the Odor and Record Its Triggers
Write the odor description before searching. Use terms such as rotten egg, sulfur, damp soil, wet towel, fishy plastic, ammonia, urine, sewage, solvent, smoke, sour milk, or decaying animal.
Record the time, room, outdoor weather, indoor humidity, and equipment operating at the moment the odor appears. Add whether the smell changes after a shower, toilet flush, dishwasher cycle, clothes-dryer cycle, furnace start, air-conditioner run, rainfall, or window opening.
You will know this step worked when: two people can describe the odor and its timing using similar terms.
Common mistake: Calling every sulfur smell “gas.” Natural gas is odorized with mercaptan, while sewer gas can contain hydrogen sulfide; the emergency response differs only in one respect, strong sulfur odor should never be investigated casually indoors.
Step 2: Reset Your Nose Outside
Leave the building for 15-30 minutes and breathe outdoor air away from exhaust fumes, fireplaces, and scented products. Ask a trusted visitor to enter first if possible, because a person who has remained indoors may have sensory adaptation.
Do not reset your sense of smell with coffee, perfume, essential oils, candles, or air freshener. Those products add volatile compounds and can obscure a weak odor. Return through the main entrance and pause for 30 seconds before entering the first room.
You will know this step worked when: the odor becomes noticeably stronger on re-entry than it seemed before the break.
Common mistake: Searching continuously for an hour. Olfactory fatigue can make the source appear to disappear, creating false confidence that ventilation solved the problem.
Step 3: Rank Rooms Without Spreading the Odor
Close interior doors, cabinets, closets, and windows for up to two hours, but leave the HVAC system off only when doing so will not create a safety or temperature hazard. Do not close combustion-air openings, block furnace ventilation, or isolate a room containing a suspected gas appliance.
Re-enter and sample each room in the same order. Open one door, stand near the threshold for 10 seconds, and assign an intensity from 0 to 5. Keep a written ranking.
| Room or area | Intensity 0-5 | First inspection point | Likely source category |
|---|---|---|---|
| Basement | 0-5 | Floor drain and sump pit | Sewer gas or moisture |
| Kitchen | 0-5 | Sink cabinet and refrigerator | Plumbing, food, appliance |
| Bathroom | 0-5 | Toilet base and floor drain | Sewer gas or microbial growth |
| Laundry room | 0-5 | Washer gasket and standpipe | Mildew or drain |
| Attic | 0-5 | Insulation and roof sheathing | Wildlife or roof moisture |
You will know this step worked when: one room consistently scores at least two intensity points higher than adjacent rooms.
Common mistake: Treating the highest-scoring room as the source. A return-air grille can pull an odor from elsewhere, so compare supply registers with return grilles before opening walls or removing flooring.
Step 4: Trace the Source Room on a Perimeter Grid
Inspect the source room clockwise, starting at the doorway and checking baseboards, floor transitions, wall penetrations, outlets, switch plates, windowsills, drains, cabinets, and appliance undersides. Use sight and smell, but do not dismantle electrical devices, plumbing traps, HVAC equipment, or gas connections.
A small fan can help identify airflow only after dangerous gas and smoke have been excluded. Hold a tissue near, rather than inside, a suspected gap and note whether air moves into or out of the room. A smoke pencil is more precise, but never use smoke near a gas appliance, open flame, smoke detector, or vulnerable person.
You will know this step worked when: the odor becomes stronger at one boundary, opening, drain, appliance, or airflow path.
Common mistake: Sniffing directly at an electrical outlet or panel. Heat, discoloration, buzzing, melting plastic, or a fishy odor requires distance and a licensed electrician, not closer inspection.
Step 5: Test Moisture, Plumbing, and Appliances
Measure room humidity with a hygrometer. Relative humidity above 60% supports mold growth and condensation risk, but humidity below 60% does not exclude a plumbing leak or wet cavity. Scan suspected drywall, trim, subfloor, and cabinet backs with a moisture meter and compare readings with a visibly dry reference area.
Pour approximately 1-2 quarts of water into an infrequently used floor drain or sink trap. Flush a rarely used toilet. A dry P-trap can allow sewer gas into the room, but adding water will not fix a cracked trap, failed toilet seal, blocked vent, or leaking drain line.
Inspect refrigerators for a dirty drip pan, dishwashers for trapped food, washing machines for gasket residue, trash bins for leaks, and garbage disposals for buildup. Clean accessible components according to the manufacturer’s instructions, then retest after 12-24 hours.
You will know this step worked when: the odor declines after the suspected source is cleaned, dried, refilled, or isolated.
Common mistake: Pouring bleach into a drain. Bleach can react with acidic cleaners or ammonia and does not repair defective plumbing; mechanical cleaning and a plumber are safer responses.
Step 6: Test HVAC Airflow and Distribution
Inspect the HVAC filter, return grille, supply registers, condensate pan, accessible drain line, and air-handler cabinet without opening sealed electrical or refrigerant compartments. Compare the odor at a return grille with the odor at supply registers while the system is off, then observe whether the smell returns when the blower operates.
A stronger smell at the return suggests the HVAC system is collecting odor from the surrounding room, crawlspace, attic, or duct leakage. A stronger smell at multiple supplies after the blower starts suggests contamination near the air handler, coil, condensate pan, or duct system.
Replace a loaded filter with the correct size and efficiency specified by the equipment manufacturer. Do not spray fragrance, disinfectant, or ozone into ductwork. Ozone can irritate lungs and damage rubber, wiring insulation, and some finishes, while masking the original source.
You will know this step worked when: the odor pattern changes predictably with blower operation and remains localized to a documented airflow path.
Common mistake: Running the HVAC continuously to “clear” the smell. This can distribute mold particles, animal odor, or chemical vapors through the entire home.
Step 7: Repeat the Test Under the Trigger Condition
Recreate one condition at a time for 10-20 minutes, while staying near the suspected area. Run the shower, dryer, range hood, bathroom exhaust fan, furnace, or air conditioner separately. Stop immediately if smoke, strong gas odor, headache, dizziness, or breathing irritation occurs.
| Trigger condition | Diagnostic clue | Common source | Safe next action |
|---|---|---|---|
| After rainfall | Odor rises within 1-24 hours | Foundation, roof, wet crawlspace | Inspect moisture paths |
| Clothes dryer runs | Smell enters bathroom or basement | Negative pressure, dry trap | Stop dryer and call plumber if persistent |
| Furnace starts | Dust, oil, plastic, or smoke smell | Burner, heat exchanger area, wiring | Shut down and call HVAC technician |
| Shower runs | Sewage odor increases | Dry trap, drain, vent defect | Refill trap, then arrange plumbing inspection |
| Air conditioner runs | Musty odor at registers | Wet coil, pan, filter, duct | Schedule HVAC cleaning and leak check |
You will know this step worked when: one trigger reliably produces the odor within a repeatable time window.
Common mistake: Changing several variables at once. Running the dryer, shower, exhaust fan, and HVAC together makes pressure and airflow impossible to interpret.
What Does the Smell Usually Indicate?
Odor character narrows the search, but smell alone cannot identify a chemical concentration or prove that a space is safe. Use the following matches as triage clues, then verify the physical source.
| Odor description | More likely sources | High-risk clue | Inspection focus |
|---|---|---|---|
| Musty or earthy | Mold, wet wood, carpet, soil gas | Visible growth or wet drywall | Basements, crawlspaces, leaks |
| Rotten egg or sulfur | Natural gas, sewer gas, drain biofilm | Hissing, appliance flame change, nausea | Gas appliances, traps, vents |
| Fishy or hot plastic | Electrical overheating, appliance wiring | Warm outlet, discoloration, crackling | Outlet, panel exterior, appliances |
| Ammonia or urine | Rodent deposits, pet waste | Droppings, stains, strong enclosed odor | Attic, wall voids, ducts |
| Decaying meat | Dead animal, blocked drain, spoiled food | Flies, stains, worsening odor | Attic, crawlspace, wall cavity |
| Solvent or sweet chemical | Paint, fuel, refrigerant, cleaning product | Headache, eye irritation, spill | Garage, utility room, stored products |
How Do You Locate Musty or Damp Odors?
Musty odors most often trace to moisture, so locate wet materials rather than treating the air. Check relative humidity, plumbing-adjacent drywall, carpet padding, baseboards, crawlspaces, attic sheathing, refrigerator pans, washer gaskets, and air-conditioner condensate components.
A pinless moisture meter is useful for comparing surfaces, not for proving mold. Take several readings around a suspected area and compare them with an unaffected surface of the same material. Water staining, swelling, peeling paint, condensation, or a persistent elevated reading matters more than one isolated number.
Moldy porous materials may require removal rather than surface spraying. The EPA advises that moldy porous materials can be difficult or impossible to clean completely. Do not disturb extensive growth, contaminated insulation, or hidden wall materials without professional guidance, especially if occupants have asthma or immune suppression.
How Do You Investigate Rotten-Egg or Sewer Odors?
Treat a strong rotten-egg odor as a potential gas emergency until the gas utility or fire department rules out natural gas. Do not light a flame, operate a switch, start a vehicle in an attached garage, or use a phone inside; leave immediately and call 911 or the utility from outside.
If the gas utility excludes natural gas, investigate sewer gas. Refill dry P-traps, check toilet bases for movement or staining, inspect cleanout caps, and note whether floor drains smell after a dryer or exhaust fan runs. A plumber may use a smoke test, drain camera, or water-column test to identify vent and trap defects.
Carbon monoxide has no smell. A carbon monoxide alarm is required for safety, but it cannot detect natural gas, hydrogen sulfide, mold, or ordinary sewer odor.
Is a Fishy or Burning Smell an Electrical Emergency?
A fishy, acrid, ozone-like, or melting-plastic smell near an outlet, switch, appliance, light fixture, or electrical panel requires immediate caution. Turn off the suspected appliance only if its control is cool and accessible, leave the building if smoke or heat is present, and call 911 for fire or a licensed electrician for a persistent odor.
Do not remove an outlet cover, open a breaker panel, or touch a warm, buzzing, discolored, or sparking device. If the panel itself is hot or smoking, do not operate the main breaker. A professional can isolate circuits and inspect loose terminations, overloaded wiring, failing breakers, motors, and appliance connections.
A dusty smell during the first furnace cycle can be normal for a short period, but a burning-plastic smell, visible smoke, repeated odor, or tripped breaker is not a normal startup condition.
Which Tools Help Find a Household Odor?
| Tool | Typical price | Detects | Cannot prove |
|---|---|---|---|
| Hygrometer | $10-$25 | Room relative humidity | Hidden leak or mold |
| Pinless moisture meter | $20-$60 | Relative dampness in materials | Mold species or source |
| Combustible-gas detector | $30-$150 | Some fuel-gas concentrations | All sewer gases or safe exposure |
| Thermal camera rental | $50-$150 per day | Temperature patterns from moisture or airflow | Moisture without a temperature contrast |
| Smoke pencil | $25-$60 | Air movement and leakage | Toxic gas identity |
A combustible-gas detector is not a substitute for evacuation. Thermal imaging is valuable when a plumbing leak, roof leak, or missing insulation creates a temperature contrast, but an ordinary thermal camera may miss a dry or small leak. DIY mold test plates also have limited diagnostic value because they measure recoverable spores, not the cause or health risk of an odor.
When Should You Call a Professional?
Call emergency services or the utility immediately for suspected natural gas, smoke, sparking, electrical heat, or severe symptoms. Arrange professional help when the source is concealed, the odor persists after basic corrections, or the affected material involves sewage, extensive mold, wildlife, or combustion equipment.
| Suspected source | Typical USA professional cost | Typical first visit | Appropriate professional |
|---|---|---|---|
| Natural-gas emergency | $0-$200 utility response | Immediate | Gas utility or fire department |
| Electrical odor | $150-$400 | Same day | Licensed electrician |
| Sewer odor | $150-$500 | 1-3 hours | Licensed plumber |
| HVAC odor | $100-$500 | 1-3 hours | HVAC technician |
| Moisture or mold assessment | $300-$800 | 2-5 hours | Qualified inspector or remediator |
| Dead animal or wildlife entry | $200-$600 | 1-3 hours | Wildlife control professional |
Prices vary by city, emergency timing, access, and repair scope. Inspection fees do not always include wall opening, remediation, duct cleaning, plumbing repair, or reconstruction.
An honest limitation matters: no consumer device can identify every odor source. Gas detectors have cross-sensitivities, moisture meters react to metal and salts, and thermal cameras show heat patterns rather than “mold.” Physical inspection and source removal remain the deciding tests.
Common Mistakes and How to Fix Them
| Failure mode | Why it fails | Recovery |
|---|---|---|
| Air freshener or candles | Masks odor and adds VOCs | Stop products, ventilate after safety clearance |
| Ozone generator | Irritates lungs and damages materials | Remove occupants, ventilate, identify source |
| Continuous HVAC operation | Distributes odor through rooms | Stop circulation, inspect return and air handler |
| Bleach on porous materials | Does not remove embedded contamination | Dry, remove damaged material, seek assessment |
| Opening walls too early | Creates unnecessary repair cost | Document odor gradient and triggers first |
| Ignoring outside-air entry | Odor may enter through vents or shared walls | Check attic, crawlspace, garage, and neighboring sources |
Practitioner rule: correct the source before deodorizing the room. Enzyme cleaners can help with pet urine and organic residue, but they do not solve an active leak, electrical fault, sewer defect, or animal entry.
Another rule: photograph every stain, meter reading, droppings trail, and damaged component before cleaning. A dated record helps a plumber, electrician, landlord, insurer, or remediation contractor see the pattern that a single visit may miss.
Variations for Difficult Situations
If the Smell Appears Only at Night
Compare nighttime temperature, wind direction, heating operation, and pressure differences. Cooler outdoor air can change stack effect and pull odors through chimneys, plumbing penetrations, crawlspaces, and shared walls. Check whether a furnace, bathroom fan, or neighboring property becomes active at the same time.
If the Smell Appears Only After Rain
Inspect roof penetrations, attic sheathing, basement walls, window wells, foundation cracks, sump areas, and crawlspace vapor barriers within 24 hours of rainfall. Rain-linked odors often come from wet building materials or soil air entering through pressure changes, but a roof leak can travel far from the visible ceiling stain.
If You Rent an Apartment
Notify the landlord or property manager in writing with dates, rooms, triggers, photographs, and symptoms. Do not open walls, alter smoke alarms, enter mechanical rooms, or shut shared building systems. If natural gas, smoke, or electrical overheating is suspected, leave and contact emergency services before the property manager.
FAQ
Can I find a bad smell without buying equipment?
Yes. Fresh-air resets, room isolation, odor ranking, a flashlight, and a written trigger log identify many food, drain, appliance, and HVAC patterns at no cost. Equipment becomes useful when moisture, airflow, or fuel gas is suspected, but no inexpensive tool replaces professional emergency evaluation.
Why does my house smell bad only when the dryer runs?
A running dryer can depressurize the house and pull sewer gas through a dry floor-drain trap, failed toilet seal, or vent defect. Stop the dryer, refill nearby traps, and repeat the test. If the odor returns or affects multiple rooms, have a plumber evaluate drainage and building pressure.
Can a dead mouse make the whole house smell?
Yes, a dead mouse, rat, bird, or squirrel can produce a strong localized odor that HVAC return airflow distributes throughout a house. Inspect accessible attic and crawlspace areas for flies, stains, nesting material, and droppings. Do not cut into walls around electrical wiring without professional help.
How long does a dead-animal smell last?
A small dead-animal odor may decline over 1-3 weeks after removal, while larger animals or contaminated insulation can smell for several weeks. Temperature, humidity, access, and material absorption determine duration. Removing the carcass and contaminated porous material is more reliable than waiting for decomposition.
Should I leave the house because of a bad smell?
Leave immediately for rotten-egg gas odor, smoke, burning plastic, electrical heat, severe chemical fumes, dizziness, headache, nausea, or breathing difficulty. For a mild musty or food odor without symptoms, isolate the area and arrange diagnosis, but do not use masking products before identifying the source.
The Bottom Line
To find the source of a bad smell in a house, document the odor and trigger, reset your nose outside, rank isolated rooms, trace the strongest airflow path, test moisture and plumbing, and check HVAC distribution. Never investigate suspected gas or electrical burning by sniffing closer. Remove the source first, then clean, dry, repair, and deodorize the affected materials.