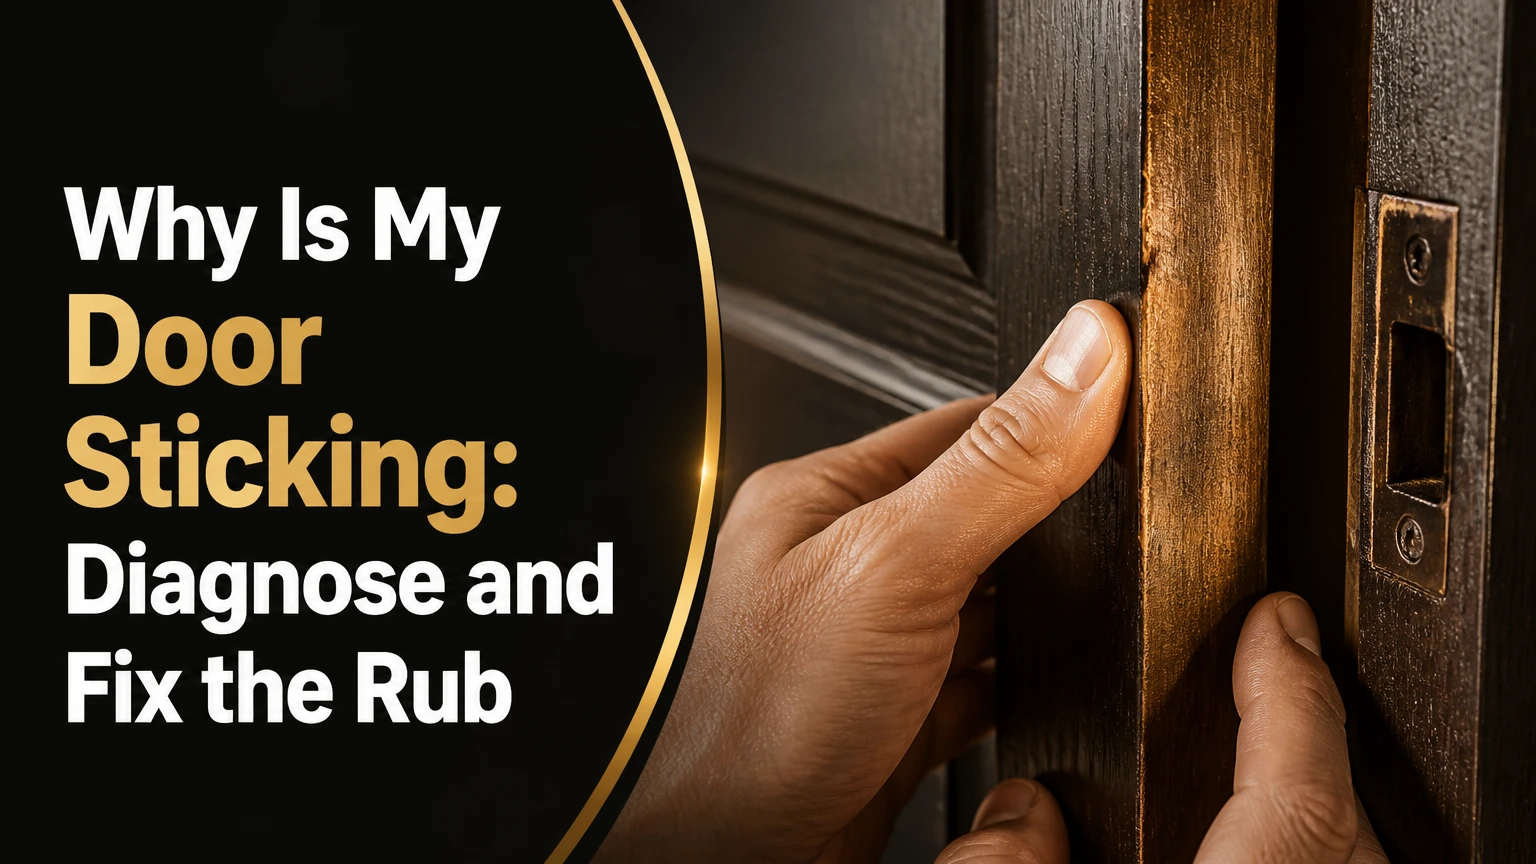
Why Is My Door Sticking: Diagnose and Fix the Rub
A door sticks when the door slab loses sufficient clearance from its frame, hinges, stop, threshold, or strike plate. The most common causes are loose or sagging hinges, seasonal wood swelling, frame movement, thick paint, or a misaligned latch. Finding the exact contact point before making adjustments determines whether the repair takes 10 minutes or requires carpentry.
Key Facts at a Glance
A typical interior door has approximately 1/16-1/8 inch of clearance at its edges, although manufacturer specifications vary.
A top latch-side corner that rubs commonly indicates hinge-side sag, not a need to immediately cut the latch edge.
Indoor relative humidity above approximately 50-60% can make unfinished or poorly sealed wood doors swell.
Tightening hinge screws is the least destructive first repair and commonly takes 10-15 minutes.
A 3-inch screw through the top hinge can reach wall framing and pull a sagging jamb back into alignment.
Planing or sanding removes material permanently, so it belongs after hinge and frame adjustments.
Why Is My Door Sticking?
A sticking door develops unwanted friction because the door and frame no longer occupy the same geometric relationship. Gravity, loose hardware, moisture, settlement, impact, or accumulated paint can reduce a small clearance gap until the slab contacts the jamb or threshold.
Doors need clearance because a rectangular slab swings around hinge pins inside a rectangular opening. If the hinge side drops by only a few millimeters, the top latch corner moves into the jamb while the lower hinge-side corner moves toward the floor. That diagonal movement explains why a small hinge defect can create a large rubbing problem.
The USDA Forest Products Laboratory describes wood as “hygroscopic,” meaning wood gains or loses moisture in response to surrounding air. Wood movement occurs mainly across the grain, so a door can swell enough to rub during a humid summer even when the frame has not moved.
What clearance should a door have?
A typical interior wood door uses roughly 1/16-1/8 inch of clearance along the sides and top, with more space commonly allowed at the bottom for flooring and air movement. The exact gap depends on the door manufacturer, floor covering, threshold, fire rating, and climate.
Do not force every door to a perfectly uniform measurement. A fire-rated door, exterior entry door, or accessibility opening may have manufacturer or code requirements that take priority over a generic carpentry tolerance.
Which Part of the Door Is Rubbing?
The rubbing location provides the fastest first diagnosis. A top latch-side contact usually points toward hinge sag, while uniform contact along the stop often points toward paint buildup or an overly tight frame.
| Rubbing location | Most likely cause | Confirmation sign | First repair |
|---|---|---|---|
| Top latch-side corner | Sagging door or loose top hinge | Diagonal gap, latch sits low | Tighten hinges, then use a 3-inch screw |
| Bottom latch-side corner | Frame twist or bottom hinge position | Top gap is wider on hinge side | Inspect frame, then shim carefully |
| Top hinge-side corner | Swollen top edge or frame distortion | Paper traps at upper hinge corner | Check moisture and frame square |
| Bottom edge near threshold | Floor movement, threshold shift, or swelling | Scrape marks on floor or threshold | Adjust threshold or sand underside |
| Full latch edge | Paint buildup or frame width issue | Paint flakes or continuous contact | Remove buildup, then realign |
| Hinge edge | Loose hinge leaves or thick paint | Hinge plates sit proud of surface | Tighten or reset hinge leaves |
| Strike plate only | Latch misalignment, not slab rubbing | Door closes but latch will not enter hole | Adjust strike plate or screws |
Use a soft pencil to mark the contact area. Chalk or lipstick can also transfer onto the frame, but avoid oily products on unfinished wood or light-colored paint.
How do you find the exact friction point?
Close the door slowly and watch the first place where the slab contacts the frame. Then slide a sheet of ordinary printer paper through the gap around the perimeter. The point where paper traps, tears, or becomes difficult to move identifies the tight zone more reliably than visual inspection alone.
Check the door with the handle released and again while lifting gently on the handle. If lifting changes the gap, the hinges or jamb attachment are likely contributing to the problem. If the gap remains unchanged but the latch misses the strike, focus on lock alignment instead of the door edge.
What Causes a Door to Stick?
The main causes are hinge movement, moisture-related expansion, frame movement, finish buildup, and hardware misalignment. Each cause produces a different pattern, so the repair should match the mechanism rather than the symptom.
| Cause | Typical timing | Physical mechanism | Distinguishing evidence |
|---|---|---|---|
| Seasonal swelling | Humid summer or after rain | Wood expands across grain | Door improves during dry weather |
| Loose hinge screws | Gradual worsening | Door slab drops under gravity | Screw heads turn easily or plates lift |
| Worn hinge knuckles | Months or years | Hinge pin develops vertical play | Door moves upward when lifted |
| Frame settlement | Progressive or recurring | Jamb shifts out of square | Drywall cracks near upper corners |
| Paint buildup | After repeated repainting | Finish consumes clearance | Contact follows the stop uniformly |
| Threshold movement | After flooring or weather work | Bottom edge meets raised surface | Rub marks appear below the slab |
| Strike misalignment | Suddenly after impact | Latch no longer meets opening | Door rubs little but will not latch |
A door that sticks only after a humid spell usually needs moisture management and edge sealing, not aggressive hinge repositioning. A door that worsens over several years, especially with cracks around the opening, may need frame or structural evaluation.
Can foundation settlement make a door stick?
Foundation settlement can make a door stick when movement distorts the jamb out of square, but one sticking door alone does not prove a foundation defect. Settlement becomes more concerning when several doors and windows bind, floors slope, or diagonal drywall cracks radiate from multiple openings.
Measure the opening diagonally from upper hinge side to lower latch side, then compare that measurement with the opposite diagonal. A difference indicates a parallelogram-shaped frame, although a professional should interpret the result alongside foundation and framing evidence.
How Do You Diagnose a Sticking Door Safely?
Diagnose the movement before removing wood or changing hardware. The inspection takes approximately 5-10 minutes and requires a screwdriver, pencil, paper, and flashlight.
- Open and close the door slowly. Stop at the first contact point and mark the slab.
- Inspect the perimeter gap. Look for a diagonal gap, a uniform narrow gap, or one isolated bulge.
- Perform the paper test. Drag paper through the gap and record each tight location.
- Lift the handle gently. Vertical movement suggests loose screws, hinge wear, or a weak jamb.
- Check the hinges. Look for proud screw heads, separated leaves, paint between hinge plates, or bent knuckles.
- Inspect the latch and strike. Confirm whether the latch contacts the strike plate before the door edge reaches the stop.
- Check weather and humidity history. A hygrometer reading above 55% supports a moisture-related diagnosis, but it does not prove one.
What does the gap pattern mean?
A diagonal gap, with extra space above the top hinge and little space at the top latch side, generally indicates sag. A consistently narrow gap around the entire slab suggests paint buildup, frame compression, or an oversized door. A single swollen area suggests localized moisture exposure or incomplete sealing.
Do not diagnose from one visual angle. A closed door can hide contact at the stop, threshold, or latch edge, so inspect the opening while slowly operating the slab.
How Do You Fix a Sticking Door?
Fix a sticking door in ascending order of invasiveness: tighten hardware, correct hinge alignment, adjust the strike or threshold, then remove a small amount of door material if the gap remains inadequate. Most minor interior-door repairs take 10-45 minutes and cost $5-$20 in materials.
Before You Start
| Requirement | Typical value | Notes |
|---|---|---|
| DIY time | 10-45 minutes | Longer if removing the slab |
| Difficulty | Low to moderate | Planing requires hand-tool control |
| Materials | $5-$20 | Screws, shims, sandpaper, primer |
| Basic tools | 4-6 items | Screwdriver, drill, pencil, paper, hammer |
| Replacement screw | 1, 3-inch screw | Use a compatible wood or construction screw |
| Finish repair | 1 primer plus 1 topcoat | Match the existing edge finish |
Step 1: Tighten Every Hinge Screw
Use a manual screwdriver to tighten the screws in both hinge leaves. Start with the top hinge because it carries the greatest leverage from a sagging door. Stop when the screw is firmly seated; excessive force can strip the jamb or crush soft wood.
Replace one loose center screw in the top jamb-side hinge leaf with a 3-inch screw that reaches the structural stud behind the jamb. Drive it slowly and keep the screw aligned with the existing hole. A screw that spins without tightening needs a different repair, such as a plugged hole or longer fastener placed in sound wood.
Success checkpoint: The door closes farther, the top latch-side gap increases, or the latch begins entering the strike.
Common mistake: Using an impact driver at high speed and stripping the screw head or jamb.
Step 2: Correct Minor Hinge Alignment
If the upper latch-side corner rubs after tightening, a thin shim behind the lower hinge jamb leaf can change the door angle. Use one thin cardboard or plastic shim, approximately 1/32 inch, and retighten the hinge.
Make small changes because hinge shimming moves the entire slab. If the door rubs at the bottom latch side, the required adjustment may be opposite, and repeated shimming can distort the reveal or prevent the hinge from sitting flat.
Success checkpoint: The rubbing point clears while the hinge leaves remain flush and the door still latches.
Common mistake: Stacking thick shims, which places bending stress on the hinge screws.
Step 3: Adjust the Strike Plate or Threshold
A latch that misses the strike plate does not necessarily indicate a swollen or warped door. Loosen the strike screws, move the plate slightly toward the latch path, and retighten if the mismatch is small. For larger movement, mark and carefully enlarge the strike opening, then secure the plate in solid jamb material.
If the bottom rubs on a threshold, inspect whether the threshold is adjustable. Many exterior thresholds use screws that raise or lower the sill, but lowering it too far can create air, water, and insect leakage.
Success checkpoint: The latch enters the strike without handle pressure, and the weather seal remains compressed without excessive force.
Common mistake: Cutting the door edge when only the strike plate was misaligned.
Step 4: Remove a Small Amount of Door Material
Plane or sand the marked contact zone only after hinge, frame, strike, and threshold checks. Remove approximately 1/32 inch at a time, reinstall the door, and test it before removing more. A hand plane gives better control than a power planer for most homeowners.
Sand or plane with attention to grain direction. On a latch edge, a slight bevel can reduce future edge impact, but the bevel must not weaken the lock bore, edge band, or fire-rated construction.
Success checkpoint: The door closes with a consistent visible gap and latches without pushing.
Common mistake: Removing material from the wrong side because the transfer mark was not checked after opening the door.
Step 5: Seal the Exposed Edge
Prime and paint or varnish any raw wood immediately after sanding or planing. A sealed edge reduces rapid moisture uptake, especially on bathroom, laundry-room, basement, and exterior doors.
Use a compatible primer and allow the coating to dry according to its label before closing the door tightly. A soft or recently painted edge can stick to the stop even when the geometry is correct.
Success checkpoint: The finish is continuous, dry, and free from exposed end grain.
Common mistake: Leaving the raw edge unfinished because the door currently swings correctly.
Which Repair Method Is Best for Your Situation?
Hinge adjustment is the best first choice for sagging, while sanding or planing is better for a confirmed permanent interference zone. Wax can reduce friction temporarily, but it cannot correct a misaligned frame, restore a lost gap, or repair a latch problem.
| Method | Typical cost | Typical time | Best application | Main limitation |
|---|---|---|---|---|
| Tighten existing screws | $0-$5 | 10-15 minutes | Loose hinge plates | Fails if jamb wood is stripped |
| Install 3-inch screw | $1-$5 | 10-20 minutes | Top-hinge sag | Needs framing behind jamb |
| Add thin hinge shim | $0-$5 | 15-25 minutes | Minor alignment error | Can distort reveal if oversized |
| Adjust strike plate | $0-$10 | 15-30 minutes | Latch misses opening | Does not fix slab rubbing |
| Paraffin or candle wax | $2-$8 | 2-5 minutes | Temporary light friction | Does not remove the cause |
| Sand or plane edge | $5-$20 | 30-60 minutes | Confirmed wood interference | Permanent and needs refinishing |
Use dry paraffin or a plain white candle on a lightly rubbing wood stop when you need temporary relief. Avoid coating a dirty hinge or door edge with oily spray because dust and fibers can accumulate; use a manufacturer-approved dry lubricant for hinge pins when lubrication is actually needed.
Why is planing usually not the first repair?
Planing is usually not the first repair because a door edge may be rubbing as a result of hinge sag, and removing wood would conceal the alignment defect while permanently widening one gap. Edge removal is appropriate when the frame is stable, the contact area is confirmed, and hardware adjustment cannot restore adequate clearance.
Planing is also unsuitable for many hollow-core doors, metal doors, and fiberglass doors. Hollow-core slabs have thin skins and a limited solid perimeter, while exterior metal and fiberglass units may require manufacturer-specific adjustments.
What Changes by Door Material?
Door material determines whether sanding, planing, sealing, or hardware adjustment is safe. Solid wood allows controlled edge removal, whereas hollow-core, MDF, steel, and fiberglass doors require more conservative repairs.
| Door material | Safe first repair | Edge-removal limit | Required follow-up | Avoid |
|---|---|---|---|---|
| Solid wood | Tighten hinges | About 1/32 inch per test cycle | Prime and paint or varnish | Removing 1/8 inch at once |
| Hollow-core | Hinge and strike adjustment | Only within solid edge band | Seal exposed edge | Cutting through the skin |
| MDF | Hardware adjustment | Minimal, often under 1/32 inch | Seal every exposed fiber | Leaving raw MDF uncoated |
| Fiberglass | Hinge, strike, and threshold adjustment | Manufacturer-specific | Refinish only as approved | Aggressive planing |
| Steel | Hinge and frame adjustment | Usually no field planing | Treat exposed metal if damaged | Filing structural edges |
| Composite exterior | Threshold and hinge adjustment | Manufacturer-specific | Preserve weather seal | Altering rated components |
MDF absorbs moisture rapidly at exposed fibers, so an unsealed cut can swell and undo the repair. Fire-rated and security doors should not be modified casually because edge dimensions, seals, and hardware can affect their tested performance.
Why Does My Door Stick in Summer?
A wood door commonly sticks in summer because higher relative humidity increases moisture content and causes the slab to expand across the grain. Seasonal swelling often appears at the top edge, latch edge, or bottom edge and improves during dry winter conditions.
Indoor relative humidity commonly rises in basements, bathrooms, kitchens, and homes without adequate air conditioning. A hygrometer costing approximately $10-$25 can reveal the pattern. Aim for a stable indoor range near 30-50% when practical, while recognizing that local climate, comfort, and building materials affect the appropriate target.
Do not remove large amounts of wood from a door that sticks only during one unusually wet week. First improve ventilation, operate exhaust fans, repair leaks, and observe whether the door returns to normal after humidity falls.
Why does a bathroom or basement door stick?
Bathroom and basement doors stick more often because repeated steam, damp masonry, condensation, and limited air circulation expose the slab and jamb to higher moisture. Water marks, swollen bottom edges, and peeling finish support a moisture diagnosis.
Repair the moisture source before sanding. Otherwise, the door can swell again, and the newly cut edge may absorb water faster than the previously sealed surface.
When Is a Sticking Door a Structural Warning?
A sticking door becomes a structural warning when the problem affects several openings, recurs after proper hardware repairs, or accompanies visible framing and foundation symptoms. One isolated interior door that binds during humid weather is usually a maintenance issue rather than proof of settlement.
| Warning pattern | Likely concern | Recommended response | Typical urgency |
|---|---|---|---|
| One door, summer-only rubbing | Seasonal swelling | Control humidity and seal edge | Routine |
| One door, loose top hinge | Hardware or jamb failure | Replace or reinforce screws | Same week |
| Three doors in one hallway | Framing movement | Document gaps and call contractor | Soon |
| Diagonal drywall cracks | Settlement or header movement | Structural inspection | Prompt |
| Exterior door will not deadbolt | Security and alignment issue | Repair before relying on lock | Immediate |
| Frame visibly separates from wall | Severe attachment failure | Stop forcing the door | Prompt professional visit |
A foundation contractor is more appropriate than a door trimmer when multiple openings move together, cracks enlarge, or the floor and frame visibly change. A finish carpenter or handyman is appropriate for isolated hinge, strike, threshold, and edge repairs.
How Much Does Door Repair Cost in the USA?
Typical USA DIY repair materials cost $5-$20, while a handyman commonly charges approximately $75-$150 per hour, often with a $100-$150 minimum visit fee. A basic hinge adjustment usually fits within one service hour, while structural or finish repairs cost more.
| Repair scenario | DIY materials | Typical professional labor | Typical duration |
|---|---|---|---|
| Tighten hinges | $0-$5 | $75-$150 | 10-20 minutes |
| Replace hinge screws | $3-$15 | $100-$200 | 20-40 minutes |
| Adjust strike or threshold | $0-$15 | $100-$225 | 30-60 minutes |
| Plane and refinish wood edge | $5-$25 | $150-$350 | 1-2 hours |
| Replace damaged hinge | $8-$35 | $125-$250 | 30-75 minutes |
| Investigate multiple sticking doors | $0-$50 | $200-$600 | 1-3 hours |
Prices vary by metro area, travel fee, door type, finish matching, and whether the opening is exterior or fire-rated. Emergency locksmith work can exceed these ranges when a locked entry door cannot open.
Common Mistakes and How to Fix Them
The most expensive mistakes come from removing wood before proving the cause, forcing the slab, or leaving repaired surfaces unsealed. Recovery is usually possible, but each error adds time and can affect security or appearance.
- Planing the latch edge first: Recheck hinge sag and strike alignment before cutting. If too much was removed, a carpenter may need to add an edge strip and refinish it.
- Using an impact driver: Switch to a hand screwdriver for final tightening. Replace stripped screws and fill badly damaged holes with glued wood plugs before refastening.
- Forcing or slamming the door: Stop applying force because the latch, lock case, hinges, and jamb can all deform. Open the door by lifting slightly only as a diagnostic test.
- Using oily lubricant on rubbing wood: Wipe the surface clean and use paraffin only as temporary friction reduction. Correct the geometry afterward.
- Stacking thick hinge shims: Remove excess layers and use one thin shim at a time. Confirm that the hinge leaf remains supported across its full surface.
- Ignoring the bottom edge: Check flooring, carpet, threshold screws, and door sweep before sanding. A new floor installation can reduce clearance without any frame movement.
An experienced installer checks the latch after every adjustment. A door that swings freely but cannot secure its latch is not fully repaired.
Situational Recommendations
What should a renter do?
A renter should use reversible adjustments, report recurring movement, and avoid planing or sanding without written permission. Tighten accessible hinge screws, test the strike, and use a small amount of paraffin for temporary relief, but notify the landlord if the frame cracks or the door affects security.
What should a beginner homeowner do?
A beginner should start with a manual screwdriver, a pencil, paper, and one compatible 3-inch hinge screw. The safest sequence is hinge tightening, a single structural screw, strike inspection, and only then a small edge adjustment if the door is solid wood.
What should an advanced DIYer do?
An advanced DIYer should measure the opening diagonally, record indoor humidity with a hygrometer, inspect hinge play, and remove no more than approximately 1/32 inch per test cycle. A hand plane gives more control than a power planer, especially near a lock bore or finished edge.
FAQ
Can loose screws alone make a door stick?
Yes. Loose hinge screws allow the slab to sag under its own weight, often causing the top latch-side corner to rub. Tightening every hinge screw can correct a minor problem, but stripped jamb wood may require a longer screw, a wood plug, or hinge relocation.
Why does my door stick after new carpet is installed?
New carpet can reduce the bottom clearance even when the hinges and frame remain aligned. Check for a continuous scrape line along the threshold, then adjust the door or threshold if possible. Do not trim the door until you confirm that the carpet installation is complete and firmly positioned.
Can I fix a sticking hollow-core door by sanding it?
A hollow-core door can sometimes tolerate very light sanding within its solid perimeter, but aggressive removal can expose the hollow interior or damage the thin face skin. Adjust hinges, the strike plate, and the threshold first, then confirm the solid edge band before removing material.
Why does my door close but not lock?
A door that closes but will not lock commonly has a misaligned strike plate, sagging slab, shifted frame, or deadbolt that meets the strike opening at an angle. Test the lock with the door open. If the lock works open but fails closed, correct alignment rather than replacing the lock first.
Should I replace a door that keeps sticking?
Replace a door when the slab is badly warped, the edge is repeatedly cut and no longer seals, or the material has rot, delamination, or structural damage. A stable solid wood door with loose hinges or a shifted strike usually needs adjustment, not replacement.
Can weather stripping cause a door to stick?
Yes. Oversized, displaced, or recently installed weather stripping can create excessive compression and prevent an exterior door from latching. Inspect the seal for continuous pressure marks, confirm the jamb remains square, and replace the seal with a compatible thickness rather than trimming the door immediately.
The Bottom Line
The answer to “why is my door sticking” is usually a loss of clearance caused by hinge sag, seasonal wood swelling, frame movement, paint buildup, or latch misalignment. Locate the friction point first, tighten and realign the hardware, adjust the strike or threshold, and remove only a small amount of material when the evidence supports it. Seal any exposed wood and seek professional help when several openings move or the door affects security.