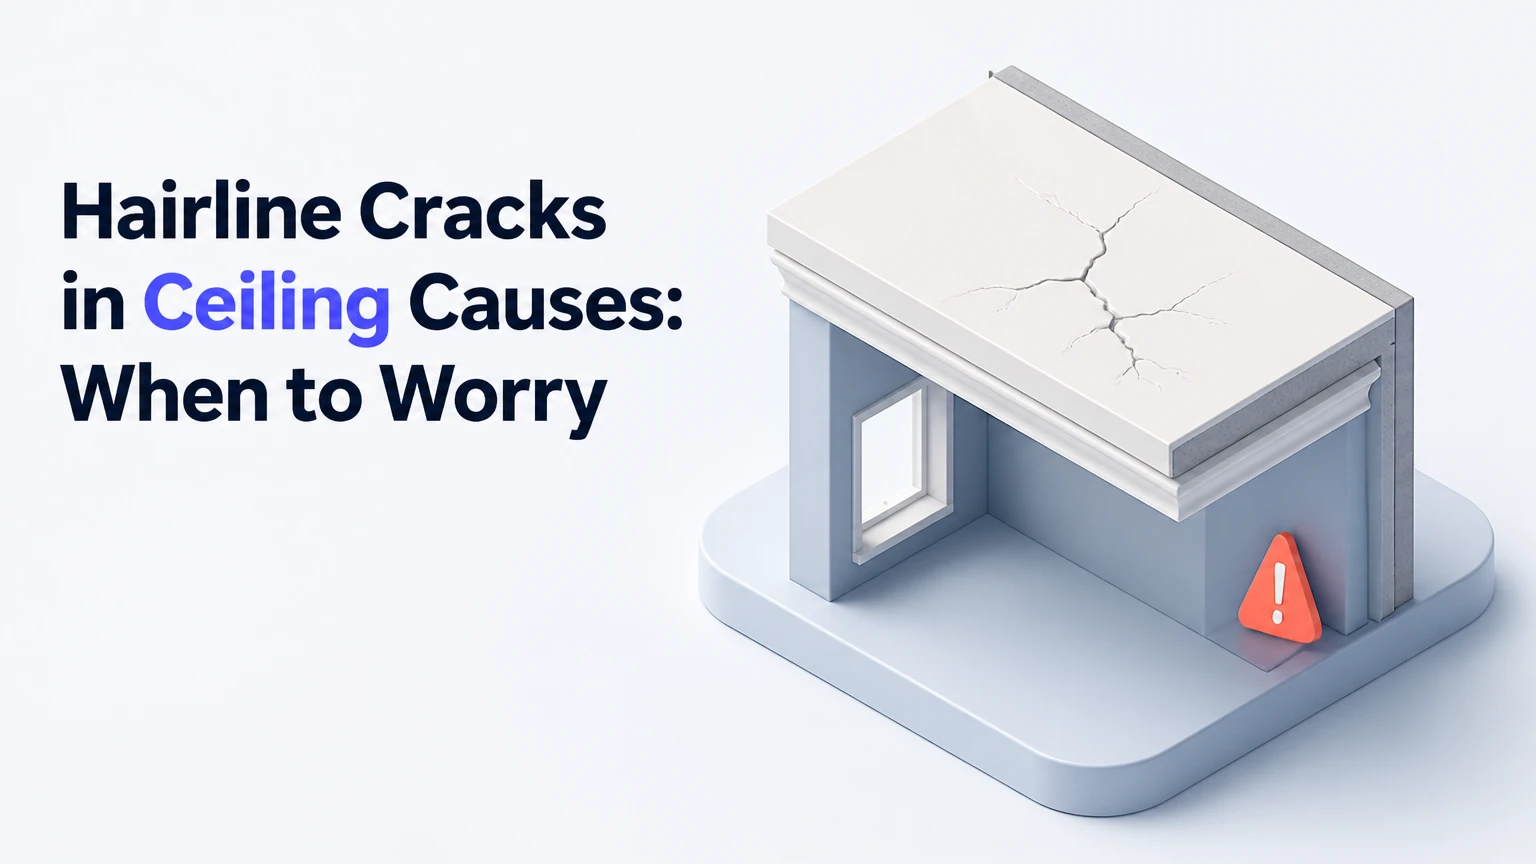
Hairline Cracks in Ceiling Causes: When to Worry
Hairline cracks in ceilings are narrow fractures in drywall, plaster, paint, or joint compound, commonly less than 1.5 millimeters wide. Most result from drying, seasonal movement, poor joint finishing, or normal building settlement, but stains, sagging, rapid growth, wide gaps, and related wall or floor movement require prompt professional assessment.
Key Facts at a Glance
A hairline crack is commonly under 1.5 mm wide, but width alone does not prove that a ceiling is safe.
A straight crack often follows a drywall seam, while a crack at the wall-ceiling junction may indicate truss uplift.
Yellow, brown, soft, or sagging material points toward water damage rather than a purely cosmetic defect.
A crack that grows, branches, crosses several surfaces, or accompanies sticking doors deserves documented inspection.
Cosmetic patching will fail if the roof leak, plumbing leak, framing movement, or loose drywall remains active.
Typical USA repair costs range from $20-$50 for materials to $250-$600 for a small professional repair.
What Causes Hairline Cracks in a Ceiling?
Hairline ceiling cracks form when movement or stress exceeds the ability of a brittle surface finish to flex. The underlying cause may be harmless material shrinkage, a failed drywall joint, wood framing movement, moisture damage, or broader structural movement.
Drywall consists of a gypsum core covered with paper. Plaster uses a hardened coating that may be attached to lath, masonry, or framing. Paint and joint compound are thinner, weaker layers that can crack before the ceiling substrate does.
A typical sequence is straightforward:
- Wood framing, gypsum, plaster, or compound changes size.
- The ceiling assembly transfers that movement to a rigid surface.
- Tensile stress concentrates at a seam, fastener, corner, opening, or weak patch.
- Paint or compound separates, exposing a visible fissure.
The same visible line can therefore have very different implications. A stable seam crack in a newer drywall ceiling is not equivalent to a wet, sagging crack below a bathroom.
Main Causes and Their Typical Risk
| Cause | Typical location | Observable clue | Usual risk |
|---|---|---|---|
| Drywall joint failure | Straight line between panels | Tape blister, ridge, or repeated seam | Low structural risk, recurring cosmetic damage |
| Seasonal framing movement | Corners and wall-ceiling junctions | Appears in winter or after humid weather | Usually low, unless movement is severe |
| Truss uplift | Interior wall-ceiling intersections | Gap opens during cold or dry months | Usually nonstructural, persistent |
| Water intrusion | Below roof, bathroom, or plumbing | Yellow stain, softness, peeling paint | High if leak or sagging continues |
| Settlement or foundation movement | Ceiling plus walls or openings | Several aligned cracks and sticky doors | Variable, potentially significant |
| Surface coating shrinkage | Random or spiderweb pattern | Thin cracking within heavy paint | Typically cosmetic |
| Loose fasteners or framing | Around screws or joists | Circular dimples, popped heads, movement | Moderate ceiling-failure risk if widespread |
Are Hairline Ceiling Cracks Normal?
Small, isolated, stable cracks can be normal in houses, especially during the first years after construction or after a seasonal humidity change. A crack is more likely to be cosmetic when it remains narrow, has no stain or sag, follows a drywall seam, and does not appear with wall, floor, door, or window distortion.
The U.S. Department of Housing and Urban Development identifies shrinkage, settlement, temperature changes, and moisture as common contributors to building cracking, but visual inspection cannot establish the condition of concealed framing or foundations. A narrow mark is a screening clue, not an engineering diagnosis.
Location matters more than many homeowners expect. A ceiling seam in one room may indicate finishing failure. Matching cracks in several rooms, especially where walls meet ceilings, provide stronger evidence of building movement.
Pattern, Location, and Likely Explanation
| Crack pattern | Common material | Likely explanation | First inspection |
|---|---|---|---|
| Straight line, 1-3 m long | Drywall | Joint tape or compound failure | Check seam, tape edges, and fasteners |
| Short radial lines | Paint or compound | Shrinkage, impact, or thick coating | Check for surface buildup and impact |
| Fine network across plaster | Plaster finish | Crazing, aging, or bond loss | Test for hollow or loose plaster |
| Perimeter gap | Drywall and framing | Truss uplift or seasonal movement | Check attic trusses and timing |
| Crack below roof feature | Drywall or plaster | Roof flashing or penetration leak | Inspect attic after rainfall |
| Crack below bathroom | Ceiling finish | Supply, drain, or tub leak | Check plumbing access and stains |
| Diagonal crack into wall | Drywall or plaster | Framing or foundation movement | Compare nearby doors, windows, and walls |
Why Do Cracks Appear Where the Wall Meets the Ceiling?
Cracks at the wall-ceiling junction often result from truss uplift, a seasonal movement pattern in roof trusses. Roof truss bottom chords move as attic temperature and moisture conditions change, while interior partitions remain comparatively stable, causing drywall tape or compound at the corner to separate.
Truss uplift is most visible in cold, dry seasons when roof framing and ceiling components move differently. The crack may close during warmer, more humid months and reopen the following winter. This pattern does not automatically mean the foundation is failing.
Do not screw the ceiling drywall tightly to the interior partition as a first response. That repair can transfer movement into the drywall and produce a larger crack nearby. A drywall specialist may use a floating corner detail, flexible caulk, or a framing-specific repair after confirming the movement source.
Truss Uplift Versus Foundation Movement
| Feature | Truss uplift | Possible foundation or framing movement |
|---|---|---|
| Main location | Interior wall-ceiling corners | Ceiling, walls, door and window openings |
| Timing | Seasonal, often winter | Progressive or unrelated to one season |
| Crack direction | Horizontal perimeter line | Diagonal, stepped, or intersecting lines |
| Door behavior | Usually unchanged | Doors may stick or fail to latch |
| Floor behavior | Usually unchanged | Sloping or uneven floors may appear |
| Typical response | Floating drywall detail | Engineer or qualified structural assessment |
How Can You Tell Whether a Ceiling Crack Comes From Water?
A ceiling crack is more likely to involve water when the surrounding material has a yellow, brown, gray, or rust-colored stain, feels soft, smells musty, peels, bubbles, or changes after rain or plumbing use. Water damage can weaken gypsum, plaster, paper facing, timber, and fasteners even when the visible crack is hairline.
Possible sources include roof flashing, pipe penetrations, failed shingles, attic condensation, an overflowing HVAC drain pan, bathroom supply lines, shower pans, toilets, and upstairs appliance connections. The room’s location provides useful evidence, but water can travel along framing and appear several feet from the entry point.
Turn off electricity to a wet ceiling fixture or nearby circuit only if you can do so safely from a dry location. Do not puncture a bulging ceiling to drain it unless a qualified professional has confirmed the procedure and electrical hazards are controlled.
Water-Damage Clues and Actions
| Clue | Likely source | Immediate action | Repair priority |
|---|---|---|---|
| Stain below attic after rain | Roof or flashing | Inspect attic and roofing | Same day if expanding |
| Stain below bathroom | Supply or drain plumbing | Stop fixture use and check access | Same day |
| Soft gypsum around crack | Active or old leak | Keep people below clear | Prompt professional repair |
| Bubbling paint | Trapped moisture | Identify source before scraping | Prompt |
| Musty odor with dark spotting | Persistent dampness | Limit disturbance and improve safety | Prompt moisture and mold assessment |
| Dry ring with no new change | Historic leak | Verify source is inactive | Repair after drying |
When Do Hairline Cracks Signal Structural Problems?
Hairline cracks warrant structural assessment when they grow measurably, widen beyond approximately 3 mm, cross from the ceiling onto walls, occur in several rooms, or accompany sagging, sloped floors, sticking doors, displaced trim, or masonry cracking. These signs do not prove structural failure, but they raise the probability of movement beyond a finish defect.
A crack’s rate of change is often more useful than its starting width. Mark each end with pencil, record the date, photograph the full ceiling and a close-up, and recheck after 30 days. Avoid placing a rigid repair over an active crack before documentation, because the patch can hide evidence and fail quickly.
The American Society of Home Inspectors treats patterns, location, progression, and associated symptoms as more meaningful than one isolated measurement. A structural engineer can distinguish a finish problem from foundation, framing, load, or connection issues without assuming that cosmetic repair is sufficient.
Warning Signs That Change the Decision
| Warning sign | What it may indicate | Recommended response | Typical urgency |
|---|---|---|---|
| Sagging plane or bulge | Wet or detached ceiling assembly | Keep clear and call a professional | Immediate |
| Crack grows over 30 days | Active movement or moisture | Document and arrange inspection | Prompt |
| Width reaches 3 mm or more | Larger movement or joint failure | Inspect cause before patching | Prompt |
| Multiple diagonal wall cracks | Framing or foundation movement | Obtain qualified evaluation | Prompt |
| Doors suddenly stick | Frame or foundation displacement | Compare several openings | Prompt |
| Water near light fixture | Leak plus electrical hazard | Isolate power safely | Immediate |
| Loose plaster over occupied area | Bond failure | Restrict access below | Immediate |
What Should You Check Before Repairing a Ceiling Crack?
Inspect the crack before filling it. Confirm the ceiling material, measure the widest point, identify nearby rooms or roof areas, check for moisture, and determine whether the surface moves or sounds hollow.
Use a ruler or caliper rather than relying on a credit card. A standard credit card is approximately 0.76 mm thick, so it can provide a rough comparison, but it cannot measure depth, movement, or the width hidden beneath paint.
A Safe Inspection Sequence
- Photograph the entire room and close-up. Include a ruler for scale.
- Measure the crack. Record the widest visible opening in millimeters.
- Mark both ends. Add the date and a small pencil tick, not a deep scratch.
- Check the surrounding finish. Look for stains, bubbling, peeling, or powder.
- Assess movement without force. Lightly touch nearby drywall; do not push a bulge upward.
- Inspect above the ceiling. Use an attic or plumbing access point if available.
- Check related symptoms. Test doors, windows, floors, and nearby wall surfaces.
- Monitor for 30-60 days. Recheck sooner after rain, freezing weather, or plumbing use.
A ceiling that moves independently, feels spongy, or produces cracking sounds should not receive a cosmetic patch. Those observations indicate possible fastener failure, water-weakened gypsum, loose plaster, or framing movement.
How Do You Repair a Stable Drywall Crack?
A stable, dry drywall crack can usually be repaired in one to three days, including drying time. The durable method is to remove loose material, reinforce the joint when necessary, apply compatible compound in thin coats, prime the repair, and repaint a sufficiently large area to blend the sheen.
Before You Start
| Item | Typical specification | Quantity or range |
|---|---|---|
| Labor time | Active work plus drying | 2-4 hours active, 1-3 days elapsed |
| Materials | Setting compound, tape, primer, ceiling paint | $20-$50 total |
| Tools | Utility knife, 6-inch knife, sanding sponge | 1 each |
| Protection | Drop cloth, eye protection, dust mask | 1 set |
| Surface condition | Dry, firm, stable drywall | Required before repair |
Step 1: Remove Loose Finish
Cut away peeling paint, loose compound, and damaged tape with a sharp utility knife. Widen only enough to reach sound material; aggressive cutting can damage the paper face and create a larger repair.
You will know the surface is ready when the edges feel firm and no flakes lift under light scraping. A damp, stained, soft, or sagging area is not ready for patching.
Step 2: Reinforce the Crack
Apply self-adhesive fiberglass mesh over a failed drywall seam, or embed paper tape in joint compound when a flatter, stronger seam is needed. A random surface crack may need no tape if it is shallow and stable, but recurring movement requires reinforcement and cause correction.
Step 3: Apply Thin Compound Coats
Use setting-type joint compound according to the manufacturer’s water ratio and working time. Apply two or three thin coats, extending each coat 2-4 inches beyond the previous edge, and allow the stated curing interval between coats.
A thick single coat shrinks more and leaves a visible hump. The patch is ready for sanding when it is uniformly hard, dry in color, and no longer cool or soft at the center.
Step 4: Sand, Prime, and Paint
Sand with a fine sanding sponge, commonly 180-220 grit, without cutting into the drywall paper. Remove dust, apply one coat of drywall primer, and repaint with matching ceiling paint using the same roller nap and texture technique.
Primer matters because porous joint compound absorbs paint differently from sealed ceiling paint. A spot can remain visibly dull even when the repair is perfectly flat.
Plaster Ceilings Need a Different Repair
Old lath-and-plaster ceilings require a bond assessment before filling. Hairline surface cracks can receive compatible plaster repair material, but hollow, bulging, or detached plaster needs mechanical stabilization or partial removal by a professional.
Do not embed modern mesh across every plaster crack without checking movement. Rigidly bridging a moving plaster substrate can transfer stress to adjacent areas and produce a wider failure.
Which Repair Material Should You Use?
Setting-type joint compound is usually the strongest practical choice for a repaired drywall seam, while flexible acrylic latex caulk suits a narrow perimeter gap that moves seasonally. Lightweight spackle is convenient for shallow, stable surface marks but is a poor choice for a recurring joint crack.
| Material | Best use | Typical working or cure time | Main limitation |
|---|---|---|---|
| Lightweight spackle | Stable pinhole or shallow mark | 30 minutes to 24 hours | Poor movement tolerance |
| Setting compound | Drywall seam and deeper repair | 20-90 minutes per mix | Limited working time |
| Premixed joint compound | Broad skim and feathering | 12-24 hours per coat | Shrinks if applied thickly |
| Paper drywall tape | Strong flat seam reinforcement | Compound-dependent | Requires embedding skill |
| Fiberglass mesh tape | Small drywall seam repair | Compound-dependent | Less crack-resistant alone |
| Acrylic latex caulk | Flexible wall-ceiling junction | 2-24 hours | Not for wet or structural damage |
How Much Does Ceiling Crack Repair Cost in the USA?
Typical USA costs range from $20-$50 for a small DIY repair, $250-$600 for one to three localized professional drywall repairs, and $800-$2,000 or more when a ceiling section must be rehung or a truss-uplift detail must be corrected.
Prices vary by region, ceiling height, texture, access, minimum service charge, paint matching, and whether the underlying leak or framing issue has already been corrected. A low patch price is not economical if a plumber, roofer, engineer, or mold specialist still needs to resolve the cause.
| Repair situation | Typical USA price | Typical duration | Cost driver |
|---|---|---|---|
| DIY hairline patch | $20-$50 | 1-3 days elapsed | Compound, tape, primer, paint |
| One small professional patch | $250-$450 | 2-5 hours | Minimum trip charge |
| Several localized cracks | $400-$900 | 1 day | Number of patches and blending |
| Textured ceiling repair | $350-$1,000 | 1-2 days | Texture matching and repainting |
| Partial drywall replacement | $800-$2,000+ | 1-2 days | New panel, access, finishing |
| Leak-related ceiling repair | $500-$3,000+ | 1-5 days | Drying, source repair, replacement |
| Structural investigation | $400-$1,500 typical | 1-3 weeks for report | Engineer location and scope |
These figures are planning ranges, not guaranteed quotes. Roof repairs, plumbing repairs, mold remediation, and structural stabilization are separate costs.
What Mistakes Make Ceiling Cracks Return?
Recurring cracks usually return because the repair treats the visible line rather than the movement, moisture, or bond failure behind it. The most common errors are filling a wet substrate, using rigid spackle at a moving corner, applying compound too thickly, and skipping primer.
- Painting over the crack: Paint hides color briefly but cannot bridge movement.
- Patching a water stain first: Moisture continues weakening the substrate and can cause mold.
- Using only vinyl spackle on a failed seam: The filler lacks reinforcement and often splits.
- Taping over loose drywall: Tape bonds to an unstable surface and transfers the failure.
- Over-sanding: Exposed paper absorbs primer unevenly and creates a fuzzy repair.
- Nailing or screwing a truss corner rigidly: The fastener can move the crack into another location.
- Matching paint with a different sheen: Flat, eggshell, and textured surfaces reveal spot repairs under side lighting.
A useful practitioner rule is to repair only after the crack passes three tests: dry, firm, and stable. If one test fails, cosmetic work is premature.
When Should You Hire a Professional?
Hire a roofer or plumber when water is involved, a drywall or plaster specialist when the substrate is damaged, and a structural engineer when progressive movement affects several building elements. A general contractor can coordinate repairs, but an engineer is the appropriate independent evaluator for suspected structural movement.
Call an engineer before patching when cracks are rapidly expanding, exceed about 3 mm, cross onto walls, accompany sloping floors or sticking doors, or occur in multiple rooms. Call an emergency professional when the ceiling bulges, sags, sheds material, or has water near a light fixture.
Homeowners should also check their insurance policy before opening a large area. Sudden covered water damage may require photographs, source documentation, and insurer approval, while gradual seepage, deferred maintenance, and normal settlement may be excluded.
Situations That Need a Different Diagnosis
New Construction
New homes commonly experience drying and settlement as lumber, engineered wood, drywall, and joint compound reach service moisture conditions. A builder warranty inspection can document recurring cracks, especially when they appear during the first heating season.
Textured or Popcorn Ceilings
Texture can conceal seam failure and make color matching difficult. Do not scrape an older popcorn ceiling before testing for asbestos, particularly in homes built or remodeled before the 1980s; the U.S. Environmental Protection Agency recommends professional sampling when suspect materials may be disturbed.
Older Lath-and-Plaster Homes
Cracks in plaster may reflect surface crazing, failed keys, loose lath, wood shrinkage, or vibration. Pressing hard on the surface can dislodge material, so a hollow sound, bulge, or falling dust calls for a plaster professional.
Rental Properties
Landlords should photograph the condition, record tenant reports, and investigate moisture promptly. Flexible acrylic caulk may suit a stable perimeter crack, but it is not a substitute for repairing a leak, detached drywall, or structural movement.
FAQ
Can I ignore a hairline crack in my ceiling?
You can usually monitor an isolated, dry, stable hairline crack with no sagging or related wall damage. Photograph it, measure the widest point, mark its ends, and review it after 30 days. Do not ignore growth, stains, softness, repeated reopening, or changes in doors, floors, and nearby walls.
Do ceiling cracks always mean foundation problems?
Ceiling cracks do not always indicate foundation problems. Drywall tape failure, paint shrinkage, humidity changes, and truss uplift are more common explanations for isolated cracks. Foundation movement becomes more concerning when ceiling damage appears with diagonal wall cracks, sticking doors, uneven floors, or progressive changes across several rooms.
Is a crack in a ceiling worse than a crack in a wall?
A ceiling crack is not automatically more serious than a wall crack, but ceiling damage can create a falling-material hazard if water or detachment weakens the assembly. A narrow, stable seam crack may be cosmetic, while a bulging or wet ceiling requires faster action than a dry wall surface crack.
Should I use caulk or joint compound on a ceiling crack?
Use joint compound for a stable drywall surface or panel-joint repair, usually with tape when the seam has failed. Use paintable acrylic latex caulk for a narrow, intentional movement gap at a wall-ceiling junction. Neither material belongs over wet, soft, sagging, or structurally moving substrate.
How long should I monitor a new ceiling crack?
Monitor a new crack for at least 30 days when it is dry, narrow, firm, and isolated; extend observation through a seasonal change when truss uplift or humidity movement is suspected. Record measurements and photographs. Arrange professional inspection sooner if the crack grows, stains, sags, or reaches a wall.
Does repainting prevent ceiling cracks?
Repainting does not prevent ceiling cracks because paint adds a surface coating without correcting movement, moisture, failed tape, or loose plaster. Repainting can improve appearance after the substrate is stable and repaired, but a primer and compatible filler are needed to prevent flashing and premature reappearance.
Conclusion: What Hairline Cracks in Ceiling Causes Usually Mean
The most common hairline cracks in ceiling causes are drywall joint failure, paint or compound shrinkage, seasonal framing movement, truss uplift, moisture intrusion, and ordinary settlement. Start with location, pattern, stains, firmness, and documented growth rather than width alone. Repair a dry, stable cosmetic crack only after ruling out water and movement; obtain qualified help for sagging, rapid growth, multiple related cracks, or structural symptoms.