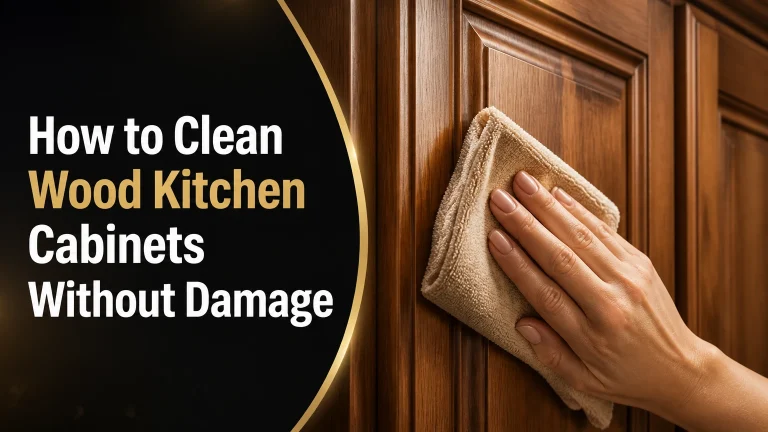
How to Remove Grease from Kitchen Cabinets Safely
To remove grease from kitchen cabinets, dust the surface, apply diluted dish soap to a microfiber cloth, loosen the film briefly, wipe with clean water, and dry immediately. The safest method takes about 20-30 minutes for a small cabinet area and depends more on the finish and moisture control than on strong chemicals.
Key Facts at a Glance
- Warm water and a small amount of dish soap are the safest first-line cleaner for most sealed cabinet finishes.
- Cabinet cleaner belongs on the cloth, not directly on doors, because liquid can enter seams, hinges, and unfinished edges.
- A three-pass process removes cleaner residue: solution wipe, water wipe, then dry microfiber buff.
- Wood veneer and painted MDF require less moisture and shorter dwell times than sealed laminate.
- White vinegar is acidic, not a universal degreaser, and repeated use can dull some wood finishes.
- Steel wool, chlorine bleach, ammonia mixtures, and abrasive powders can permanently damage cabinet coatings.
What Makes Kitchen Cabinet Grease Difficult to Remove?
Kitchen cabinet grease is a thin film of cooking oil mixed with airborne dust, smoke particles, food residue, and cleaner residue. Heat near a range keeps the film soft at first, while repeated cooking cycles make the deposit thicker and more adhesive.
Grease is not best described as an “alkaline-based stain.” Cooking oils are largely nonpolar fats and triglycerides, while alkaline cleaners can help break or emulsify some fats. Dish soap works primarily because surfactants surround oil droplets so water can carry them away. Heat lowers viscosity, but very hot water is unnecessary and can soften some coatings.
The most difficult deposits usually occur on the cabinet above the range, the underside of the hood-adjacent cabinet, door rails, drawer pulls, and the narrow strip beside the oven. Textured paint and routed wood profiles trap more residue than flat slab doors.
What determines whether grease will come off?
The cabinet finish, grease age, surface temperature, and cleaning pressure determine the result. Fresh oil on a sealed laminate door may disappear with one soapy wipe, while polymerized residue on a painted rail may need several short applications.
A practical rule is to increase dwell time before increasing abrasion. Scrubbing harder can remove the finish before it removes the deposit. If the surface remains tacky after two gentle cleaning cycles, the residue may include degraded coating, furniture wax, or adhesive contamination rather than ordinary cooking grease.
Before You Start
Prepare the work area before adding water. Remove items from the cabinet, protect the countertop, open ventilation, and test every unfamiliar cleaner on an inconspicuous spot for 10 minutes before treating the visible face.
| Item | Typical quantity | Specification | Purpose |
|---|---|---|---|
| Microfiber cloths | 4-6 | 12-by-12-inch, lint-free | Cleaning, rinsing, drying |
| Warm water | 1 quart | About 100-120°F | Dilution and rinsing |
| Dish soap | 1 teaspoon | Mild, non-bleach formula | First-line degreaser |
| Soft sponge | 1 | Non-scratch, white or blue | Flat stubborn areas |
| Soft detailing brush | 1 | Nylon bristles, 1/2-inch head | Grooves and corners |
| Nitrile gloves | 1 pair | Household cleaning grade | Skin protection |
| Small bucket | 1 | 1-2 gallon capacity | Controlled solution mixing |
| Painter’s tape | 12-24 inches | Low-tack | Marking test area or protecting seams |
Typical time: 20-30 minutes for 6-10 cabinet doors with light or moderate grease; 2-4 hours for a heavily soiled kitchen including interiors and hardware.
Difficulty: Low, if the finish is intact and sealed.
Cost: About $3-$12 using existing supplies, or $10-$25 for new microfiber cloths, gloves, and a soft brush.
How to Remove Grease from Kitchen Cabinets
A safe cabinet degreasing process has six steps: identify the finish, remove dry debris, apply a controlled cleaner, allow a short dwell time, rinse, and dry. The most important factor is keeping liquid away from seams and unfinished edges.
Step 1: Identify and Test the Cabinet Finish
Check the cabinet manufacturer’s care instructions, then inspect a hidden edge or the inside of a door. Place one drop of diluted cleaner on the test area, wait 10 minutes, wipe it away, and check for color transfer, haze, swelling, tackiness, or gloss change.
Solid wood, wood veneer, painted MDF, laminate, and thermofoil do not respond identically. A cleaner that is acceptable on a factory-sealed laminate panel can soften a failing painted coating or penetrate a damaged veneer edge.
You’ll know it worked when: the test area has the same color, sheen, and texture after drying for 15 minutes.
Common mistake: testing only the center of a door while ignoring the more vulnerable bottom edge.
Step 2: Remove Dust and Loose Debris
Use a dry microfiber cloth or a vacuum with a soft brush attachment, working from the top cabinets downward. Clean the door face, top edge, underside, hinge area, and adjacent wall before wet cleaning.
Dry debris becomes abrasive when dragged across a damp surface. Dust mixed with grease can form a gritty paste that increases scratching, especially on satin paint and high-gloss laminate.
You’ll know it worked when: the cloth picks up little visible dust before the cleaner is introduced.
Common mistake: spraying first, which turns flour, ash, and dust into a sticky layer.
Step 3: Mix a Mild Degreasing Solution
Add 1 teaspoon of mild dish soap to 1 quart of warm water. Dip a microfiber cloth into the mixture, wring it until damp rather than wet, and keep a second cloth available for rinsing.
Do not flood the door. Direct spraying can force liquid behind trim, into hinge cups, under edge banding, or between a door panel and its frame. For a concentrated commercial cleaner, follow the label dilution instead of guessing, and never combine it with vinegar, bleach, ammonia, or another degreaser.
You’ll know it worked when: the cloth feels slick but does not drip when squeezed.
Common mistake: using several teaspoons of soap, which leaves a new sticky film that resembles unresolved grease.
Step 4: Loosen the Grease Without Abrading the Finish
Wipe a small section of about 12 by 12 inches, then leave the damp cleaner in contact with the residue for 2-5 minutes. For wood veneer or older painted surfaces, start with 60-90 seconds. Use a soft sponge or microfiber cloth with light pressure, and repeat rather than scrubbing aggressively.
Clean grooves with a soft nylon brush. A plastic putty knife can lift a thick edge deposit; avoid metal blades, even when wrapped, because a sharp corner can cut paint or veneer. Work around handles and hinges with a nearly dry cloth.
You’ll know it worked when: the greasy sheen transfers to the cloth and the surface no longer feels draggy under a clean fingertip.
Common mistake: allowing the solution to dry on the panel, which concentrates surfactant and creates streaks.
Step 5: Rinse With the Triple-Wipe Method
Use three separate passes. First, wipe with the soapy cloth to lift the oil. Second, wipe with a clean cloth dampened with plain water to remove soap and loosened residue. Third, buff with a dry microfiber cloth.
Rinse the water cloth frequently, ideally after every door or whenever it feels greasy. Residual dish soap can attract dust and create a dull halo around frequently touched areas.
You’ll know it worked when: the dry cloth glides without grabbing and the door shows no cloudy streaks under angled light.
Common mistake: skipping the water pass because the cabinet appears clean immediately after the detergent wipe.
Step 6: Dry Seams, Edges, and Hardware
Dry the entire panel immediately, then inspect the bottom edge, stile joints, corners, hinge plates, and handle mounting points. If moisture collected in a seam, press a folded dry microfiber cloth against it rather than forcing liquid deeper.
Leave doors open for 10-15 minutes if the room has poor ventilation. Do not reinstall wet hardware or close a damp door against its frame.
You’ll know it worked when: no cool, damp strip remains along the lower edge and the hardware feels dry.
Common mistake: cleaning a large group of doors at once and allowing the first group to remain wet while the rest are treated.
Which Cleaner Matches the Cabinet Finish?
Mild dish soap and warm water are the best starting point for sealed wood, painted, laminate, and thermofoil cabinets, but the safest concentration and dwell time vary by material. Stronger products make sense only after a patch test confirms that the finish tolerates them.
| Cabinet surface | First choice | Typical dwell time | Main restriction |
|---|---|---|---|
| Factory-sealed solid wood | 1 teaspoon dish soap per quart | 2-3 minutes | Dry immediately; avoid standing water |
| Wood veneer | Diluted dish soap on cloth | 60-90 seconds | Keep liquid away from exposed edges |
| Painted MDF | Mild dish soap, low moisture | 60-120 seconds | Avoid heat, soaking, and abrasive sponges |
| Laminate | Dish soap or labeled laminate cleaner | 3-5 minutes | Do not lift edge banding with water |
| Thermofoil | Damp microfiber and mild soap | 60-120 seconds | Heat can loosen the vinyl membrane |
| High-gloss acrylic | Manufacturer-approved cleaner | 30-60 seconds | Use only non-abrasive cloths |
| Unsealed or waxed wood | Manufacturer’s wood cleaner | 30-60 seconds | Water may darken or swell the surface |
Dish soap and warm water
Dish soap is the safest broadly applicable option because surfactants emulsify cooking oil without the solvent strength of many heavy-duty degreasers. Use a small amount, because excess detergent increases rinsing time and can leave a tacky film.
Vinegar and water
White vinegar is not automatically safer for cabinets. A 1:1 vinegar-and-water mixture can remove some mineral haze and light residue, but its acidity may dull certain wood finishes, damage natural-stone surroundings, or affect vulnerable coatings with repeated use. Patch-test it, and never mix vinegar with bleach.
Baking soda and commercial degreasers
Baking soda can help with a small stubborn spot because its fine particles add mild abrasion, but make a paste with water, not oil. A water-based paste applied for 2-5 minutes should be removed completely and followed by a rinse.
Commercial degreasers are appropriate for thick buildup only when the label identifies the cabinet surface as compatible. Avoid oven cleaner, caustic grill cleaner, and solvent-heavy products on painted, veneered, waxed, or thermofoil doors unless the manufacturer specifically approves them.
| Cleaner | Best use | Typical amount | Risk |
|---|---|---|---|
| Mild dish soap | Daily and moderate grease | 1 teaspoon per quart | Soap film if overused |
| White vinegar solution | Light residue or mineral haze | 1 part vinegar to 3 parts water | Finish dulling on some wood |
| Baking soda paste | Small sticky spot | 2 tablespoons soda plus water | Micro-scratches if rubbed hard |
| Labeled cabinet degreaser | Heavy sealed-surface buildup | Label dilution | Coating damage if incompatible |
| Murphy Oil Soap | Approved sealed wood surfaces | Label dilution | Residue or incompatibility on laminate |
| Isopropyl alcohol | Only manufacturer-approved spot use | Small amount on cloth | Can soften or dull some coatings |
How Should You Clean Edges, Hardware, and Grooves?
Cabinet edges and hardware need less liquid than flat panels because seams, screw holes, and hinge recesses can retain moisture. Remove knobs and pulls when practical, wash metal hardware separately in warm soapy water, rinse it, and dry it fully before reinstalling.
For a door profile, fold a damp microfiber cloth over a plastic card and trace the groove without forcing liquid into the joint. A soft nylon detailing brush handles corners and hinge plates. Cotton swabs work around screw heads, but replace them when they become saturated.
| Area | Tool | Solution | Maximum wet contact |
|---|---|---|---|
| Flat door panel | Microfiber cloth | Diluted dish soap | 5 minutes |
| Routed profile | Soft nylon brush | Diluted dish soap | 2 minutes |
| Hinge recess | Nearly dry cloth | Plain water after cleaning | 60 seconds |
| Metal pull | Removed hardware and cloth | Warm soapy water | 10 minutes |
| Bottom edge | Folded microfiber | Mild soap, then water | 60-90 seconds |
| Glass insert frame | Cotton swab and cloth | Manufacturer-approved cleaner | 60 seconds |
Do not soak hardware made from unlacquered brass, unfinished iron, or porous wood. Water can accelerate tarnishing or create dark marks that are more difficult to remove than the original grease.
Why Do Cabinets Remain Sticky After Cleaning?
Cabinets remain sticky when detergent, old wax, polymerized cooking oil, or degraded finish remains on the surface. Repeat the cleaning cycle with less soap, a complete water rinse, and immediate drying before escalating to a stronger product.
Use this diagnosis table before applying an aggressive degreaser:
| Symptom after drying | Likely cause | Recovery method | Stop condition |
|---|---|---|---|
| Uniform tackiness | Excess dish soap | Plain-water wipe twice, then dry | Tackiness remains after 2 cycles |
| Yellow-brown patch | Aged cooking oil | Repeat mild soap with 3-minute dwell | Color does not change |
| White haze | Cleaner residue or finish dulling | Water wipe, then dry buff | Haze persists when dry |
| Swollen edge | Water penetration | Stop wet cleaning, dry and inspect | Edge remains raised |
| Color on cloth | Paint or stain transfer | Stop and contact refinisher | Transfer repeats |
| Rough texture | Abrasion or coating failure | Stop scrubbing; assess finish | Texture catches a fingernail |
A baking soda paste can address a small isolated deposit, but it cannot restore a finish that has been chemically dulled. A paste made with oil is counterproductive for this job because the added oil can create the same greasy sensation the cleaning process is meant to remove.
Which Cleaning Mistakes Damage Cabinets?
The most damaging mistakes are excess water, prolonged dwell time, abrasive tools, untested chemicals, and heat. Cabinet finish repair costs far more than a mild cleaner, so stop when color transfers, veneer lifts, or the coating becomes soft.
- Using steel wool or melamine foam: These materials can scratch clear coats and remove paint from high spots.
- Spraying into seams: Liquid can swell MDF, loosen edge banding, or stain unfinished wood.
- Using oven cleaner: Highly alkaline formulas can etch paint, varnish, aluminum, and some laminates.
- Mixing products: Bleach and ammonia can create dangerous vapors; vinegar and bleach produce chlorine gas.
- Leaving vinegar on wood: Acidic residue can affect sheen and finish chemistry.
- Applying furniture wax automatically: Wax can trap dirt and complicate future refinishing; follow the cabinet maker’s care instructions instead.
- Scrubbing a warm door: Heat softens some coatings and increases the chance of gloss changes.
An honest limitation matters here: household cleaning can remove grease, but it cannot reliably repair yellowed varnish, burned-on polymerized oil, peeling thermofoil, swollen fiberboard, or a finish that has already lost adhesion. Those conditions require a cabinet refinisher or replacement component.
How Much Time and Money Does Cabinet Cleaning Require?
A small cabinet section usually takes 20-30 minutes and costs $3-$12 with household supplies. A full residential deep clean typically takes 2-4 hours, while a heavily neglected kitchen can take 4-6 hours when doors, drawers, hardware, and cabinet tops are included.
| Cleaning scope | Typical time | DIY supply cost | Typical USA professional price |
|---|---|---|---|
| Six greasy door fronts | 20-30 minutes | $1-$3 | $25-$60 |
| Ten to fifteen doors | 45-90 minutes | $3-$8 | $50-$120 |
| Full cabinet exterior | 2-4 hours | $5-$15 | $75-$150 |
| Exterior plus interiors | 4-6 hours | $8-$25 | $125-$250 |
| Small commercial kitchen | 4-8 hours | $20-$60 | $300-$500 |
| Large commercial kitchen | 8-20 hours | $50-$150 | $1,000-$2,500-plus |
Professional rates vary by region, soil level, cabinet count, access, and whether the cleaner removes hardware. These are typical USA planning ranges, not fixed national prices.
How Can You Prevent Grease From Returning?
Use the range hood during cooking and for at least 10 minutes afterward, wipe the cabinet near the stove daily, and use lids or splatter screens on frying pans. Source control reduces the amount of airborne oil that reaches doors and cabinet tops.
A practical maintenance schedule looks like this:
- After cooking: Wipe the area beside and above the range if visible oil landed there.
- Weekly: Clean handles, drawer fronts, the hood-adjacent cabinet, and the underside of upper doors.
- Monthly: Inspect door rails, cabinet tops, hinge recesses, and the wall behind the range.
- Every six months: Review the manufacturer’s instructions before applying any wax or wood conditioner.
- After refinishing: Use only the product and cure time specified by the refinisher.
The range hood must actually capture and exhaust air for this strategy to work well. A recirculating hood with a saturated filter may move odor while returning fine grease particles to the room, so clean or replace filters according to the hood manufacturer’s schedule.
Frequently Asked Questions
Can I use Dawn dish soap on wooden kitchen cabinets?
You can use a small amount of mild dish soap on sealed wooden cabinets, diluted at about 1 teaspoon per quart of warm water. Apply it to a damp cloth, not directly to the wood, keep contact under 3 minutes, rinse with plain water, and dry the surface immediately. Test unfinished or waxed wood first.
Is Magic Eraser safe for greasy cabinet doors?
A Magic Eraser is melamine foam, a mild abrasive, so it is not universally safe for cabinet doors. It may dull high-gloss acrylic, remove paint from edges, or change the sheen of satin finishes. Use a microfiber cloth or non-scratch sponge first, and reserve melamine foam only for a tested, isolated mark.
How do I remove grease from cabinets above a stove?
Clean the cabinet above a stove in sections no larger than 12 by 12 inches. Use diluted dish soap, allow 2-5 minutes of contact on sealed surfaces, wipe gently, rinse with plain water, and dry the underside and front edge immediately. Turn off the stove and wait until the cabinet surface is cool.
Can grease permanently stain painted cabinets?
Grease can permanently discolor painted cabinets when it penetrates a porous, cracked, or failing coating, or when heat changes the paint film. Mild surface grease usually comes off, but repeated color transfer, bubbling, peeling, or a brown shadow after cleaning indicates finish damage rather than removable soil.
Should I remove cabinet doors before degreasing them?
Remove doors when grease has accumulated around hinges, edges, or hardware, or when you need to clean both sides safely. For ordinary exterior residue, door removal is unnecessary and adds alignment work. Label each hinge and door position if you remove them, because similar-looking doors may not return to their original locations.
The Bottom Line
The safest answer to how to remove grease from kitchen cabinets is controlled cleaning, not maximum chemical strength. Identify the finish, use 1 teaspoon of mild dish soap per quart of warm water, work in small sections, rinse with plain water, and dry every edge. Repeat gently before trying a stronger product, and stop immediately if the finish changes.