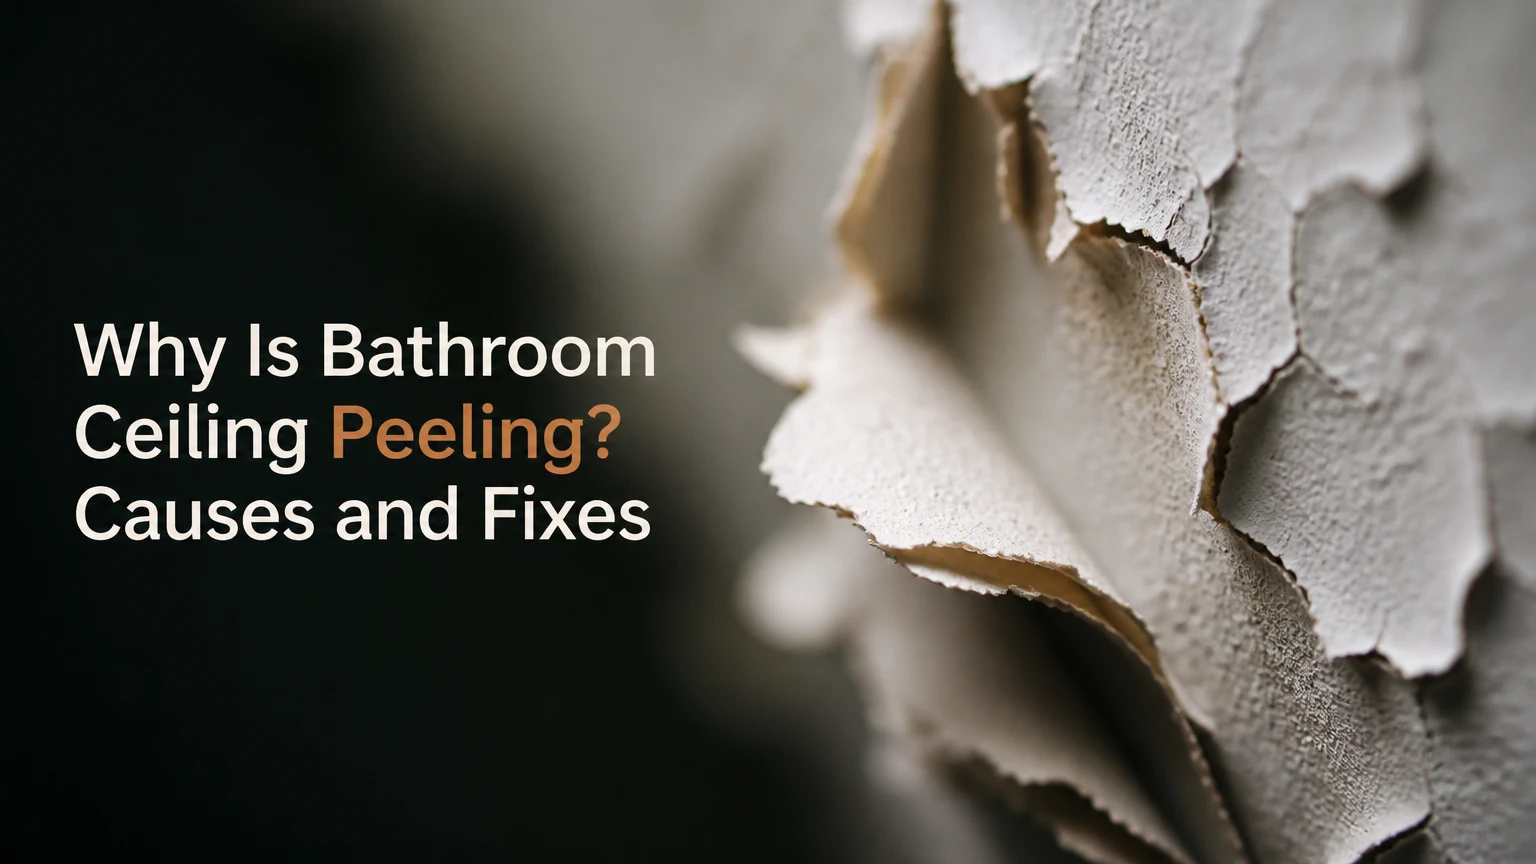
Why Is Bathroom Ceiling Peeling? Causes and Fixes
Bathroom ceiling paint peels when moisture, poor surface preparation, incompatible coatings, or a hidden leak breaks the bond between paint and drywall, plaster, or primer. Steam condensation is the most common cause, but yellow staining, sagging, or rapidly spreading damage indicates water intrusion that must be repaired before repainting.
Key Facts
Bathroom ceiling peeling usually results from repeated condensation, not one unusually long shower.
A bathroom exhaust fan should run during bathing and for 20-30 minutes afterward.
A typical small bathroom needs at least 50 CFM of intermittent exhaust capacity.
Yellow or brown stains, soft drywall, and sagging indicate possible plumbing or roof leakage.
Paint must be removed to a firmly bonded edge before patching or priming.
Typical USA DIY repair costs range from $95-$225, while professional repairs often cost $350-$900.
Why Is Bathroom Ceiling Peeling?
Bathroom ceiling peeling occurs because water reaches the coating or substrate and weakens adhesion. Steam condenses on a cooler ceiling, enters microscopic cracks, and repeatedly expands drywall paper, joint compound, plaster, and paint at different rates. Poorly prepared glossy paint, dusty joint compound, uncured patches, and active leaks create the same visible failure through different mechanisms.
The ceiling is especially vulnerable because warm, moist air rises directly toward it. When the ceiling surface falls below the room air’s dew point, invisible vapor becomes liquid water. Repeated wetting and drying creates tension between the rigid paint film and the changing substrate.
A coating can remain apparently intact for months while the bond weakens underneath. Peeling often becomes visible after a seasonal change, a failed exhaust fan, or a fresh coat of paint adds weight to an already unstable surface.
What does peeling actually mean?
Peeling means the paint film has separated from the layer beneath it. The separation may occur between paint and primer, primer and drywall paper, paint and plaster, or two incompatible paint layers.
The failure pattern provides useful evidence:
| Visible symptom | Most likely location of failure | Typical underlying cause | Immediate concern |
|---|---|---|---|
| Small flakes near shower | Paint-to-substrate bond | Condensation and porous flat paint | Recurring moisture |
| Long rubbery sheets | Paint-to-paint bond | Latex over glossy oil paint | Widespread delamination |
| Clean sheets exposing white compound | Primer-to-joint-compound bond | Dust or uncured drywall mud | Poor preparation |
| Brown ring with soft center | Drywall or plaster saturation | Plumbing or roof leak | Active water intrusion |
| Blisters with dark spotting | Paint-to-substrate bond and mold growth | Trapped moisture | Hidden damp material |
| Powdery surface under flakes | Weak chalking layer | Aging paint or damp substrate | Poor primer adhesion |
How Does Moisture Cause Ceiling Paint to Fail?
Condensation causes ceiling paint to fail through repeated wet-dry cycles. Warm bathroom air deposits water on a colder ceiling, the substrate absorbs part of that moisture, and later drying produces movement that the paint film cannot accommodate.
Paint does not usually dissolve in one exposure. Instead, moisture travels through pinholes, cracks, porous paint, and unsealed edges. Drywall paper can swell, joint compound can soften, and plaster can develop a weak surface layer. The paint remains less flexible than the wet substrate, so the bond eventually tears.
Thermal stress adds another load. A ceiling may warm during a shower and cool rapidly when the fan removes humid air. Paint, primer, joint compound, and plaster have different expansion rates. The larger the temperature and humidity swings, the more often the coating is stressed.
The U.S. Environmental Protection Agency recommends controlling indoor moisture and keeping indoor relative humidity below 60%, ideally between 30% and 50%, to reduce condensation and mold risk. A cheap digital hygrometer can verify whether the bathroom routinely exceeds that range.
How much ventilation does a bathroom need?
A typical USA bathroom requires at least 50 CFM of intermittent exhaust ventilation, with approximately 1 CFM per square foot commonly used for rooms up to 100 square feet. The fan must discharge outdoors through a properly sized duct, not into an attic, wall cavity, or ceiling void.
| Bathroom condition | Typical fan capacity | Recommended control | Likely result |
|---|---|---|---|
| 40-square-foot half bath | 50 CFM | Wall switch | Adequate odor and moisture removal |
| 60-square-foot full bath | 60-80 CFM | Timer switch | Better post-shower drying |
| 80-square-foot bathroom | 80-100 CFM | 20-30 minute timer | Lower condensation load |
| 100-square-foot bathroom | 100 CFM | Humidity-sensing control | Stronger moisture control |
| Bathroom over 100 square feet | 1 CFM per square foot | Two fans or sized system | More even air removal |
| Window-only ventilation | Variable, often below 50 CFM | Open window during and after bathing | Weather-dependent performance |
The Home Ventilating Institute commonly recommends 1 CFM per square foot for bathrooms up to 100 square feet, with a 50 CFM minimum. A powerful fan cannot compensate for a crushed flex duct, blocked exterior damper, or duct termination inside the attic.
How Can You Tell Condensation From a Leak?
Condensation usually causes widespread fine flaking, mildew spotting, or peeling concentrated above the shower. A leak more often produces a defined yellow or brown stain, a soft or swollen ceiling, active dripping, or damage that enlarges when the upstairs bathroom or roof receives water.
Use the pattern, timing, and substrate condition together. A moisture meter can help compare the damaged area with an unaffected section, although meter readings vary by drywall type and calibration.
| Diagnostic clue | Condensation pattern | Plumbing or roof leak pattern | Recommended response |
|---|---|---|---|
| Location | Broad area near shower | One localized spot or line | Inspect source before painting |
| Color | Gray, white, or mildew-darkened | Yellow, tan, or brown | Trace water path |
| Surface | Dry but flaky after ventilation | Soft, swollen, or sagging | Stop use and open inspection |
| Timing | Worse after showers | Worse after rain or fixture use | Test during suspected event |
| Odor | Musty surface odor | Persistent damp or sewage odor | Investigate hidden moisture |
| Spread | Gradual across ceiling | Expands outward from one point | Photograph and mark boundary |
A ceiling stain that returns after sealing is not a paint problem. Check the bathroom above, supply lines, drain assemblies, toilet wax ring, HVAC condensate lines, and roof penetrations before applying any coating.
Do not probe a sagging ceiling aggressively. Water-damaged drywall can fall, and recessed lights or wiring may be present above it.
Which Primer and Paint Should You Use?
Use a moisture-compatible acrylic or bonding primer for sound surfaces, a stain-blocking primer for dry water marks, and a penetrating sealer for chalky or torn drywall. Finish with two coats of labeled bathroom or kitchen-and-bath acrylic paint, selected for washability and mildew resistance.
No paint can waterproof a leaking ceiling. Paint marketed as mold-resistant also cannot eliminate moisture behind drywall. Product labels differ, so follow the manufacturer’s recoat time, substrate limits, and ventilation requirements.
| Material or system | Typical USA price | Dry or recoat time | Best application | Limitation |
|---|---|---|---|---|
| Acrylic bonding primer | $20-$45 per gallon | 1-3 hours | Clean, lightly scuffed latex or mixed surfaces | Poor choice for active stains |
| Oil-based stain-blocking primer | $25-$55 per gallon | 4-24 hours | Dry yellow or brown water stains | VOC odor and mineral-spirit cleanup |
| Clear penetrating sealer | $25-$50 per gallon | 1-3 hours | Chalky drywall, torn paper, porous compound | Adds little color coverage |
| Peel-binding sealer | $20-$45 per quart | 1-3 hours | Firm edges and damaged paint film | Cannot stabilize loose drywall |
| Acrylic bathroom paint | $35-$80 per gallon | 2-4 hours between coats | Humid residential bathrooms | Not a substitute for ventilation |
| Satin acrylic enamel | $40-$90 per gallon | 4-6 hours between coats | Washable, frequently cleaned ceilings | Shows more surface defects |
A ceiling does not need a glossy finish to resist moisture. Satin is more washable but can reveal ridges and patch marks; matte bathroom paint hides defects better, provided the product is designed for humid interiors.
What should you avoid?
Avoid painting over loose edges, using ordinary interior flat paint in a high-steam bathroom, or applying latex directly over glossy oil paint without adhesion testing and a compatible bonding primer. Avoid waterproof coatings that trap moisture inside a damp ceiling.
Expert rule: a primer is not a magic layer between incompatible products. Test a small prepared area, let it cure according to the label, and apply painter’s tape firmly. If the new coating lifts in strips, more preparation is required.
How Do You Fix Peeling Bathroom Ceiling Paint?
Repair peeling bathroom ceiling paint in seven stages: isolate the moisture source, protect the room, remove unstable coating, feather the edges, clean and dry the substrate, repair and prime it, then apply two compatible finish coats. A typical small repair takes 1-2 days because drying time controls the schedule.
Before you start
| Requirement | Typical quantity or value | Why it matters | Checkpoint |
|---|---|---|---|
| Labor time | 4-8 active hours | Covers scraping, patching, and coating | Reserve two calendar days |
| Materials budget | $95-$225 | Includes primer, paint, and consumables | Buy compatible products |
| Respirator | N95 or better | Reduces dust exposure | Use a properly fitted mask |
| Eye protection | 1 pair of sealed goggles | Prevents falling chips and cleaner contact | Wear overhead |
| Scraper | 1 rigid 1.5-3 inch tool | Removes loose film | Keep blade flat |
| Sandpaper | 120 and 220 grit | Feathers and smooths repairs | Use a sanding pole |
| Primer | 1 quart for spot repair | Seals prepared surface | Match substrate condition |
| Paint | 1 gallon for two coats | Provides uniform color | Retain label for recoat time |
If the home predates 1978, do not assume old ceiling paint is safe to disturb. EPA lead-safe practices apply to many renovation activities, and suspected asbestos-containing textured coatings or joint compound require professional testing before sanding or scraping.
Step 1: Stop the moisture source
Repair the leaking pipe, roof penetration, fan duct, or ventilation deficiency before disturbing the coating. Run the exhaust fan during bathing and for 20-30 minutes afterward, and confirm the exterior damper opens.
You will know this step worked when the ceiling stays dry after several normal showers and the hygrometer records relative humidity below 60% within a reasonable recovery period. Painting first is the common mistake.
Step 2: Remove loose paint
Cover fixtures and floors with plastic, then scrape every flake and hollow-sounding area using a rigid putty knife. Stop only at edges that resist lifting under moderate hand pressure.
You will know the surface is ready when pressing painter’s tape beside the repair does not pull away additional film. Do not force the scraper into intact drywall paper, because gouges increase patching work and can expose weak fibers.
Step 3: Feather the perimeter
Sand the transition between bare substrate and remaining paint with 120-grit abrasive. Finish with 220 grit after patching to reduce visible ridges under ceiling light.
You will know the edge is feathered when your fingertips cannot detect a sharp step across the perimeter. Dry sanding old coatings can release hazardous dust, so use containment and appropriate precautions.
Step 4: Clean and dry the ceiling
Remove dust with a vacuum fitted with a fine-particle filter, then wipe the area with a lightly damp cloth or the cleaner specified by the paint manufacturer. Do not saturate drywall or rely on household bleach to solve porous mold contamination.
Allow the substrate to dry fully, often 24 hours after washing or water damage. The surface must be clean, dry, and free of soap film, hairspray residue, mildew debris, and sanding dust.
Step 5: Patch damaged areas
Apply a moisture-tolerant setting compound or joint compound in thin layers where scraping created gouges. Let each layer dry, sand it smooth, and remove dust before the next coat.
You will know the patch is ready when it is uniformly firm and does not darken after a normal humidity cycle. Thick compound shrinks, cracks, and delays priming.
Step 6: Prime the entire prepared area
Apply the selected primer over bare substrate, patches, stained areas, and the feathered perimeter. A spot repair may need a quart, while a full ceiling generally benefits from one uniform primer coat.
You will know the primer worked when the surface has an even sheen and no powder transfers to a clean fingertip. Do not prime over active dampness, soft drywall, or friable plaster.
Step 7: Apply two finish coats
Use a quality angled brush at edges and a 3/8-inch nap roller for most smooth ceilings. Apply two thin, even coats, respecting the product’s stated recoat time and keeping the room ventilated.
You will know the repair is complete when color and sheen are consistent under both bathroom lighting and daylight. Avoid shower steam for at least 24-48 hours, or longer if the label specifies a longer cure period.
How Long and How Much Does Repair Cost?
A minor, dry, localized repair typically costs $95-$225 and requires 4-8 active labor hours spread across 1-2 days. A professional repair for a standard 5-by-8-foot bathroom ceiling commonly costs $350-$900, with replacement drywall, leak repair, mold remediation, and high ceilings increasing the price.
| Repair scope | DIY materials | Professional price | Typical duration | Appropriate when |
|---|---|---|---|---|
| Spot scrape and repaint | $95-$150 | $350-$550 | 1-2 days | Less than 10 square feet, dry substrate |
| Full ceiling preparation | $140-$225 | $500-$900 | 2-3 days | Widespread peeling and multiple patches |
| Drywall section replacement | $180-$350 | $700-$1,500 | 2-4 days | Soft, swollen, or mold-damaged drywall |
| Leak repair plus repainting | $250-$700 | $900-$2,500+ | 3-7 days | Active plumbing or roof source |
| Plaster stabilization | $150-$400 | $800-$2,000 | 2-5 days | Historic or cracked plaster ceiling |
Prices are typical USA ranges, not fixed bids. Local labor rates, access, disposal requirements, ceiling height, and the cost of correcting the water source create the largest differences.
When Should the Ceiling Be Replaced?
Replace a ceiling section when drywall is soft, swollen, delaminated, extensively mold-contaminated, or unable to hold screws and compound. Repainting is appropriate only when the substrate is structurally sound and the failure is confined to the coating or a shallow patch.
Replacement may also be more economical when peeling covers most of the ceiling. Removing a large unstable area can take longer than installing new moisture-resistant drywall, sealing its joints, and applying a complete paint system.
Greenboard or other moisture-resistant gypsum board tolerates humid air better than standard board, but it is not waterproof and does not correct inadequate exhaust. Cement board or a PVC ceiling system may be appropriate in unusually wet locations, although installation details matter more than the product name.
What Alternatives Work When Paint Keeps Failing?
PVC beadboard panels, properly installed moisture-resistant gypsum board, and professionally repaired plaster provide alternatives when repeated repainting fails. Alternatives are useful when ventilation is corrected but the existing substrate remains unstable, stained, or difficult to prepare.
| Ceiling alternative | Typical installed cost | Moisture tolerance | Appearance or finish | Main limitation |
|---|---|---|---|---|
| Repaired and repainted drywall | $350-$900 | Moderate with ventilation | Smooth painted ceiling | Requires sound substrate |
| New moisture-resistant gypsum board | $700-$1,500 | Moderate to high | Smooth painted surface | Seams require skilled finishing |
| PVC beadboard panels | $800-$2,000 | High | Plank or beadboard profile | Can look less traditional |
| Repaired historic plaster | $800-$2,000 | Moderate | Original architectural character | Labor-intensive and skill-dependent |
| Fiber-cement panel system | $1,000-$2,500 | High | Modern panel appearance | Heavier, harder to cut and finish |
Paneling conceals damaged paint but does not eliminate a leak or mold behind the ceiling. Leave access to plumbing and electrical components where future inspection is likely.
What Should You Do About Mold?
Small surface growth on a sound, washable surface can sometimes be cleaned with an EPA-registered product and dried thoroughly, but porous mold-damaged drywall, recurring growth, and areas larger than about 10 square feet warrant professional evaluation. Mold removal fails when the moisture source remains active.
The EPA’s mold guidance emphasizes moisture control, drying, and removal of mold-contaminated porous materials when they cannot be adequately cleaned. Bleach may change surface color, but it is not a reliable method for restoring saturated drywall or eliminating the cause.
Do not sand moldy drywall. Isolate the room, protect occupants with respiratory precautions, and avoid disturbing large contaminated areas until the source and remediation plan are understood.
How Does the Best Response Vary by Situation?
The best repair depends on substrate condition, ownership, age of the coating, and whether moisture is still present. A renter should document the damage and report leaks, while a homeowner should correct ventilation and substrate defects rather than conceal them.
For renters
Photograph the ceiling, record dates and shower-related changes, and notify the landlord in writing. Do not scrape suspected lead or asbestos coatings without permission and appropriate testing.
For standard homeowners
Measure bathroom humidity, inspect fan airflow at the exterior termination, identify the substrate, and repair the full failed area. A complete preparation and primer system costs more initially but reduces repeated patching.
For historic-home owners
Preserve sound plaster where possible and use a contractor familiar with lime or gypsum plaster. Covering historic plaster with PVC or drywall may solve the peeling but can hide architectural details and complicate future repairs.
For severe or recurring damage
Hire a qualified contractor when the ceiling sags, wiring may be wet, the source is hidden, mold is extensive, or the coating’s age and composition are unknown. A paint contractor cannot substitute for a plumber, roofer, electrician, or mold-remediation professional.
Common Mistakes and How to Fix Them
| Mistake | Why it fails | Recovery action | Prevention rule |
|---|---|---|---|
| Painting over flakes | Loose film remains a weak layer | Scrape back to firm edges | Test adhesion before coating |
| Using ordinary wall paint | Film may lack humid-room durability | Remove failed coating and recoat | Choose labeled bathroom paint |
| Skipping primer | Patches and stains absorb unevenly | Sand and apply compatible primer | Prime all bare substrate |
| Running the fan only during showers | Damp air remains after bathing | Add a timer or humidity control | Run 20-30 minutes afterward |
| Sealing a damp stain | Water remains trapped | Find and repair the source | Confirm dryness before priming |
| Sanding mold or old unknown paint | Dust may spread hazards | Stop and assess material safety | Test suspect coatings first |
Can You Repair a Small Peeling Area Yourself?
A homeowner can usually repair a small, dry area under 10 square feet when the ceiling is firm, the coating is known to be safe, and no leak or extensive mold is present. DIY repair is unsuitable for sagging drywall, active water intrusion, suspected asbestos, or widespread contamination.
A small patch still requires the full sequence: remove loose paint, feather edges, clean, dry, patch, prime, and apply two finish coats. Spot painting can leave a visible sheen difference, so repaint the entire ceiling when lighting makes the repair obvious.
The most reliable test is adhesion, not appearance. If surrounding paint lifts with light scraping or tape, the visible patch is smaller than the actual failure zone.
FAQ
Will a bathroom fan stop ceiling paint from peeling?
A correctly sized, outdoor-vented bathroom fan can stop condensation-related peeling by lowering humidity, but it cannot repair failed adhesion or a water leak. Use at least 50 CFM for a typical small bathroom, run the fan during bathing and for 20-30 minutes afterward, and verify performance at the exterior vent.
Is satin or flat paint better for a bathroom ceiling?
Satin paint offers greater washability and moisture resistance, while a purpose-made matte bathroom ceiling paint hides patch irregularities better. Choose the product based on the ceiling’s finish and the manufacturer’s humid-room rating, rather than assuming every satin or flat coating performs the same.
Why is only one corner of the ceiling peeling?
One-corner peeling often indicates a localized leak, cold bridging, poor compound preparation, or a weak repair rather than general bathroom humidity. Compare the area with the shower location, inspect the attic or room above, and check whether the corner becomes damp after rain or fixture use.
Can I use waterproof bathroom ceiling paint over old paint?
Waterproof bathroom paint should not be applied over loose, chalky, glossy, contaminated, or damp paint. Remove unstable layers, clean the surface, scuff compatible glossy coatings, use the required bonding or stain-blocking primer, and confirm that the substrate is dry.
How do I know whether the ceiling is plaster or drywall?
Drywall usually has a paper-faced surface, visible joint seams, and a hollow sound when tapped, while plaster is harder, denser, and often attached to lath or masonry. A small damaged edge can reveal the material, but do not probe an unstable or hazardous coating without proper precautions.
The Bottom Line
Why is bathroom ceiling peeling? Steam condensation is the leading cause, but failed preparation, incompatible paint, damaged drywall, and hidden leaks can produce similar symptoms. Correct the moisture source, remove every unstable layer, let the substrate dry, use a compatible primer, and apply two bathroom-rated finish coats. A durable repair depends more on ventilation and substrate condition than on paint price.