Why Is Drywall Cracking? Causes, Risks, and Repairs
Drywall cracks because movement or moisture creates stress that exceeds the strength of the gypsum panel, joint compound, paper tape, or fastener connection. The most common causes are seasonal framing shrinkage, poor joint installation, foundation or framing movement, truss uplift, impact, and water damage. Crack location, shape, width, movement, and recurrence determine the appropriate response.
Key Facts at a Glance
- Drywall joint cracks usually result from movement at a seam, corner, opening, or fastener rather than failure of the entire panel.
- A crack narrower than 1/8 inch is often cosmetic, but width alone cannot rule out a serious underlying problem.
- A diagonal crack from a window or door corner deserves more attention than an isolated short seam crack.
- Ceiling-to-wall separation that appears during cold weather commonly relates to truss uplift, not necessarily foundation failure.
- Paper tape with joint compound provides a different repair system from fiberglass mesh tape with setting compound.
- A crack that widens, returns after repair, accompanies sticking doors, or appears with water damage requires investigation before patching.
What Causes Drywall Cracks?
Drywall cracks when a rigid finish bridges building components that move at different rates. Wood framing changes dimension with moisture, roof trusses deflect, foundations settle or heave, and panels respond to impact or vibration. Joint compound has little tensile flexibility, so the finish commonly fractures at the weakest connection first.
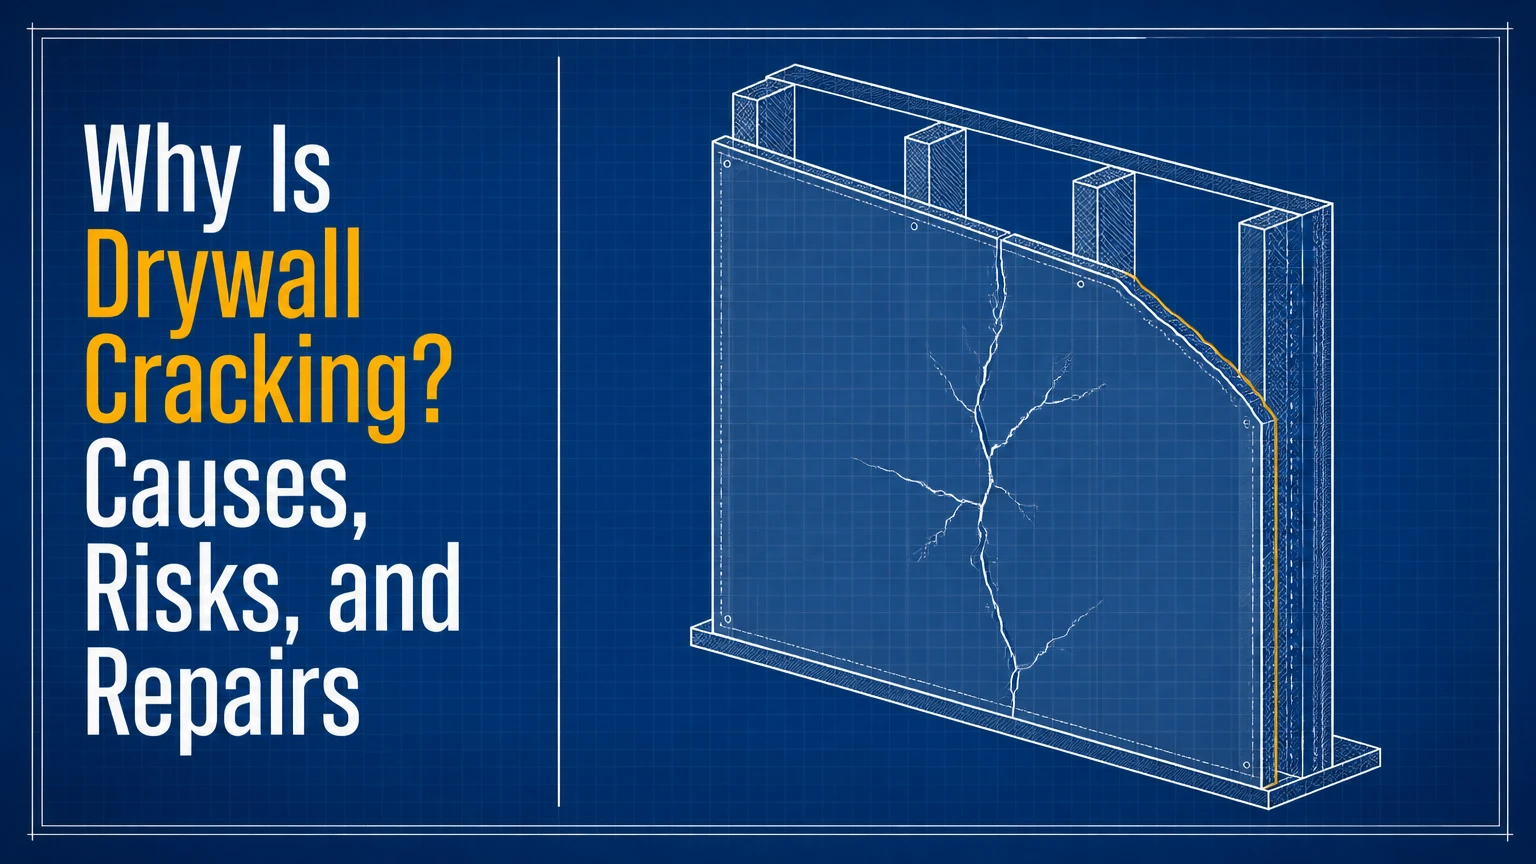
A drywall wall is a layered assembly. The gypsum core supplies the panel body, paper or fiberglass tape reinforces joints, joint compound fills and feathers the seam, and screws connect the panel to framing. If a stud shrinks, a ceiling truss lifts, or one panel shifts against another, stress concentrates in the finished joint instead of spreading evenly across the wall.
The Gypsum Association’s GA-216 standard addresses gypsum-panel application, while ASTM C840 covers installation and finishing practices. Those standards matter because fastener spacing, panel support, joint placement, and finishing details affect whether normal building movement becomes visible damage.
How does movement reach the finished surface?
Movement reaches drywall through screws, nails, framing members, blocking, ceiling connections, and panel edges. A wall can remain sound while a joint compound layer cracks because the finish tolerates less movement than wood or steel framing.
Typical mechanisms include:
- Framing shrinkage: Newly installed wood loses moisture and becomes slightly smaller.
- Differential movement: Adjacent framing members, walls, ceilings, or additions move by different amounts.
- Deflection: A floor, beam, header, or roof assembly bends under load.
- Stress concentration: Openings and unsupported joints focus movement at corners.
- Bond failure: Tape loses adhesion, compound shrinks, or the panel loosens around a fastener.
What Does the Crack Pattern Mean?
Crack shape provides a useful starting diagnosis, but no pattern proves a structural cause by itself. Inspect the crack’s location, width, depth, edge offset, nearby stains, seasonal behavior, and related changes before selecting a repair.
| Crack pattern and location | Typical cause | Immediate checks | Usual response |
|---|---|---|---|
| Straight seam crack, 1-6 inches long | Poor tape bond or seasonal movement | Peeling tape, hollow sound, panel movement | Retape and refinish after stabilization |
| Straight ceiling seam, 2-20 feet long | Panel movement or inadequate joint treatment | Attic framing, fastener spacing, recurrence | Repair joint and inspect framing |
| 30-50 degree crack at a door corner | Header deflection or settlement movement | Door operation, floor slope, exterior masonry | Monitor and obtain evaluation if progressive |
| 30-50 degree crack at a window corner | Opening movement or foundation movement | Window frame, exterior crack, water entry | Investigate opening and foundation conditions |
| Ceiling-to-wall gap, 1/16-1/4 inch | Truss uplift or seasonal framing movement | Winter appearance, attic insulation, truss connection | Use a compatible floating detail |
| Small circular bulge, 1/4-1 inch | Nail or screw pop | Loose panel, visible fastener head | Add fastening and patch |
| Branching surface crazing, under 1/32 inch | Rapid compound drying or thick application | Surface-only fractures, no movement | Remove loose finish and skim coat |
| Brown-edged crack with soft gypsum | Plumbing, roof, or condensation leak | Moisture meter, stain, odor, nearby fixture | Stop water source before repair |
Are diagonal drywall cracks always structural?
Diagonal drywall cracks are not always structural, but cracks radiating from door and window corners deserve a broader inspection than isolated seam cracks. Drywall around openings is vulnerable because headers, jambs, and adjacent studs transfer loads into a small area.
A short, stable diagonal crack may come from poor tape placement or minor framing shrinkage. Concern increases when the crack widens beyond 1/8 inch, crosses several finishes, has one side offset, returns after a proper repair, or appears with sticking doors, sloped floors, exterior masonry cracks, or foundation water problems.
How Do Moisture and Temperature Cause Cracks?
Moisture changes cause drywall cracks by shrinking or swelling wood framing, weakening paper and gypsum, and creating differential movement between materials. Temperature changes amplify the effect when roof framing, exterior walls, and conditioned rooms experience different thermal cycles.
Indoor relative humidity between 35% and 50% is a practical target for many homes, although the appropriate range varies by climate, season, ventilation, and building envelope. A hygrometer can identify extreme conditions, but humidity control cannot correct a roof leak, foundation movement, or improperly attached ceiling.
| Environmental condition | Likely drywall effect | Observable evidence | Corrective action |
|---|---|---|---|
| Indoor humidity below 30% for weeks | Wood shrinkage and open seams | Winter seam cracks, static electricity | Humidify carefully and monitor |
| Indoor humidity above 60% | Swelling, poor drying, mold risk | Musty odor, peeling paint, soft paper | Dehumidify and locate moisture |
| Roof or plumbing leak | Saturated gypsum and tape failure | Brown stain, soft spot, active drip | Repair leak and replace damaged panel |
| Cold roof with warm interior | Truss uplift or thermal movement | Ceiling gap during winter | Inspect attic and use floating attachment |
| Rapid fan or heater drying | Surface crazing and shrinkage | Fine network of shallow cracks | Remove loose compound and refinish |
| Flood or prolonged wetting | Core deterioration and fastener corrosion | Bulging, crumbling, delamination | Replace affected drywall |
Water damage changes the repair decision. Joint compound over a wet or softened panel will fail, and painting over a stain can conceal an active leak. Probe only when safe, avoid electrical components, and have a professional inspect areas near wiring, recessed lights, plumbing, or suspected mold.
Why Does the Ceiling Separate From the Wall?
Ceiling drywall separates from an interior wall when roof trusses or ceiling framing move independently from the wall below. Seasonal truss uplift is the classic example: the bottom chord remains warmer and more stable while the top chord responds to cold, dry attic conditions, lifting the ceiling near interior partitions.
A small seasonal gap can appear in winter and reduce in warmer, more humid weather. The standard repair concept is to allow the ceiling to move without pulling the wall finish upward. Depending on the framing system, solutions may include floating interior-wall corners, drywall clips, or keeping ceiling fasteners away from the top plate as specified by the construction detail.
| Ceiling symptom | Likely mechanism | Attic or room evidence | Escalation level |
|---|---|---|---|
| 1/16-inch winter gap at wall corner | Truss uplift | Gap narrows in spring | Monitor and repair correctly |
| Long crack across ceiling joint | Joint failure or framing deflection | Crack follows panel seam | Inspect support and fastening |
| Ceiling center sag, 1/2 inch or more | Framing overload, water, or fastener failure | Bowed surface, wet insulation | Prompt professional inspection |
| Circular ceiling stain, 3-12 inches | Roof, plumbing, or condensation leak | Brown ring or soft gypsum | Stop water and replace damage |
| Crack with popping sounds | Panel or framing movement | Loose fasteners, visible bulges | Inspect before patching |
A sagging ceiling requires more caution than a flat seam crack. Do not push a bulging wet panel back into place, and do not remove ceiling drywall beneath heavy insulation or an uncertain electrical installation without appropriate precautions.
How Do You Diagnose a Drywall Crack?
Diagnose a drywall crack by documenting its dimensions, checking for movement and moisture, inspecting nearby structural clues, and monitoring change over time. A five-minute inspection often separates a surface repair from a problem that should not be covered.
Use this diagnostic sequence
- Photograph the crack. Place a ruler beside it and record the date, room, wall orientation, and nearby openings.
- Measure the widest point. Record the width in millimeters or inches, not an estimate such as “large.”
- Check the surface. Look for tape, loose compound, peeling paint, paper bubbles, stains, and edge offset.
- Press gently beside the crack. Movement, clicking, or a loose panel suggests failed fastening.
- Check moisture. Compare the suspect area with a dry nearby area using a moisture meter when appropriate.
- Inspect adjacent features. Test doors and windows, inspect baseboards, and look for floor slope or exterior cracking.
- Mark the ends. Use pencil marks and dates, then remeasure after two to four weeks or after a major seasonal change.
| Finding during inspection | Most likely interpretation | Monitoring interval | Recommended next action |
|---|---|---|---|
| Dry crack, no movement, under 1/16 inch | Surface or seasonal finish failure | 30 days | Repair if stable |
| Loose panel and fastener click | Fastener or framing connection failure | Same day | Ref fasten before finishing |
| Moisture reading above nearby drywall | Active or recent water exposure | 24-48 hours | Find source and dry assembly |
| Crack grows 1/16 inch in 30 days | Active movement | Weekly | Obtain building professional assessment |
| Offset surfaces, sticking door, exterior crack | Possible structural movement | Immediate | Request qualified inspection |
| Ceiling sag over 1/2 inch | Deflection, water, or attachment failure | Immediate | Keep people clear and investigate |
A width threshold is a triage aid, not a structural verdict. A 1/4-inch cosmetic separation at a poorly taped joint may be less serious than a narrow, growing crack paired with foundation movement.
Which Repair Material Should You Use?
Paper tape is the preferred reinforcement for most flat drywall joints repaired with ready-mixed joint compound. Fiberglass mesh tape is convenient for small repairs, but ordinary air-drying compound does not provide the same reinforcement system; mesh is better paired with a compatible setting-type compound.
| Material | Typical working time | Best use | Limitation |
|---|---|---|---|
| Ready-mixed joint compound | 12-24 hours per coat | Flat seams and broad finishing | Shrinks and dries slowly |
| 5-minute setting compound | About 5 minutes | Small, urgent patches | Hard to sand and easy to misuse |
| 20-minute setting compound | About 20 minutes | Fast repairs with moderate control | Limited working window |
| 45-minute setting compound | About 45 minutes | Mesh tape and larger repairs | Requires accurate mixing |
| Paper drywall tape | 2-inch standard width | Flat seams and inside corners | Requires full compound bedding |
| Fiberglass mesh tape | 1 7/8-2-inch common width | Small patches with setting compound | Can telegraph cracks with regular mud |
| Lightweight spackle | 1-24 hours, product-dependent | Nail holes under 1/8 inch | Poor choice for moving seams |
Avoid caulk for a broad drywall seam that must be sanded and painted flush. Flexible caulk can hide a narrow corner gap, but it does not restore a delaminated tape joint or stabilize a moving panel.
How Do You Repair Drywall Cracks?
Repair drywall cracks by removing failed material, stabilizing the panel, reinforcing the joint, applying several thin coats, and repainting only after the surface is dry. A typical repair takes 2-3 calendar days because joint compound commonly needs 12-24 hours between coats, although active labor may total 30-90 minutes.
Before you start
| Requirement | Typical quantity or range | Detail |
|---|---|---|
| Labor time | 30-90 minutes active | Spread across multiple visits |
| Calendar time | 2-3 days | Includes drying and primer |
| DIY material cost | $20-$50 | Tape, compound, knife, sandpaper |
| Joint compound | 1 quart to 1 gallon | Depends on crack length |
| Paper tape | 6-20 feet | Cut beyond damaged joint |
| Putty knives | 4-inch and 10-inch | Narrow bedding, broad feathering |
| Sandpaper | 120 and 220 grit | Finish without cutting tape |
| Primer | 1 pint to 1 quart | Seal compound before paint |
Step 1: Open the failed joint
Cut a shallow V along loose compound with a utility knife, then remove peeling tape and all powdery material. Do not widen sound drywall unnecessarily, because an oversized excavation requires more compound and creates a larger visible repair.
You will know the joint is ready when the edges are firm and the remaining tape does not lift under light pressure. A common mistake is leaving loose tape beneath new mud.
Step 2: Stabilize the panel
Drive drywall screws into framing about 1-2 inches from a popped or loose fastener, avoiding pipes and wiring. Set screw heads slightly below the paper without breaking through it, then remove or reset the failed fastener if it no longer holds.
You will know the panel is stable when gentle pressure produces no clicking or movement. Adding compound before stabilizing the panel almost guarantees recurrence.
Step 3: Embed reinforcement
Apply a thin bed of joint compound, center paper tape over the seam, and press it firmly into the compound with a 4-inch knife. For mesh tape, use the setting compound specified by the tape manufacturer and cover the adhesive mesh completely.
You will know the tape is embedded when no dry areas, bubbles, or exposed edges remain. A dry joint, where tape contacts the panel without enough compound, is a frequent failure point.
Step 4: Apply finish coats
After the embedded coat dries, apply a second coat 2-4 inches wider than the tape. Add a final coat 8-12 inches wide, feathering the edges so the repair disappears under side lighting.
You will know the surface is ready to sand when the compound is uniformly dry, pale, and hard. Thick applications dry unevenly and may shrink after painting.
Step 5: Sand, prime, and paint
Sand with 120-grit paper for ridges and 220-grit paper for the final surface. Apply drywall primer to the repair before matching the finish paint, because unprimed compound absorbs paint differently from surrounding coated drywall.
You will know the finish is acceptable when a work light held at a low angle shows no ridge or depression. Over-sanding can cut into paper tape and weaken the repair.
Why Does the Crack Keep Coming Back?
A drywall crack returns when the underlying movement remains active or the repair does not reconnect the assembly correctly. Repeatedly applying spackle over a moving seam treats the visible symptom while leaving loose panels, truss movement, water intrusion, or foundation displacement unchanged.
| Recurring failure | Why the first repair failed | Durable correction |
|---|---|---|
| Seam reopens in one season | Movement remained active | Monitor seasonal change and improve joint repair |
| Crack follows screw line | Panel lacks adequate fastening | Add fasteners into sound framing |
| Tape bubbles again | Dry joint or contaminated surface | Remove tape and re-embed fully |
| Corner gap returns | Rigid ceiling-to-wall connection | Use an appropriate floating detail |
| Paint blisters over patch | Moisture remains | Repair leak and dry or replace panel |
| Hairline network reappears | Compound applied too thick or dried fast | Remove crazed layer and skim thinly |
A practitioner rule is simple: if the same crack reappears in the same season after a properly taped repair, stop refining the patch and investigate movement. The repair material is rarely the only variable.
What Does Drywall Crack Repair Cost?
Typical U.S. cosmetic drywall crack repair costs range from $20-$50 for a DIY repair, $150-$400 for a small professional visit, and $2,500-$10,000 or more when foundation or framing remediation is required. Local labor rates, access, texture matching, paint blending, travel, and investigation can change the total substantially.
| Scope of work | Typical U.S. cost | Typical duration | Cost drivers |
|---|---|---|---|
| DIY seam patch | $20-$50 | 2-3 days | Compound, tape, tools, paint |
| Handyman repair | $150-$400 | 1-3 visits | Labor, texture, repainting |
| Large ceiling repair | $400-$1,500 | 2-5 days | Access, panel removal, painting |
| Moisture-damaged drywall | $300-$2,000 | 2-7 days | Leak repair, drying, replacement |
| Engineer or building inspection | $300-$1,000 | 1-14 days | Region, report scope, access |
| Foundation-related remediation | $2,500-$10,000+ | Weeks to months | Drainage, underpinning, structural work |
These figures are typical planning ranges, not universal prices. A contractor should separate the proposal into diagnosis, source correction, drywall restoration, texture matching, primer, and finish paint so a low patch price does not conceal an unresolved cause.
When Should You Call a Professional?
Call a qualified building professional when a crack is growing, wider than approximately 1/4 inch, visibly offset, accompanied by water or sagging, or associated with sticking openings and other building movement. A structural engineer is more appropriate for suspected load-path or foundation movement; a roofer, plumber, or water specialist is appropriate when moisture is the primary clue.
Seek prompt evaluation for these conditions:
- A ceiling is sagging, bulging, or visibly separating from framing.
- The crack increases during a documented monitoring period.
- One side of the crack sits higher or farther forward than the other.
- Several rooms develop aligned cracks at the same time.
- Doors or windows bind after the crack appears.
- Exterior brick, stucco, concrete, or foundation walls show related cracks.
- Drywall is wet near electrical devices, recessed lights, plumbing, or HVAC equipment.
- A crack follows a smoke alarm, fire separation, or other life-safety assembly.
What should renters and homeowners document?
Photograph the crack with a scale, record dates and weather conditions, preserve repair invoices, and report active leaks in writing. Renters should notify the landlord or property manager before cutting or patching drywall, while homeowners should check insurance exclusions because gradual settlement, maintenance neglect, and flood damage may receive different treatment from sudden covered events.
What Can You Do When the Cause Is Still Active?
Do not permanently conceal a crack until the source is stable. You can photograph it, measure it, protect the area from water, maintain moderate indoor humidity, and use a temporary removable marker line, but a cosmetic patch is not a substitute for correcting a leak, unstable framing, or foundation movement.
| Active condition | Temporary measure | Permanent solution | Do not do |
|---|---|---|---|
| Roof leak | Container and safe isolation | Roof repair and dry-out | Paint over stain |
| Plumbing leak | Shutoff and documentation | Replace failed fitting and damaged panel | Leave wet gypsum enclosed |
| Seasonal seam movement | Measure monthly | Correct joint or framing detail | Repatch every week |
| Truss uplift | Photograph seasonal gap | Floating ceiling connection | Rigidly screw moving truss |
| Foundation concern | Monitor and limit disturbance | Qualified structural evaluation | Assume width alone proves safety |
Frequently Asked Questions
Can low humidity make drywall crack?
Low indoor humidity can make wood framing lose moisture and shrink, which may open drywall seams or expose fastener movement. Winter heating often creates the condition. Use a hygrometer, target roughly 35%-50% relative humidity where suitable for the home, and investigate cracks that continue growing after humidity stabilizes.
Should I repair a drywall crack before selling my house?
Repair a stable cosmetic crack before listing when the surface is dry, flat, and unrelated to movement. Document larger, recurring, or structurally associated cracks instead of hiding them, because concealment can create inspection, disclosure, and buyer-trust problems. Source correction should precede cosmetic finishing.
Can paint alone cover a drywall crack?
Paint can hide an extremely shallow surface line temporarily, but paint cannot reinforce a failed tape joint or stop framing movement. Scrape away loose coating, stabilize the panel, retape where needed, apply compound in thin coats, prime, and then paint.
Is a crack beside a window more serious than one in the middle of a wall?
A crack beside a window can be more informative because opening corners concentrate header and framing movement. A small stable repair may remain cosmetic, but a widening diagonal crack paired with sticking windows, exterior cracks, or floor movement should receive professional assessment.
How long should I monitor a drywall crack?
Monitor a questionable crack for at least 30 days when no immediate hazard exists, marking both ends and recording the widest point. Seasonal cracks may require observation through a meaningful weather change. Do not wait to monitor active leaks, major ceiling sag, exposed wiring, or rapidly widening structural symptoms.
The Bottom Line
Why is drywall cracking? Most drywall cracks come from movement at joints, corners, fasteners, ceilings, or openings, with moisture and temperature changes often intensifying the stress. Stable, dry, narrow surface cracks can usually receive a careful DIY repair, while growing, offset, wet, recurring, or movement-associated cracks require diagnosis before patching. Use the pattern as a clue, measure the change, correct the cause, and then restore the drywall finish.