How to Tell if Mold Is Behind Drywall Safely
To tell if mold is behind drywall, combine the history of moisture exposure with musty odors, staining or distortion, moisture-meter readings, and a carefully chosen inspection method. No single symptom or consumer test proves hidden mold. Confirmation usually requires a controlled opening, borescope inspection, or qualified assessment after the water source is fixed.
Key Facts at a Glance
- Mold behind drywall requires moisture, a food source such as paper facing, and suitable temperature conditions.
- A musty smell indicates possible microbial growth, but odor alone cannot locate or identify mold.
- Moisture meters and thermal cameras detect conditions associated with mold, not mold spores themselves.
- Drywall with damaged paper, swelling, crumbling, or extensive contamination usually requires removal rather than surface cleaning.
- The EPA uses approximately 10 square feet of visible mold as a general DIY decision boundary, but local rules and occupant health can change that choice.
- Fixing the leak and drying the wall matters more than applying bleach or paint over a stained surface.
Why Can Mold Grow Behind Drywall?
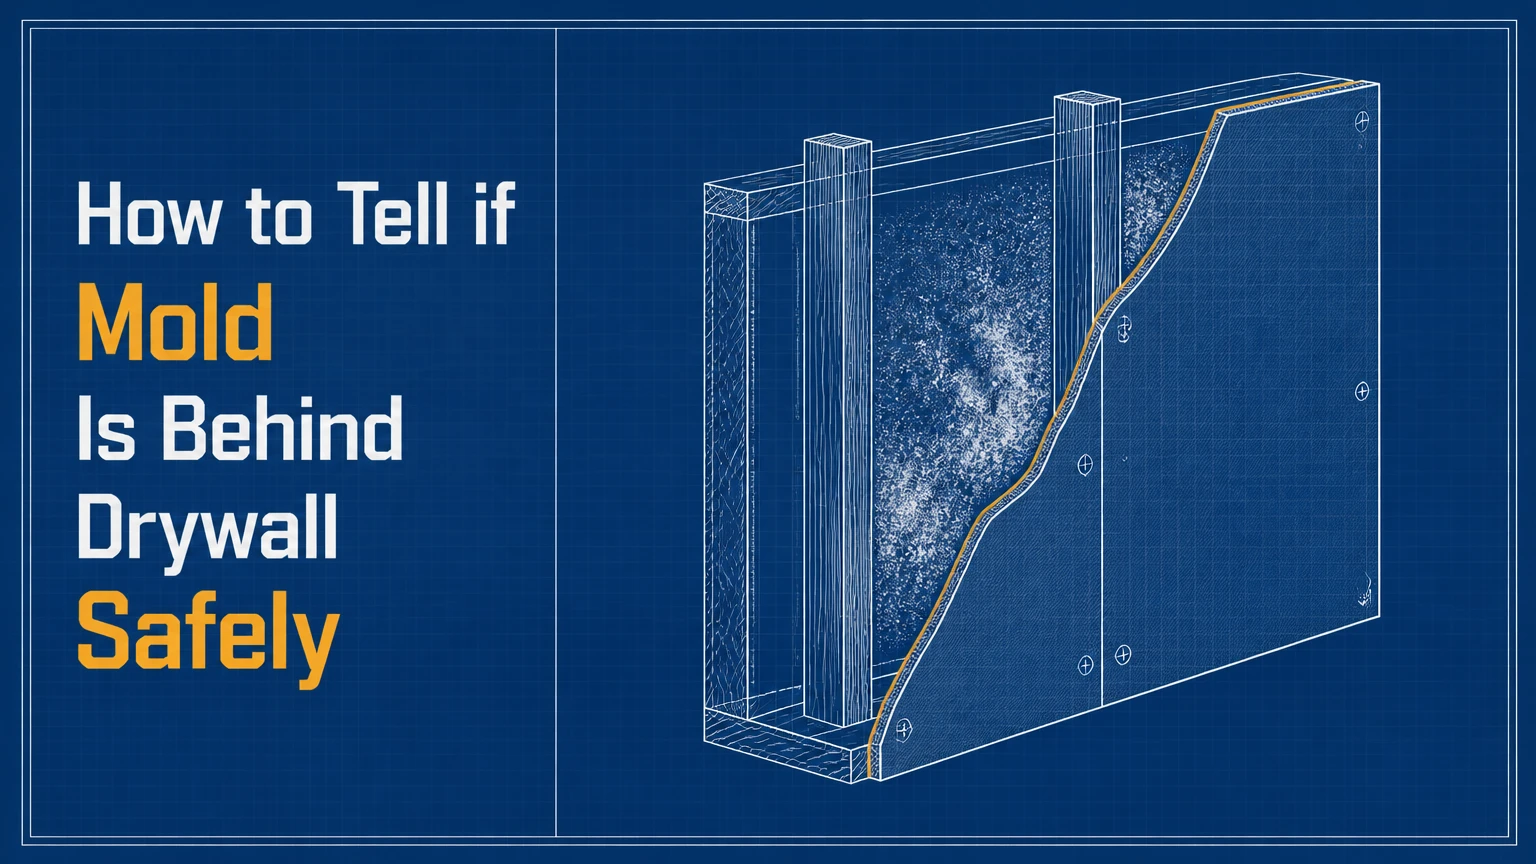
Mold can grow behind drywall because standard gypsum board contains paper facing, and paper is a cellulose-based food source. A plumbing leak, roof leak, foundation seepage, condensation problem, or persistently humid room can wet the paper side inside the wall cavity before the living-space surface looks abnormal.
Drywall is layered: paint covers the front paper, gypsum forms the core, and another paper layer faces the cavity. Water can wick laterally through gypsum, collect near the bottom plate, and wet insulation or framing. A small bathroom supply-line leak may therefore affect a larger hidden area than the visible stain suggests.
The EPA states, “If mold is a problem in your home, you need to clean up the mold and fix the water problem.” That principle is more useful than trying to classify a spot by color. Mold color does not reliably identify species, toxicity, age, or health risk.
How Quickly Can Hidden Mold Start?
Mold may begin growing within 24-48 hours on continuously wet materials, but the exact timing varies with temperature, material, airflow, and species. The 24-48-hour window is a water-damage response target, not a guarantee that every wet wall will contain mold after two days.
| Moisture condition | Typical concern | Recommended response | Useful timeframe |
|---|---|---|---|
| Clean water, drywall slightly damp | Absorption and swelling | Stop source, ventilate, measure repeatedly | Begin drying immediately |
| Drywall wet for less than 24 hours | Early microbial risk | Remove standing water and use air movement | Inspect within 24 hours |
| Wet paper facing for 24-48 hours | Increasing mold and structural risk | Professional drying or controlled removal | Act the same day |
| Sewage or floodwater exposure | Biological contamination | Avoid DIY disturbance and isolate area | Call a professional promptly |
| Indoor relative humidity above 60% | Condensation and recurring growth risk | Run dehumidifier and correct ventilation | Lower humidity within hours |
The common “replace drywall after 48 hours” rule is too absolute. Drywall that remains sound and was exposed to clean water may sometimes be dried and evaluated, while swollen, delaminated, contaminated, or moldy board should be removed.
What Signs Point to Mold Behind Drywall?
The strongest pattern is a moisture event plus persistent odor and a physical change in the wall. A single brown stain or an isolated allergy symptom is weak evidence because plumbing stains, adhesive failure, dust, and outdoor allergens can produce similar observations.
Persistent Musty Odor
A musty, earthy, damp-basement, or wet-cardboard smell near one wall increases suspicion, especially when the odor becomes stronger after the room is closed or the HVAC system runs. Odor can also come from wet insulation, crawl spaces, carpets, floor drains, or stagnant air, so it cannot prove that drywall contains mold.
Do not place your nose against an outlet, crack, or newly drilled hole. Air movement from a wall cavity can carry dust and biological particles into the breathing zone.
Stains, Bubbling, and Surface Distortion
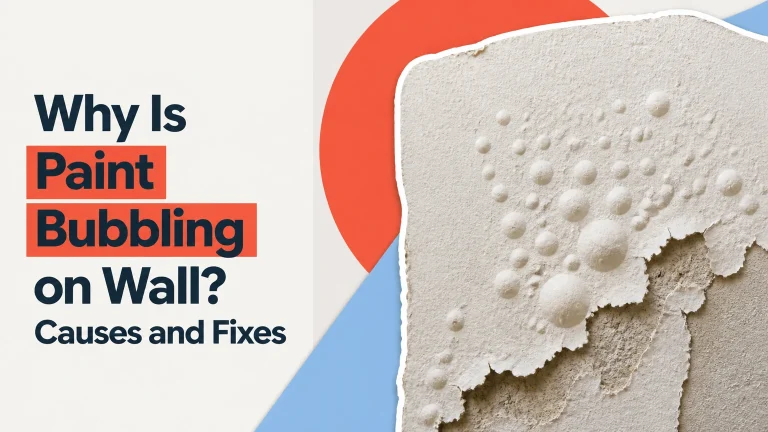
Yellow, tan, or brown marks generally establish prior moisture, not mold. Bubbling paint, peeling wallpaper, nail pops, cracked joint compound, swollen seams, and soft drywall indicate that moisture has affected the assembly.
| Visible condition | What it establishes | What it does not establish | Next check |
|---|---|---|---|
| Yellow or brown ring | Earlier or current water intrusion | Mold species or active growth | Moisture mapping and leak history |
| Black, green, or gray spot | Possible surface mold or soot | “Toxic black mold” identification | Photograph, avoid disturbance, assess source |
| Bubbling paint | Moisture, adhesion failure, or vapor pressure | Mold behind the entire panel | Moisture reading around the bubble |
| Soft or crumbly drywall | Gypsum or paper deterioration | Exact contamination boundary | Stop pressing and plan controlled removal |
| Warped baseboard | Wet lower wall or flooring | Hidden mold by itself | Inspect plumbing and bottom plate area |
| Clean wall with odor | Possible concealed growth or another source | Location of the odor source | Compare adjacent rooms and HVAC operation |
Allergy or Respiratory Symptoms
The CDC and EPA recognize that damp indoor environments can aggravate respiratory symptoms for some occupants, but symptoms cannot diagnose mold or identify its location. Coughing, wheezing, congestion, itchy eyes, and asthma flares may also result from dust, pets, pollen, smoke, or cleaning chemicals.
People with asthma, chronic lung disease, significant allergies, immune suppression, or other medical vulnerabilities should avoid opening suspect walls. Seek medical care for breathing difficulty, and treat the building investigation separately from medical diagnosis.
How Do You Check for Hidden Mold Without Cutting Drywall?
Start with documentation and non-invasive checks, then escalate only when the result will change your decision. A moisture meter is usually the most practical first tool, while thermal imaging identifies patterns that require confirmation.
Step 1: Document the Wall and Find the Water Source
Photograph stains, cracks, baseboards, ceilings, nearby fixtures, and any visible condensation. Record when the odor appears, whether rain or showering changes it, and whether the HVAC system distributes the smell.
Check the likely sources: supply and drain pipes, roof penetrations, exterior flashing, windows, HVAC condensate lines, bathrooms, kitchens, basements, and foundation walls. A wall cannot be considered safe merely because the visible stain is dry.
Success checkpoint: You can describe where water entered, whether the source is active, and which wall surfaces show changes.
Common mistake: Painting over a stain before confirming that the leak has stopped.
Step 2: Measure Indoor Humidity and Wall Moisture
Keep indoor relative humidity near 30-50% when practical; sustained readings above 60% increase condensation and mold risk. Use a hygrometer in the room, then compare suspect areas with an unaffected wall made from similar materials.
Pinless meters scan broadly but can react to metal studs, wiring, corner guards, foil-backed insulation, and changes in wall density. Pin meters provide localized readings but puncture the surface and may contact hidden electrical wiring or plumbing.
Consumer meter percentages are not universal drywall moisture content standards. Meter brands use different scales, and painted assemblies produce different readings. Use the instrument’s reference scale and a dry baseline from the same building.
| Tool | Typical USA purchase cost | Detects | Main limitation | Best use |
|---|---|---|---|---|
| Hygrometer | $10-$30 | Room relative humidity | Does not measure wall moisture | Confirm humidity conditions |
| Pinless moisture meter | $30-$100 | Relative moisture pattern | False positives near metal and wiring | Map a broad wall |
| Pin moisture meter | $40-$150 | Localized electrical resistance | Leaves holes and has safety limits | Confirm a small area |
| Thermal camera attachment | $200-$600 | Surface temperature patterns | Cannot identify mold directly | Locate suspected wet zones |
| Borescope | $30-$150 | Visible cavity conditions | Narrow field of view | Inspect through a controlled hole |
Success checkpoint: The suspect wall shows a repeatable moisture difference from a comparable dry wall, or the meter indicates no current abnormality.
Common mistake: Treating a displayed number such as 16% as a universal pass-fail mold threshold.
Step 3: Use Thermal Imaging as a Map, Not Proof
A thermal camera can reveal a cool or warm pattern caused by evaporative cooling, wet insulation, missing insulation, air leakage, framing, or plumbing. Thermal imaging works best when a temperature difference exists between the wall and the cavity, and it cannot see through drywall or identify fungal growth.
Scan after a stable indoor temperature has existed for several hours. Compare the suspect wall with adjacent wall sections, inspect corners and plumbing routes, and verify any anomaly with a moisture meter.
Success checkpoint: The thermal pattern aligns with the leak path or a moisture reading.
Common mistake: Calling every dark thermal image mold. A missing insulation pocket can look similar.
Step 4: Inspect Existing Openings Carefully
An unused cable opening, plumbing access panel, or removable baseboard may provide limited visual information. An electrical outlet opening can expose a cavity edge, but removing a cover plate is not a risk-free inspection because wiring may be damaged, energized, or improperly installed.
Turn off the correct breaker, verify power with an appropriate tester, and do not reach into the cavity. Renters should not remove plates or make openings without written permission. A licensed electrician is the safer choice when electrical conditions are uncertain.
Success checkpoint: You obtain a limited view without touching wiring, insulation, or debris.
Common mistake: Assuming an empty-looking outlet opening proves that the entire wall is clean.
Step 5: Use a Borescope Only When the Result Justifies It
A borescope through a small, controlled opening can show the back of drywall, insulation, framing, or visible growth. It does not provide a complete survey because studs block the camera and mold may exist outside the narrow viewing angle.
Avoid drilling near outlets, switches, plumbing fixtures, radiators, and known pipe or cable routes. Wear eye protection, gloves, and a well-fitting N95 or better respirator, and stop if the wall contains suspect asbestos-containing materials, vermiculite, sewage contamination, or extensive debris.
Seal the hole temporarily with plastic tape and mark its location. Do not spray chemicals into a cavity that you cannot dry or inspect.
Success checkpoint: The camera reveals a defined condition that changes the plan, such as wet insulation, damaged paper, or visible fungal-like growth.
Common mistake: Drilling multiple exploratory holes and spreading dust without containment.
Which Mold Detection Method Should You Choose?
Choose a moisture meter for current moisture mapping, thermal imaging for locating patterns across a large surface, and a borescope for limited visual confirmation. Choose professional assessment when the wall involves sewage, extensive water damage, vulnerable occupants, recurring moisture, or a planned insurance or property transaction.
| Method | Typical result time | Typical USA cost | Evidence strength | Appropriate limitation |
|---|---|---|---|---|
| Visual and odor review | 10-30 minutes | $0 DIY | Suggestive | Cannot confirm concealed growth |
| Moisture mapping | 15-45 minutes | $30-$150 DIY; $150-$350 professional | Identifies wet conditions | Does not identify mold |
| Thermal scan | 30-60 minutes | $200-$600 equipment; $250-$600 professional | Locates anomalies | Needs confirmation |
| Borescope inspection | 20-60 minutes | $30-$150 DIY; $250-$500 professional | May show cavity growth | Limited viewing area |
| Surface tape or swab sample | 2-5 business days | $40-$150 DIY lab; $250-$600 professional | Identifies sampled material | Misses hidden areas |
| Indoor air sample | 2-5 business days | $150-$400 DIY or lab; $400-$900 professional | Compares airborne particles | Results vary with timing and disturbance |
Surface sampling is useful when a visible spot must be characterized or when post-remediation documentation is required. Air sampling is less useful as a stand-alone answer because outdoor spore levels, weather, HVAC operation, occupant activity, and sampling location can change results.
The American Industrial Hygiene Association emphasizes that mold assessment should focus on moisture, building conditions, and a practical response rather than relying on a single numerical test. A laboratory report can identify what was captured, but it cannot certify that an entire wall is mold-free.
How Much Does a Mold Inspection Cost in the USA?
A targeted professional inspection typically costs about $250-$600, while a larger assessment with moisture mapping, thermal imaging, sampling, and a written report commonly costs $400-$900. Remediation, containment, demolition, drying, and reconstruction are separate charges.
| Service | Typical USA price | Typical duration | Usually includes | Usually excludes |
|---|---|---|---|---|
| Basic visual assessment | $150-$300 | 30-90 minutes | Moisture history and visible review | Laboratory sampling |
| Moisture and thermal survey | $250-$600 | 1-2 hours | Meter readings and thermal map | Drywall removal |
| Independent mold assessment | $400-$900 | 1-3 hours | Written findings and sampling options | Remediation work |
| Small-area remediation | $800-$2,500 | 1-3 days | Containment, removal, cleaning | Major reconstruction |
| Wall cavity remediation | $2,000-$6,000 | 2-7 days | Removal, drying, HEPA cleaning | Broad structural repairs |
| Extensive water or HVAC case | $5,000-$20,000 or more | Several days to weeks | Containment and multiple trades | Insurance deductible and upgrades |
Prices vary by region, access, containment requirements, laboratory fees, and whether the source is sewage or floodwater. Ask whether the assessor also performs remediation. Independent assessment can reduce conflicts of interest when the work may involve substantial demolition.
Can You Remove Moldy Drywall Yourself?
DIY removal may be reasonable for a small, isolated area of approximately 10 square feet or less when the water source is fixed, the material is not sewage-contaminated, and no vulnerable occupant is exposed. The EPA’s 10-square-foot guidance is a practical reference, not a universal legal limit.
Do not attempt DIY demolition when contamination is widespread, the HVAC system may be affected, the wall has sewage or floodwater exposure, asbestos or lead is possible, or the occupant has significant respiratory or immune concerns. Local and state requirements can also impose stricter rules.
| Situation | DIY position | Preferred action | Reason |
|---|---|---|---|
| One small area, clean water, sound surrounding wall | Sometimes suitable | Contain and remove carefully | Limited scope |
| Several connected wall sections | Usually unsuitable | Obtain professional assessment | Boundary is uncertain |
| Sewage or floodwater | Do not disturb | Use qualified remediation | Pathogens and porous materials |
| Suspect pre-1980 construction materials | Avoid cutting | Test or consult specialists | Asbestos and lead concerns |
| Mold near HVAC return or ductwork | Avoid casual cleanup | Inspect HVAC and containment plan | Distribution risk |
| Asthma or immune-compromised occupant | Avoid exposure | Arrange professional handling | Lower exposure tolerance |
What Should You Do After Confirming Mold?
First stop the water, then isolate the affected area, remove unsalvageable porous materials, dry the assembly, clean remaining structural materials, and verify that the source and moisture conditions are controlled. Bleach is not a reliable solution for mold embedded in drywall because porous gypsum and paper cannot be disinfected throughout by wiping the surface.
For a small repair, use plastic sheeting to separate the work zone, keep doors closed, turn off air circulation that could spread debris, and use a HEPA-filtered vacuum where appropriate. Do not sand, brush, or use a household fan that blows contaminated dust into occupied rooms.
EPA guidance favors detergent and water for cleaning certain hard surfaces, followed by complete drying. Porous drywall, insulation, carpet, and ceiling tile often require removal when moldy or structurally damaged.
Expert Insight: Dry Does Not Mean Clean
A dry moisture-meter reading means current moisture may be absent. It does not erase prior mold growth, staining, odor, or contaminated porous material. Historic leaks frequently explain why a wall smells musty even after a plumber has repaired the pipe.
Expert Insight: The Hidden Side Often Matters More
The cavity-facing paper can support growth while the painted face remains visually normal. A clean front surface therefore has less diagnostic value than a documented leak path, damp insulation, or an odor concentrated at a wall-floor junction.
Expert Insight: Air Tests Rarely Answer the Main Question
An air sample can show airborne particles during one brief sampling period, but it cannot reliably exclude mold hidden behind a closed wall. Use sampling when a defined decision requires it, not as a substitute for locating moisture and inspecting building materials.
What Are the Common Investigation Mistakes?
The most damaging errors are disturbing the wall too early, misreading tools, and treating the symptom while leaving the water source active. A cautious investigation gathers evidence in escalating stages.
| Mistake | Why it fails | Correction | Typical consequence |
|---|---|---|---|
| Spraying bleach on drywall | Surface liquid does not penetrate the full porous assembly | Remove damaged porous material when appropriate | Hidden growth and added moisture |
| Trusting wall color | Mold color does not identify species or risk | Evaluate moisture and material condition | False reassurance |
| Using one meter reading | Readings vary with density and metal | Establish a dry comparison baseline | False positive or negative |
| Opening an outlet without power verification | Electrical shock and wiring damage are possible | Use an electrician or avoid the opening | Injury or property damage |
| Running central HVAC during demolition | Air movement can distribute dust and spores | Isolate the zone and assess HVAC | Wider contamination |
| Replacing drywall before leak repair | New material becomes wet again | Repair and verify the source first | Repeated remediation costs |
What Changes for Renters and Home Buyers?
Renters should document the condition, avoid invasive testing, and send a dated written notice to the landlord or property manager. Include photographs, odor dates, visible leaks, room locations, and any maintenance request numbers; local housing procedures vary, so legal advice should come from the relevant state or municipal agency.
Home buyers should request prior water-loss records, invoices, permits, roof and plumbing repairs, remediation reports, and post-remediation verification where available. A general home inspection can identify clues, but it is not automatically a mold assessment.
| Person or scenario | First action | Avoid | Escalate when |
|---|---|---|---|
| Renter | Written notice with dated photos | Drilling or removing plates | Landlord ignores active moisture |
| Home buyer | Independent inspection and records review | Relying on seller-selected testing alone | Odor or moisture remains unexplained |
| Homeowner with small clean-water area | Stop leak and map moisture | Uncontained demolition | Material boundary is unclear |
| Family with asthma | Keep occupant away from area | DIY opening or spraying | Symptoms or visible spread occur |
| Repeated basement seepage | Correct drainage and humidity | Repainting recurring stains | Foundation or drainage needs repair |
When Should You Call a Professional?
Call a qualified mold assessor or remediation contractor when the affected area exceeds roughly 10 square feet, the moisture source is unresolved, contamination involves sewage, multiple rooms are affected, or the HVAC system may have distributed particles. Professional help is also appropriate when demolition could disturb asbestos, lead paint, vermiculite, or other hazardous materials.
Look for written scope, moisture-source diagnosis, containment procedures, HEPA controls, disposal methods, and reconstruction boundaries. In states that license or regulate mold professionals, verify the applicable credential through the state agency. A laboratory result without a building assessment is not a complete remediation plan.
FAQ
Can You See Mold Through Drywall?
Usually, no. Mold behind drywall is concealed by paint, paper, and gypsum, so visible evidence may be limited to staining, bubbling, or surface growth. A borescope can show a small section of the cavity, but only controlled removal or professional assessment can establish the broader condition of a wall assembly.
Does a Musty Smell Always Mean Mold?
No. A musty odor can come from mold, wet insulation, damp carpet, a crawl space, a floor drain, or trapped humidity. The odor becomes more meaningful when it is localized, persistent, and associated with a leak, elevated wall moisture, staining, or soft drywall.
Can a Moisture Meter Detect Mold Behind a Wall?
A moisture meter detects electrical or dielectric changes associated with moisture, not mold. A high reading supports the conclusion that conditions may support microbial growth, while a normal reading does not rule out historic, dried mold. Compare the suspect area with an unaffected wall and interpret the manufacturer’s scale.
Is Black Mold More Dangerous Than Other Mold?
Color cannot determine danger. The term “black mold” commonly refers to visually dark growth, but species identification requires laboratory analysis and color alone does not establish toxicity. The practical response is the same: control moisture, limit disturbance, remove contaminated porous material when necessary, and protect occupants from exposure.
Should You Buy a Home Mold Test Kit?
Buy a kit only when a specific laboratory question justifies the result. Surface kits can characterize a sampled spot, but they cannot inspect a closed wall; air kits can vary with weather, HVAC operation, and occupant activity. Moisture investigation and building-condition assessment usually provide more actionable information.
How Do You Prevent Mold Behind Drywall?
Keep indoor relative humidity near 30-50%, repair plumbing and roof leaks promptly, dry water-damaged materials quickly, maintain bathroom exhaust ventilation, and keep furniture from blocking exterior walls in humid conditions. Repeated stains require source correction, not stain-blocking primer alone.
The Bottom Line
To determine how to tell if mold is behind drywall, begin with the moisture history, odor, wall condition, and humidity level, then map the area with a moisture meter and use thermal imaging only as a locating aid. Escalate to a borescope or professional assessment when the result affects demolition, health protection, insurance, or a property transaction. Never open a wall before considering electrical hazards, hazardous building materials, containment, and the unresolved water source. When mold is confirmed, fixing the moisture problem and removing damaged porous drywall matter more than bleaching or repainting the surface.