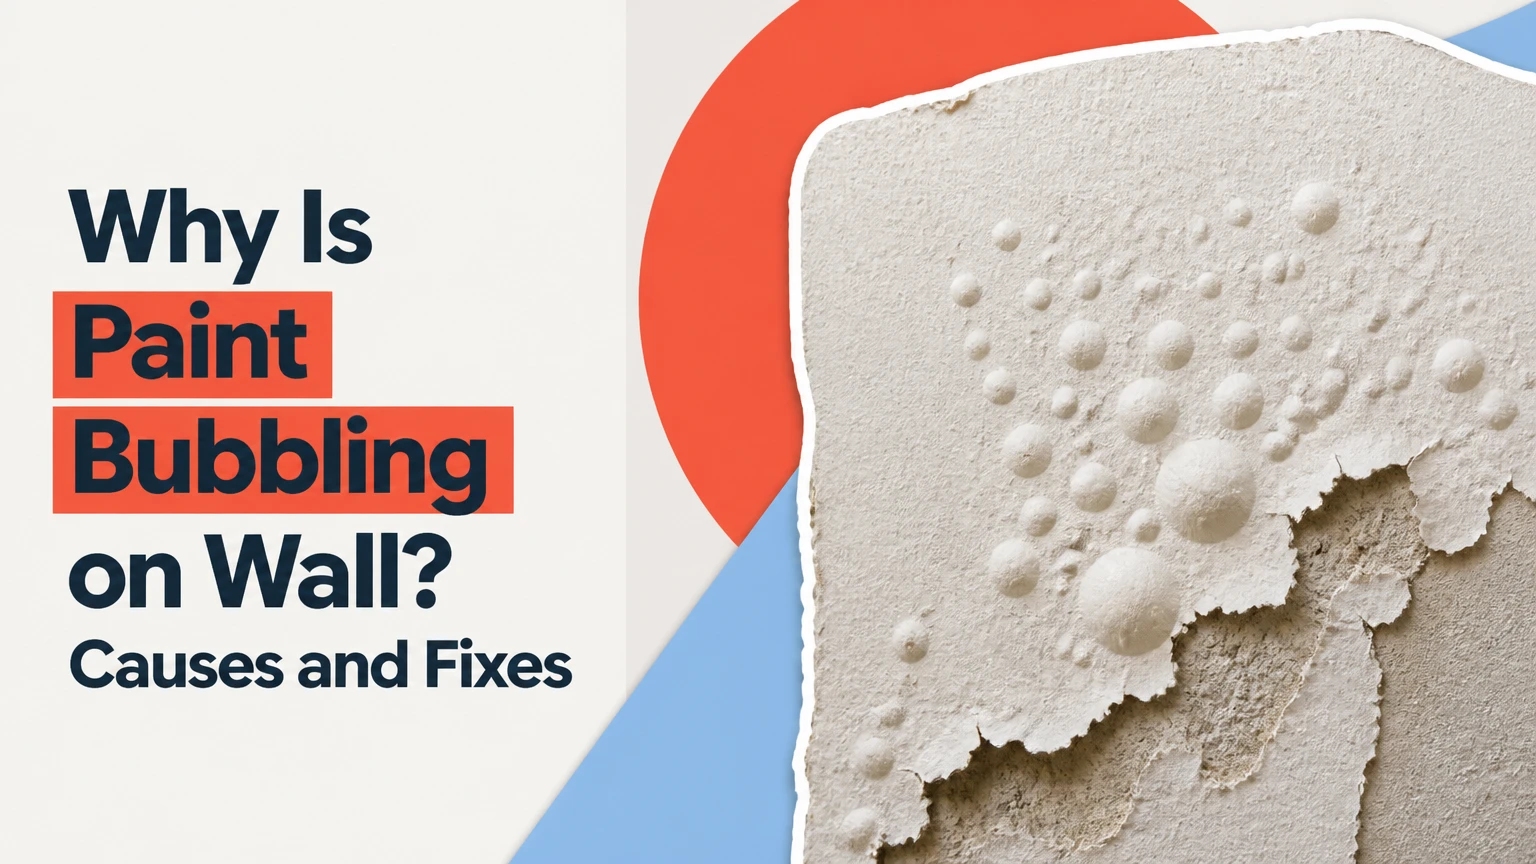
Why Is Paint Bubbling on Wall? Causes and Fixes
Paint bubbles on a wall when moisture, vapor, air, or a weak underlying layer pushes against the paint film and breaks its adhesion to drywall, plaster, wood, or masonry. The most common cause is water, but rushed recoating, trapped solvents, grease, dust, glossy old paint, heat, and poor surface preparation can create the same blistered appearance.
Key Facts at a Glance
- Moisture is the leading cause of recurring paint bubbles on interior walls, especially below windows, near plumbing, and in bathrooms.
- A 12% moisture-content limit is commonly used for wood, but drywall requires a dry visual inspection and, when appropriate, a meter reading interpreted by the meter manufacturer.
- Bubbling paint must be scraped back to firmly bonded material before patching, priming, and repainting.
- Painting over an active leak or damp substrate hides the defect temporarily and usually causes another failure.
- A small isolated blister may need $20-$75 in DIY materials, while damaged drywall replacement can cost substantially more.
- Lead-safe precautions are required before disturbing painted surfaces in many pre-1978 U.S. homes.
Why Is Paint Bubbling on a Wall?
Paint bubbling on a wall is usually an adhesion failure caused by pressure beneath the coating. Water vapor, liquid water, trapped solvent, or air occupies a space between the paint and substrate; when that pressure exceeds the bond strength, the paint film lifts into a blister.
The location provides an important clue. Bubbles below a bathroom supply line suggest plumbing or condensation, while bubbles on an exterior-facing wall may indicate rain penetration, poor flashing, or cold-surface condensation. A bubble that appeared shortly after painting points more strongly toward contamination, excessive film thickness, incompatible coatings, or a missed recoat interval.
A cured bubble is different from small pinholes or foam-like bubbles visible immediately during rolling. Wet-paint bubbles can result from overworking the roller, excessive agitation, porous drywall, or a roller that introduces air. Cured blisters indicate that the paint separated after or during drying and require substrate diagnosis.
How Does Paint Form a Bubble?
A paint blister forms in four stages: an entrapped substance creates pressure, heat increases expansion or evaporation, adhesion weakens, and the flexible paint film deforms outward. The paint does not create a void by itself; the void forms because the coating loses contact with the surface beneath it.
The failure often involves more than one factor. A slightly damp wall may tolerate a thin, well-bonded coating, but a thick coat applied during high humidity dries slowly and traps more vapor. Likewise, glossy oil paint may remain stable for decades until a water-based coating is applied without sanding and bonding primer.
Paint manufacturers treat temperature, humidity, substrate condition, and recoat time as connected variables. The product label takes priority over generic timing because acrylic, alkyd, elastomeric, and shellac primers dry at different rates.
What Do the Bubble’s Size and Location Reveal?
Bubble size and location provide a practical first diagnosis, although only opening the defect confirms the failure layer. Clusters around seams, corners, windows, or plumbing deserve more attention than isolated bubbles in the middle of a dry interior wall.
| Visual pattern | Most likely cause | Confirmation check | Immediate response |
|---|---|---|---|
| Brown-edged bubbles below a window | Rain intrusion or failed flashing | Inspect exterior caulk, sill, and flashing | Stop water entry before repainting |
| Small blisters near a bathroom ceiling | Condensation or weak ventilation | Check exhaust fan operation and surface dampness | Ventilate, dry, then inspect coating |
| Large soft bubbles near a pipe | Plumbing leak | Check adjacent fixtures and shutoff valves | Call a plumber if leakage is active |
| Fine bubbles across a fresh coat | Overworked roller or trapped air | Observe whether coating is still wet | Stop rolling and follow paint-label technique |
| Bubbles exposing old paint | Poor intercoat adhesion | Scrape a test area and inspect gloss | Remove weak coating and use bonding primer |
| Bubbles exposing brown drywall paper | Moisture or severe substrate damage | Check paper swelling and wall moisture | Dry the wall and replace damaged paper or drywall |
What Causes Paint to Bubble?
The main causes are water intrusion, condensation, rushed recoating, surface contamination, incompatible paint layers, excessive heat, and movement in the substrate. Identifying the cause matters because a cosmetic patch cannot correct a leak, chronic humidity, or a coating that never bonded.
Moisture From Leaks or Exterior Walls
Liquid water can enter from supply pipes, drain lines, roof leaks, window openings, foundation walls, or failed exterior sealants. Water softens drywall paper and joint compound, reduces coating adhesion, and may leave yellow, brown, or gray staining around the blister.
The U.S. Environmental Protection Agency’s moisture-control guidance prioritizes fixing water entry and drying materials before mold remediation or finish repair. A recurring stain, musty odor, swollen drywall, or bubble that enlarges after rain indicates a building-envelope or plumbing issue rather than ordinary paint failure.
Condensation in Bathrooms and Kitchens
Condensation forms when warm humid air contacts a wall or ceiling surface that is colder than the surrounding air. Repeated condensation can loosen paint even when no pipe or roof leak exists, particularly above showers, behind appliances, and on exterior corners.
Use the bathroom exhaust fan during bathing and for about 20-30 minutes afterward, if the fan vents outdoors and the manufacturer permits that operating pattern. A dehumidifier can reduce room humidity, but it cannot correct water entering through a wall or ceiling.
Recoating Before the First Layer Dries
A second coat applied before the first coat releases enough water and co-solvent can trap vapor under a drying surface film. The result may appear as blisters, wrinkles, soft patches, or peeling rather than a clean, uniform finish.
Many interior latex paints list a recoat time of approximately 2-4 hours under standard conditions, but high humidity, low temperature, poor airflow, and thick application extend that period. Follow the can rather than treating the shortest printed time as a guarantee.
Dirt, Grease, Dust, and Chalking
Paint bonds to the contaminant instead of the wall when grease, cooking residue, nicotine, soap film, dust, wax, or chalking pigment remains on the surface. The weak layer may lift under drying tension or normal cleaning.
Clean sound surfaces with the product recommended by the paint manufacturer. A mild detergent solution may be sufficient for ordinary dirt; stronger cleaners require rinsing and complete drying. Never leave cleaning residue beneath primer.
Glossy or Incompatible Previous Paint
Water-based latex paint does not reliably adhere to a glossy oil-based or alkyd coating without mechanical abrasion and an appropriate bonding primer. Older calcimine coatings, wallpaper paste, and unstable layers can also cause widespread failure.
A small test patch is useful. If scraping removes several old layers easily, the visible topcoat is not the only problem. Remove all loose material, dull glossy surfaces with suitable sandpaper, and use a primer compatible with both the existing surface and new finish.
Can Temperature or Humidity Make Paint Bubble?
Temperature and humidity can cause paint bubbling by slowing evaporation, increasing condensation, or expanding trapped air and solvent. Most interior latex products perform best when the air and surface remain within the label’s range, commonly about 50-90°F, with moderate humidity and no rapid temperature change.
| Condition | Typical workable range | Failure risk | Practical control |
|---|---|---|---|
| Interior latex application | 50-90°F | Slow drying below 50°F | Heat room and follow label |
| Interior alkyd application | 45-90°F | Poor flow in cold air | Maintain stable temperature |
| Relative humidity | 40-60% preferred | Extended drying above 70% | Ventilate or dehumidify |
| Recoat interval for latex | 2-4 hours typical | Solvent or water entrapment | Wait longer in humid rooms |
| Drywall substrate | Visibly dry and firm | Paper swelling or soft compound | Repair, ventilate, and retest |
| Wood substrate | Often below 12% moisture | Coating movement and blistering | Use a calibrated moisture meter |
The 12% figure is a useful field guideline for many painted wood surfaces, not a universal pass-fail rule for drywall. Drywall meters vary by material and calibration, so a reading should be interpreted alongside swelling, staining, room humidity, and the suspected water source.
Direct sunlight can heat one portion of a wall rapidly while the rest remains cooler. That uneven temperature can increase drying tension, especially when a thick coat is applied over a dark or glossy surface.
How Do You Diagnose Bubbling Paint?
Diagnose bubbling paint by mapping the affected area, checking moisture, opening one blister, and identifying the layer that failed. Do not begin scraping the entire wall until you know whether water, contamination, or a weak previous coating is responsible.
- Map the defect. Photograph the wall and mark the bubble edges with removable tape. Record whether the area grows after rain, showering, cooking, or use of a nearby fixture.
- Check for active moisture. Inspect plumbing, windows, ceilings, exterior walls, and HVAC condensate paths. A moisture meter can support the diagnosis, but it does not identify the source.
- Open one bubble carefully. Cut a small cross with a sharp utility knife. Look for dampness, staining, swollen paper, old paint, dust, grease, or a clean separation between paint layers.
- Test adhesion nearby. Make shallow crosshatch cuts in an inconspicuous area and apply painter’s tape. If firmly pressed tape removes sound paint, the coating system has broader adhesion failure.
- Classify the damage. Sound drywall with a local blister can be patched. Soft drywall, mold-contaminated material, or widespread delamination may require removal and replacement.
| What appears beneath the blister | Likely failure type | Meaning | Repair direction |
|---|---|---|---|
| Damp drywall or brown stain | Water damage | Moisture remains active or recent | Find source and dry materials |
| Brown paper lifting from gypsum | Wet drywall paper | Surface integrity is compromised | Remove loose paper and seal or replace |
| Old glossy paint layer | Intercoat adhesion | New coating did not bond | Sand, clean, and prime |
| Powdery white residue | Chalking or masonry salts | Substrate is depositing material | Remove residue and investigate moisture |
| Greasy or dark film | Contamination | Paint bonded to residue | Degrease, rinse, dry, and prime |
| Firm bare plaster | Local coating failure | Substrate may remain sound | Patch, seal, and repaint |
How Do You Fix Bubbling Paint?
Fix bubbling paint by eliminating moisture, removing every loose layer, cleaning and drying the substrate, repairing damage, priming, and applying compatible finish coats. A localized repair typically takes 1-3 days because joint compound, primer, and paint need separate drying periods.
Before You Start
| Item | Typical requirement | Why it matters |
|---|---|---|
| Safety equipment | N95 respirator, eye protection, gloves | Controls dust and cleaner exposure |
| Scraper | 1-2 inch stiff putty knife | Removes loose coating |
| Sandpaper | 120-150 grit, then 180-220 grit | Levels edges and patching compound |
| Joint compound | 1 pint for a small patch | Rebuilds shallow craters |
| Primer | 1 quart for local work | Seals porous or stained repairs |
| Finish paint | 1 quart minimum practical quantity | Allows two thin matching coats |
| Drying time | 24-72 hours typical | Depends on moisture and compound thickness |
Step 1: Stop the Water and Let the Wall Dry
Repair the plumbing, roof, window, siding, flashing, or ventilation problem before applying filler. Use fans and controlled ventilation, but avoid directing intense heat at drywall because rapid drying can crack joint compound or spread moisture into adjacent materials.
You will know the condition is improving when the stain stops expanding, the wall feels firm, and moisture readings or visual checks remain stable over at least 24 hours. Painting while the substrate is still damp is the most common reason a technically neat repair fails.
Step 2: Scrape Back to Firm Paint
Wear eye protection and a respirator while scraping. Hold the putty knife at a low angle and remove bubbles, flakes, and hollow-sounding paint until the remaining edge cannot be lifted with light pressure.
Do not stop at the visible blister perimeter. Extend removal several inches into the surrounding area if the tape test or gentle scraping reveals weak adhesion. The common mistake is preserving a thin loose edge because it makes the patch smaller; that edge later telegraphs through the new paint.
Step 3: Clean and Prepare the Surface
Remove dust and contamination with a compatible cleaner, then rinse when the product requires it. Allow the wall to dry completely before sanding, because sanding damp joint compound or softened drywall paper creates a larger damaged area.
For grease, cooking residue, or nicotine, a stronger degreasing approach may be necessary. Never mix cleaning chemicals. A clean surface should feel dry and firm rather than slick, powdery, or tacky.
Step 4: Repair the Crater or Damaged Paper
Fill shallow depressions with lightweight joint compound in thin coats, allowing approximately 24 hours for a typical coat to dry under normal indoor conditions. If drywall paper is torn but the gypsum core is firm, trim loose fibers, seal the exposed paper with a compatible problem-surface primer, and then skim.
Replace drywall when the panel is soft, swollen, mold-contaminated, or structurally degraded. Joint compound can restore a profile, but it cannot restore gypsum strength or remove concealed contamination.
Step 5: Sand and Remove Dust
Sand the fully dry patch with 180-220 grit paper until the transition feels flat under your fingertips. Use a bright side light to reveal ridges, then remove dust with a clean damp cloth that does not wet the patch excessively.
A visible ridge after priming is easier to correct than a ridge hidden beneath two finish coats. Do not polish the patch to a glossy surface, since primer needs a clean, suitable profile for adhesion.
Step 6: Prime the Entire Repair
Prime exposed drywall, joint compound, stained areas, or old glossy paint with a product designed for that substrate. Use a bonding primer for glossy or difficult coatings and a stain-blocking primer for persistent water marks, smoke, or tannin bleed.
Allow the primer to dry for the label’s stated period, commonly 2-4 hours for many water-based products, then inspect for flashing, pinholes, or remaining porosity. A single primer coat may be insufficient over severe stains or porous paper.
Step 7: Apply Two Compatible Finish Coats
Stir the paint gently, load the roller evenly, and apply two thin coats rather than one heavy coat. Maintain the label’s recoat interval, keep room conditions stable, and feather beyond the repair only when the existing finish allows a reasonable blend.
You will know the repair is ready when the surface has uniform sheen, no visible edge under side lighting, and no soft or lifting area after the final coat dries. The final cure may take several days even when the surface feels dry.
Which Repair Is Best for Bubbling Paint?
Localized patching is best for a small, isolated blister on a dry, firm wall. Full skim coating suits widespread cosmetic failure over sound drywall, while substrate replacement is the correct choice when moisture has swollen, softened, or contaminated the wall.
| Repair option | Typical DIY cost | Typical professional cost | Typical duration | Best condition |
|---|---|---|---|---|
| Local scrape and patch | $20-$75 | $150-$500 | 1-3 days | One or two dry blisters |
| Several wall patches | $40-$125 | $400-$1,000 | 2-4 days | Scattered adhesion defects |
| Full skim coat | $100-$300 | $800-$2,500 | 3-6 days | Broad surface irregularity |
| Drywall section replacement | $75-$250 | $600-$2,000 | 2-5 days | Soft or swollen drywall |
| Mold and moisture remediation | $200-$1,500 DIY materials vary | $1,000-$5,000 or more | 3 days to several weeks | Recurring water or contamination |
These are typical U.S. planning ranges, not fixed bids. Labor rates, access, paint matching, containment, drywall thickness, and the source of moisture can change the final price substantially.
When Is Repainting a Bad Idea?
Repainting is a bad idea when the wall remains damp, the bubble is expanding, drywall paper is swollen, mold is present beyond a small surface area, or the surrounding coating fails an adhesion test. New paint adds a surface layer without restoring the failed bond beneath it.
Professional evaluation is appropriate after flooding, sewage intrusion, repeated roof leaks, or suspected mold inside wall cavities. The EPA advises that porous materials with extensive mold growth or water damage may need removal rather than surface cleaning.
What Repair Mistakes Make Bubbles Return?
The most damaging mistakes are painting over moisture, leaving loose edges, skipping primer, applying thick coats, and using incompatible paint over a glossy surface. Each mistake preserves the original failure mechanism beneath a new decorative layer.
- Painting over active bubbles: Locate and stop the water source first.
- Popping without scraping: A puncture leaves a weak perimeter that can continue lifting.
- Skipping the adhesion test: Local repairs fail when the surrounding wall is also loose.
- Applying joint compound without primer: Porous compound can absorb binder unevenly and create visible flashing.
- Ignoring cleaner residue: Detergent left on the wall acts as a release layer.
- Using heat to force drying: Rapid surface drying can trap moisture underneath.
- Matching color before matching sheen: A flat patch beside satin paint remains visible even when the color is accurate.
A practitioner rule is to spend more time finding the water path than repairing the paint crater. The visible defect is often several inches away from the entry point, particularly around windows and roof transitions.
What If Bubbling Appears in a Bathroom, Ceiling, or Old House?
Bathroom bubbling usually requires humidity control, ceiling bubbling requires an overhead leak inspection, and old-house bubbling requires coating and lead precautions. The same scraping method does not suit every location because water direction, substrate type, and hazardous paint risk differ.
Bathroom Walls
Check the exhaust fan, shower enclosure, grout, caulk, and plumbing access panel. Use a bathroom-rated acrylic coating only after the substrate is dry and stable; mildew-resistant paint cannot compensate for persistent condensation or water intrusion.
Ceilings
Inspect the room above, attic, roof, HVAC drain, and bathroom exhaust duct. A yellow-brown ceiling bubble may indicate a leak even if the ceiling feels dry today, because the original water may have evaporated while staining and adhesion damage remained.
Exterior-Facing Walls
Inspect siding, masonry joints, window flashing, weep paths, and gutters. Interior paint may bubble from rain penetration through the wall assembly, so an interior patch without exterior repair usually has a short service life.
Homes Built Before 1978
The U.S. Department of Housing and Urban Development and EPA identify renovation in pre-1978 homes as a lead-dust risk when painted surfaces are disturbed. Test suspect layers or hire an EPA-certified renovation firm before sanding or scraping; ordinary dust masks do not provide lead-safe containment.
How Can You Prevent Paint Blisters?
Prevent paint blisters by controlling water, preparing the substrate, using compatible coatings, and respecting product conditions. Prevention starts before the roller touches the wall and includes ventilation, cleaning, abrasion, primer selection, and adequate drying time.
- Repair leaks and failed exterior sealants promptly.
- Keep indoor relative humidity near 30-50% when practical.
- Run bathroom ventilation during and after showers.
- Wash greasy kitchen walls before sanding or priming.
- Remove chalking, loose paint, wallpaper residue, and dust.
- Sand glossy coatings and use a bonding primer.
- Apply paint only within the product’s air and surface-temperature range.
- Extend drying time in humid, cold, or poorly ventilated rooms.
- Use thin, even coats rather than trying to cover in one pass.
- Store and acclimate paint according to the manufacturer’s instructions.
The counterintuitive point is that “dry to the touch” does not mean “ready for another coat.” A surface can feel dry while water or co-solvent remains inside the film, particularly after a heavy application in a humid room.
FAQ
Can I paint over a small paint bubble?
No. Scrape the bubble and surrounding loose paint first, then identify whether moisture or adhesion caused the defect. If the wall is dry and firm, patch the crater, sand it level, prime the repair, and apply compatible finish paint.
Why is new paint bubbling while I roll it?
New paint can bubble during rolling when the roller is overworked, the coating is too thick, the wall is highly porous, or the paint has been shaken and contains entrained air. Stop rolling, allow the film to settle, and use the manufacturer’s application method after correcting the surface condition.
Does bubbling paint always mean mold?
No. Bubbling can result from solvent entrapment, grease, dust, glossy paint, or excessive heat without mold. Musty odor, persistent dampness, dark growth, flooding, and recurring stains increase the likelihood of a moisture-related problem that needs further inspection.
Should I use oil-based primer on bubbling paint?
Use an oil-based or shellac-based primer only when its specific function matches the problem, such as difficult stains, old coatings, or certain exposed wood surfaces. A water-based bonding or stain-blocking primer may be more suitable for other substrates, so check compatibility and ventilation requirements.
How long should bubbling paint dry before repair?
After correcting the water source, allow the wall to dry until it is firm, unstained from active moisture, and stable during repeated checks. A small surface repair may need 24-72 hours before painting, while wet insulation, masonry, or damaged wall cavities can require much longer.
Can a renter repair bubbling wall paint?
A renter can photograph the defect, protect the area, and report suspected leaks or moisture to the landlord before scraping. Cosmetic patching may be reasonable with written permission, but plumbing, roof, mold, and wall-cavity problems require property-owner action.
The Bottom Line
Why is paint bubbling on wall? The usual answer is moisture or inadequate adhesion beneath the paint film, with heat, humidity, contamination, rushed recoating, and incompatible coatings acting as additional triggers. Find the source, remove weak paint, dry and repair the substrate, prime the exposed area, and repaint only after the wall is stable.