How to Get Rid of Old House Smell, Fix the Source
To get rid of old house smell, find and correct moisture or contamination first, then dry the building, remove odor-holding materials, clean safe surfaces, filter the air, and seal remaining porous substrates. A practical sequence takes 2-7 days for a localized problem and costs about $100-$1,200 before professional remediation.
Key Facts at a Glance
- Old house smell is a mixture of microbial volatile organic compounds, smoke residue, pet contamination, dust, and aging porous materials.
- EPA recommends keeping indoor relative humidity below 60%, ideally between 30% and 50%; 40%-50% is a practical target for odor control.
- HEPA filters capture mold spores and dust, while activated carbon reduces gaseous odors; neither replaces leak repair.
- Never mix vinegar, borax, hydrogen peroxide, bleach, or ammonia in one cleaning solution.
- Carpet padding, damp drywall, insulation, wallpaper paste, and crawlspace materials often hold more odor than painted trim.
- Ozone generators are unsafe around people and animals and can damage rubber, foam, finishes, and electronics.
What Causes Old House Smell?
Old house smell usually comes from moisture interacting with porous building materials, although smoke, pets, drains, and stagnant air can create a similar odor. Mold and bacteria release microbial volatile organic compounds, or mVOCs, while damp carpet, wood, plaster, wallpaper paste, and insulation absorb and later re-release those gases.
The smell is therefore a source problem rather than a fragrance problem. A basement may contain active mold, while an otherwise dry living room may hold decades of tobacco smoke in plaster and woodwork. Oxidized wood finishes, dust, rodent contamination, and a dry or poorly trapped drain can add separate odor compounds.
The U.S. Environmental Protection Agency states that “Mold spores are always present in the air.” Spores become a building problem when water, nutrients, and time allow growth. The odor itself does not prove a dangerous mold species, and odor strength cannot measure contamination size.
| Odor description | More likely source | First inspection area | Typical response |
|---|---|---|---|
| Earthy, damp, mushroom-like | Mold or mildew | Basement corners, carpet edges, crawlspace | Moisture repair and material removal |
| Sweet, stale, dusty | Old textiles or wood finishes | Drapes, upholstery, closets, attic | Textile cleaning and source reduction |
| Acrid, tar-like, smoky | Tobacco, coal, or wood smoke | Plaster, ceilings, cabinets, HVAC returns | Degreasing, cleaning, odor-blocking primer |
| Sour, ammonia-like | Pet urine or rodent waste | Subfloor, wall voids, insulation | Containment and enzymatic or professional cleaning |
| Sewer-like or rotten-egg odor | Dry trap, sewer gas, plumbing issue | Floor drains, unused sinks, basement plumbing | Refill traps and repair plumbing |
Is Old House Smell Always Mold?
Old house smell is not always mold, but a persistent earthy odor near water damage should be treated as a possible moisture problem until inspection rules it out. Mold may be hidden behind drywall, below flooring, inside insulation, under sinks, or around HVAC components.
A dry home with smoky yellowing on ceilings points toward historic tobacco or combustion residue. A smell that appears when the furnace or air conditioner starts suggests contamination near the return, filter cabinet, evaporator coil, condensate pan, or duct insulation. A localized odor under a bathroom may indicate a plumbing leak rather than airborne mold.
Do not rely on a home mold test as the first decision tool. Surface and air samples can miss concealed growth, and a positive result does not identify the water source. EPA guidance emphasizes visual inspection and moisture correction over routine sampling when contamination is visible.
What Humidity Level Stops Musty Odors?
Relative humidity below 60% limits the moisture available for microbial growth, and EPA identifies 30%-50% as the preferred indoor range. A 40%-50% target is usually practical because it reduces condensation risk without excessively drying wood flooring, furniture, skin, or historic plaster.
Measure each level with a digital hygrometer rather than trusting a whole-house thermostat reading. Record readings morning and evening for at least two days, especially after rain, bathing, cooking, or air-conditioning cycles. Humidity above 55% for long periods deserves investigation; a short spike after a shower is less significant than a basement remaining at 70%.
A dehumidifier lowers air moisture but cannot stop water entering through a foundation wall. Drying the air before repairing the leak creates a temporary improvement and often causes the odor to return when weather changes.
| Reading or condition | Interpretation | Recommended action | Recheck interval |
|---|---|---|---|
| 30%-50% RH | Preferred indoor range | Maintain ventilation and HVAC operation | Morning and evening |
| 51%-59% RH | Watch range | Inspect condensation and improve drying | Within 48 hours |
| 60%-69% RH | Elevated moisture load | Use dehumidification and locate source | Daily |
| 70% RH or higher | High growth and condensation risk | Investigate leaks, crawlspace, or HVAC | Same day |
| Visible water or wet material | Active source regardless of RH | Stop water and dry promptly | Within 24 hours |
How to Get Rid of Old House Smell Safely
The reliable method has six stages: stop moisture, dry the structure, remove contaminated porous materials, clean salvageable surfaces, treat the air, and seal residual odor only after the substrate is dry. The most important factor is source removal, because filtration and fragrance cannot compensate for a wet wall, saturated pad, or leaking crawlspace.
Before You Start
| Requirement | Typical specification | Cost in USD | Purpose |
|---|---|---|---|
| Digital hygrometer | Two room-level units, 30%-90% RH range | $15-$40 | Locate humidity differences |
| Dehumidifier | 35-50 pint per day for one basement zone | $180-$450 | Reduce sustained moisture |
| HEPA vacuum | Sealed unit with disposable bag | $150-$400 | Capture settled dust and spores |
| Respiratory protection | N95 minimum for light cleanup | $2-$5 each | Reduce inhalation exposure |
| Gloves and eye protection | Nitrile gloves and sealed goggles | $15-$30 | Protect skin and eyes |
| Carbon air cleaner | Replaceable carbon plus HEPA filter | $150-$600 | Reduce particles and gases |
| Cleaning supplies | Detergent, microfiber cloths, labeled disinfectant | $30-$100 | Clean nonporous surfaces |
Avoid DIY mold cleanup when the affected area is extensive, sewage-contaminated, inside HVAC systems, or associated with severe respiratory symptoms. EPA commonly uses about 10 square feet as a point at which homeowners should consider professional guidance, although building materials, occupants, and contamination type can change that decision.
Step 1: Find and Stop Moisture
Start with the strongest odor point and inspect outward for water entry, condensation, or organic contamination. Check plumbing joints, dishwasher hoses, water heaters, window wells, roof penetrations, gutters, foundation walls, sump systems, crawlspaces, and HVAC drain pans.
Use a flashlight and moisture meter where appropriate, but do not drill into walls casually. Look for staining, swollen trim, peeling paint, efflorescence, soft flooring, rusted fasteners, and insect activity. Photograph damage and record dates if an insurance claim or landlord notification may be necessary.
You will know Step 1 worked when the leak is repaired, wet materials are drying, and humidity remains below 60% without constant emergency dehumidification. The common mistake is cleaning the visible stain while leaving the roof, plumbing, or drainage defect active.
Step 2: Dry and Ventilate the Home
Set a dehumidifier to maintain approximately 40%-50% RH, and drain it continuously into a suitable floor drain or condensate pump when possible. Use fans to move air across exposed surfaces, but do not blow contaminated dust from a moldy area into occupied rooms.
Open windows only when outdoor air is actually drier than indoor air. Cross-ventilation during a humid summer day can increase indoor moisture, while winter ventilation often dries a building quickly. Keep HVAC filters clean and maintain normal system operation unless a professional identifies contamination inside the equipment.
EPA advises drying wet materials within 24-48 hours to reduce mold growth risk. That timeframe is not a guarantee: dense wood, wall cavities, carpet padding, and insulation may remain wet after the surface feels dry.
You will know Step 2 worked when the hygrometer reaches the target range for 24-48 hours and damp materials show no continuing moisture increase. The common mistake is aiming for 30%-40% everywhere, which can damage sensitive wood and historic finishes in dry climates.
Step 3: Decide What to Remove
Remove materials that are porous, visibly moldy, sewage-contaminated, swollen, delaminated, or still odorous after complete drying. Carpet padding, wet fiberglass insulation, moldy ceiling tiles, heavily contaminated drywall, and deteriorated particleboard rarely justify repeated cleaning.
Cleanable materials include sound solid wood, metal, glass, ceramic tile, and many washable synthetic textiles. Historic wool, paper, leather, plaster, and painted wood require small-area testing because water, heat, solvents, and alkaline products can permanently change them.
Bag or wrap contaminated debris before carrying it through clean rooms. Do not tear out suspect drywall without controlling dust and checking for electrical, plumbing, or lead-paint hazards in older houses.
You will know Step 3 worked when the strongest odor drops substantially after removal and no damp backing or hidden debris remains. The common mistake is keeping a ten-year-old carpet because the top fibers look clean while the pad and subfloor retain odor.
Step 4: Clean Salvageable Materials
Clean hard, nonporous surfaces with detergent and water, then rinse and dry completely. For small areas of surface mold, follow the label of an EPA-registered product suitable for that material, or use detergent where disinfection is unnecessary. Never combine vinegar, borax, hydrogen peroxide, bleach, or ammonia.
Bleach is not a universal mold solution. It can discolor materials, irritate the lungs, and add moisture; porous wood, plaster, and drywall may remain contaminated beneath the surface. The right product depends on the substrate and the specific contamination.
Launder washable curtains, cushion covers, and clothing using the manufacturer’s instructions. A professional textile cleaner is safer for antique wool, silk, fragile upholstery, and smoke-damaged fabrics. Keep cleaned textiles out of the room until the odor source is controlled.
You will know Step 4 worked when cleaned surfaces remain odor-free after drying and overnight closure of the room. The common mistake is soaking plaster or wood, which drives moisture into the material and prolongs the microbial cycle.
Step 5: Filter the Air
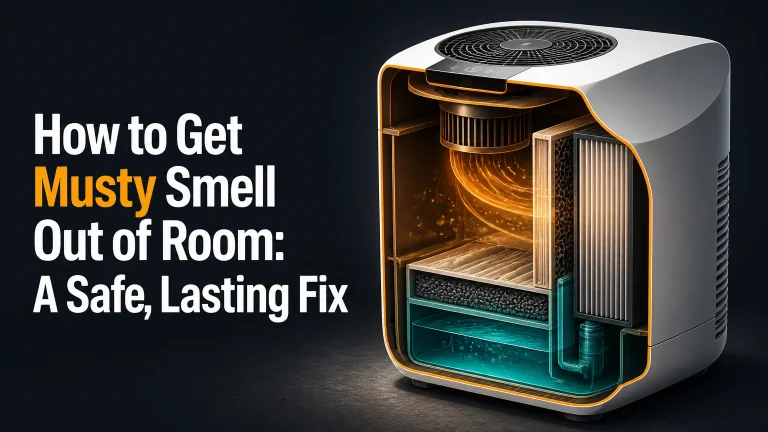
Use a sealed HEPA purifier to capture airborne particles and spores, then choose a model with substantial activated carbon for gaseous odors. HEPA filtration addresses particles, not most odor gases; thin carbon sheets in small desktop units have limited capacity.
Choose an air cleaner by clean air delivery rate, room size, noise, replacement-filter price, and carbon mass. The often-quoted five-pound carbon minimum is a useful heavy-duty benchmark for serious odor control, not a universal certification requirement. A small closet may need less, while a large basement may need multiple units.
| Air-cleaning method | Main target | Useful specification | Typical cost | Limitation |
|---|---|---|---|---|
| HEPA purifier | Dust and airborne spores | CADR matched to room size | $150-$500 | Limited gas adsorption |
| Carbon purifier | Odor compounds and VOCs | 2-5 lb loose carbon for stronger odors | $200-$600 | Carbon saturates |
| HVAC filter | Particles in circulating air | MERV 11-13 if system supports it | $15-$40 | Does not repair duct contamination |
| Box fan filter | Low-cost dust reduction | MERV 13 filter, sealed edges | $35-$80 | Minimal gas control |
| Baking soda bowl | Very small odor load | 1-2 cups in a closet | $3-$8 | Ineffective for room-scale sources |
Replace carbon when odor returns near the unit or according to the manufacturer’s interval, often every 3-12 months depending on loading. A purifier improves air quality while remediation continues; it does not prove that hidden mold is gone.
Step 6: Seal Residual Odors
Apply an odor-blocking primer only after the substrate is repaired, clean, dry, and free of active mold. Shellac-based primers block smoke and severe embedded odors effectively on suitable wood and drywall, while oil-based products may offer a slower-drying alternative.
Test a small inconspicuous area first. Shellac products have strong solvent vapors, require ventilation, and may need compatible topcoats. Follow the product’s label for surface preparation, drying time, respirator requirements, and disposal.
Do not coat wet wood, active mold, or historic plaster simply to hide evidence. On old lime plaster and breathable masonry, an impermeable coating can trap moisture and accelerate deterioration. A preservation specialist should assess significant historic finishes before encapsulation.
You will know Step 6 worked when the room remains neutral after the primer cures and humidity stays stable through a rain event or HVAC cycle. The common mistake is priming every wall before determining whether the smell originates below the floor or inside a wall cavity.
Which Odor-Removal Option Works Best?
Source removal and moisture repair provide the highest chance of lasting success, while dehumidifiers and air cleaners provide support. Primers help with residual smoke or embedded odor after remediation; ozone and fragrance products are poor first choices because they add risk or mask the diagnostic smell.
| Option | Best application | Typical cost | Timeframe | Main limitation |
|---|---|---|---|---|
| Leak repair and drying | Basement, roof, plumbing, crawlspace | $100-$2,000+ | 1-14 days | Requires finding the source |
| Porous-material removal | Wet carpet, pad, drywall, insulation | $50-$2,000 | 1-3 days | Disposal and replacement cost |
| Dehumidifier | Sustained RH above 60% | $180-$450 | 24 hours onward | Ongoing energy and maintenance |
| HEPA plus carbon purifier | Airborne particles and residual gases | $150-$600 | Hours to weeks | Filters have finite capacity |
| Odor-blocking primer | Dry smoke-stained or porous surfaces | $40-$100 per gallon | 1-3 days | Permanent coating and ventilation |
| Professional remediation | Hidden, extensive, or HVAC contamination | $1,500-$6,000+ | 3-7 days typical | Higher upfront cost |
| Ozone treatment | Restricted vacant-space specialty use | $300-$1,500 | 1-3 days | Occupancy and material hazards |
Ozone is not a safe shortcut for an occupied home. The EPA warns that ozone can irritate the respiratory system, and ozone concentration must be controlled with specialized equipment and clearance testing. Hydroxyl systems also require professional assessment because performance varies with humidity, temperature, and source location.
What Does Odor Removal Cost?
A localized musty odor commonly costs $100-$600 for supplies, a dehumidifier, limited material removal, and filtration, while hidden leaks, crawlspace work, HVAC contamination, or whole-house remediation can exceed $6,000. Actual pricing depends more on demolition and moisture repair than on the odor itself.
| Project scope | Typical labor and materials | Typical duration | Likely decision |
|---|---|---|---|
| One closet or small room | $50-$300 | 1-3 days | DIY if dry and accessible |
| Basement humidity problem | $300-$1,500 | 2-7 days | Dehumidification plus leak repair |
| Carpet and pad replacement | $800-$3,000 | 1-3 days | Remove when padding remains odorous |
| Crawlspace moisture control | $1,500-$6,000 | 3-10 days | Contractor assessment often appropriate |
| HVAC or concealed growth | $500-$6,000+ | 2-7 days | Licensed HVAC or remediation contractor |
| Whole-house smoke odor | $2,000-$10,000+ | 5-14 days | Cleaning, sealing, and ventilation plan |
Treat unusually low estimates with caution when they include fogging or fragrance but exclude moisture repair, demolition, disposal, or post-work verification. Ask contractors for the source diagnosis, affected materials, containment plan, drying records, and exact products.
Why Does the Smell Keep Returning?
Recurring odor usually means moisture, contaminated porous material, or an air pathway remains unresolved. If the smell intensifies after rain, inspect roof flashing, gutters, downspouts, window wells, foundation walls, and exterior grading before buying another purifier.
A smell that appears when HVAC starts often points to the return plenum, filter cabinet, evaporator coil, condensate pan, or nearby insulation. Change a dirty filter, but do not assume a MERV 13 filter cleans contaminated ducts. An HVAC professional should inspect the system without spreading debris into occupied rooms.
Ground-floor and stairwell odors can result from the stack effect, in which rising warm air pulls air from a basement or crawlspace through gaps around plumbing, wiring, stairs, and floorboards. Sealing air leaks helps, but crawlspace water and soil moisture must be corrected first.
| Symptom timing or location | Likely source | Immediate check | Professional trigger |
|---|---|---|---|
| Returns after rain | Roof, windows, foundation, gutters | Inspect stains and drainage | Repeated wetting or wall cavity |
| Strongest below stairs | Basement or crawlspace air | Check RH and floor penetrations | Persistent source after drying |
| Starts with HVAC | Coil, pan, ducts, return cavity | Inspect filter and condensate | Odor throughout supply registers |
| Strongest under carpet | Pad, subfloor, pet contamination | Lift a small edge safely | Damp, stained, or extensive pad |
| Concentrated near sink | Plumbing leak or cabinet base | Check joints and cabinet floor | Soft wood or concealed leak |
| Present in dry rooms | Smoke, textiles, aging finishes | Check yellowing and fabrics | Whole-house embedded odor |
Situational Variations
Historic Homes With Plaster and Wood
Historic homes need low-moisture cleaning, staged testing, and preservation advice before sealing. Horsehair plaster, lime plaster, shellac finishes, antique flooring, and old wallpaper can crack, stain, warp, or lose historic value when aggressively washed or coated.
Remove the moisture source, stabilize humidity, and clean a small test area first. Avoid steam cleaning antique wool and avoid covering breathable masonry with an impermeable film without a preservation assessment. A conservator or building-science professional can distinguish historic material aging from active water damage.
Renters and Apartments
Renters should document odor, visible damage, humidity readings, dates, and maintenance requests before removing flooring or painting. Use portable dehumidification, washable textiles, and a carbon-containing purifier when permitted, but do not perform demolition that could affect the lease or conceal a landlord’s water problem.
Do not use ozone in an occupied apartment. Notify property management promptly when odor comes from a shared wall, ceiling, HVAC system, or plumbing chase.
Homes Being Sold
Sellers should correct the source and retain invoices, moisture readings, photographs, and remediation documentation. Fragrance, ozone, or a last-minute coat of primer can create disclosure and inspection problems if the underlying water damage remains.
A buyer or inspector may notice odor after the house is closed overnight. Test the home under normal conditions rather than relying on an open-window walkthrough.
Common Mistakes and How to Fix Them
- Using candles or plug-in fragrance: Remove masking products, ventilate safely, and locate the source while the odor remains detectable.
- Mixing cleaning chemicals: Stop immediately, leave the area, and ventilate. Never combine bleach with acids, ammonia, or peroxide.
- Running fans on visible mold: Stop air movement that spreads contamination, isolate the area, and use a sealed HEPA vacuum or professional containment.
- Keeping wet carpet: Lift the carpet edge and inspect the pad and subfloor. Replace materials that remain damp or odorous after drying.
- Priming before drying: Remove the coating where practical, repair moisture, and confirm stable RH before recoating.
- Trusting one humidity reading: Measure basement, living area, closets, and crawlspace separately at different times.
- Using bowls of charcoal as the main treatment: Keep them only for small enclosed spaces; use source repair and properly sized carbon filtration for rooms.
When Should You Hire a Professional?
Hire a qualified remediation or building professional when contamination exceeds roughly 10 square feet, sewage or floodwater is involved, odor comes from HVAC equipment, occupants have significant respiratory vulnerability, or the source is concealed. Professional help is also appropriate when the smell persists after documented drying and material removal.
Choose contractors who explain containment, negative air, drying verification, disposal, and post-remediation cleaning. Mold testing alone is not remediation, and a fogging treatment without source repair cannot provide a durable solution.
People with asthma, chronic lung disease, immune suppression, or severe mold sensitivity should avoid disturbing contaminated materials. Seek medical advice for persistent wheezing, shortness of breath, fever, or worsening symptoms, and treat urgent breathing difficulty as an emergency.
Frequently Asked Questions
Will opening windows remove an old house smell?
Opening windows removes odor temporarily when outdoor air is cleaner and drier than indoor air. Ventilation cannot remove odor stored in carpet padding, plaster, wood, or insulation, and humid outdoor air can worsen a basement problem. Use a hygrometer to compare indoor and outdoor conditions before extended airing.
Does vinegar remove musty odors from a house?
Vinegar may reduce some surface odors on compatible, washable materials, but it does not remove hidden mold, repair leaks, or clean contaminated insulation. Never mix vinegar with bleach, peroxide, or other cleaners. Test diluted products on inconspicuous areas and dry the material promptly.
How long does old house smell take to disappear?
A small, surface-level odor may improve within 24-72 hours after cleaning and drying. Embedded smoke, damp subfloors, crawlspace contamination, and wall-cavity sources can take one to several weeks after repair. The odor should steadily decline rather than disappear briefly and return after rain or HVAC operation.
Can baking soda absorb a whole-house musty smell?
Baking soda has limited value in a small, enclosed space such as a drawer or closet, but bowls cannot meaningfully treat a whole-house odor source. Baking soda does not dry a wet wall, capture substantial mVOCs, or remove contaminated carpet padding. Use it only as minor supplemental control.
Should you replace an old carpet because of the smell?
Replace carpet when the pad is damp, visibly moldy, pet-contaminated, delaminated, or still odorous after professional cleaning and complete drying. Sound carpet in a dry home may be salvageable through professional extraction. Always inspect the subfloor because new carpet will also absorb odor from a contaminated base.
The Bottom Line
To get rid of old house smell permanently, repair moisture entry, dry the building to approximately 40%-50% relative humidity, remove odor-holding porous materials, clean compatible surfaces safely, and use HEPA plus activated carbon filtration as support. Seal dry residual odors only after diagnosis. If odor returns after rain, follows HVAC operation, or remains after material removal, investigate concealed building or air-system contamination instead of masking it.