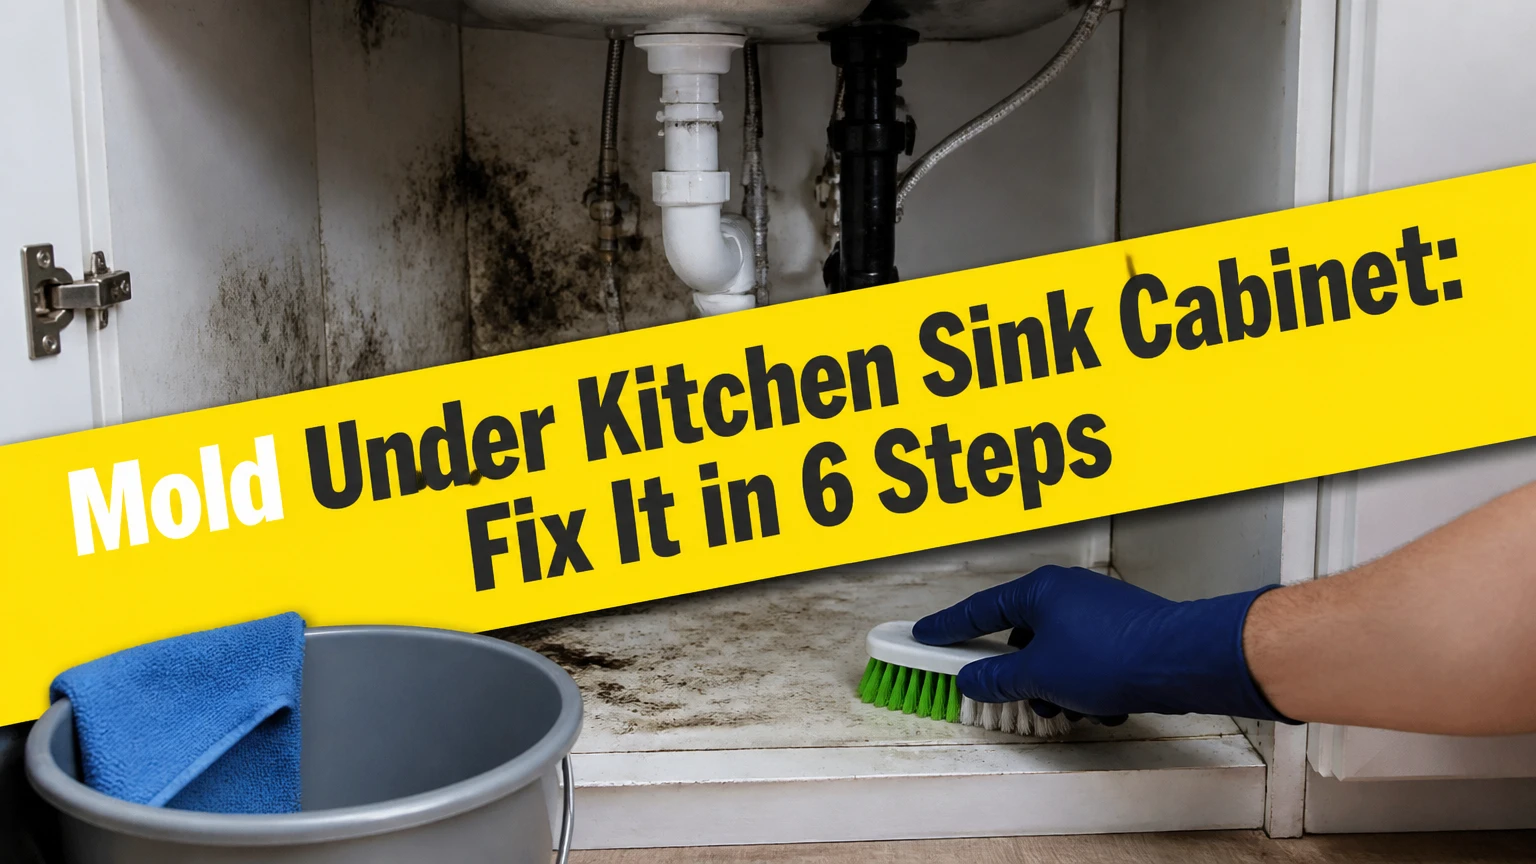
Mold Under Kitchen Sink Cabinet: Fix It in 6 Steps
Mold under a kitchen sink cabinet usually indicates a current or previous moisture problem involving plumbing, the sink rim, dishwasher hose, or damp cabinet material. Small, visible growth on sound surfaces can often be cleaned safely, but swollen particleboard, hidden wall growth, sewage contamination, or an area over 10 square feet usually requires professional assessment.
Key facts at a glance
Mold under a kitchen sink cabinet can return within days if the leak or condensation source remains unresolved.
The EPA generally allows small household mold areas under approximately 10 square feet to be handled by homeowners, subject to material and health conditions.
Porous particleboard, MDF, drywall, and swollen cabinet flooring often need removal rather than surface cleaning.
Bleach is a poor choice for porous wood because it does not reliably penetrate deeply enough to remove embedded growth.
Complete drying matters more than the brand of cleaner; cabinet materials should be dry before sealing, painting, or restocking.
A typical small DIY cleanup costs $30-$75 and takes about 2-4 hours of active work, plus 24-48 hours of drying.
What Is Mold Under a Kitchen Sink Cabinet?
Mold under a kitchen sink cabinet is fungal growth on or inside cabinet flooring, side panels, drywall, trim, plumbing insulation, or accumulated debris. Mold requires moisture, a food source such as wood fibers or dust, and enough time for spores to germinate. Darkness alone does not cause mold, but an enclosed cabinet hides leaks and slows evaporation.
Common colors include white, green, gray, brown, and black. Color cannot identify a species or determine toxicity. Stachybotrys chartarum, often called black mold, is only one possible species, and visual inspection cannot confirm it.
The odor may come from microbial volatile organic compounds, damp wood, or stagnant water. A musty smell without visible growth often means mold is behind the cabinet back, beneath the floor, around a wall opening, or inside wet insulation.
The EPA states, “The key to mold control is moisture control.” That principle determines whether cleaning succeeds. Mold removal without moisture correction is temporary surface treatment.
Why Does Mold Form Under a Kitchen Sink?
Plumbing leaks, sink-rim failures, and trapped humidity are the main causes of mold under a kitchen sink cabinet. The most common hidden source is a slow drip that wets the cabinet floor repeatedly rather than one large flood.
Inspect these locations in order:
- P-trap joints: Run water for two minutes, then hold a dry tissue under each connection.
- Supply shutoff valves: Look for mineral deposits, corrosion, or droplets around compression nuts.
- Flexible supply lines: Check the full hose length, especially where it bends behind the cabinet.
- Sink basket strainer: Water can leak through the drain flange and run beneath the sink rim.
- Faucet hoses: Pull-out and pull-down faucet hoses may spray inside the cabinet during use.
- Dishwasher connection: Examine the drain hose, air gap, and inlet valve if the dishwasher is adjacent.
- Garbage disposal: Check the discharge elbow, dishwasher nipple, and bottom seal.
- Cabinet-to-wall gap: Water may travel through a pipe opening from a leak behind the wall.
- Condensation: Cold supply pipes can sweat in humid kitchens, especially during summer.
Place dry paper under each suspected joint and check it after normal sink use. A moisture meter can help locate wet plywood, but readings vary by species, finish, and meter type, so compare the suspect area with an unaffected cabinet panel.
Is DIY Cleanup Safe for Your Cabinet?
DIY cleanup is reasonable for a small area on accessible, structurally sound material when no sewage overflow occurred and no vulnerable person will be exposed. The EPA’s approximately 10-square-foot guideline is a practical screening threshold, not a guarantee that every smaller project is safe.
| Condition | DIY decision | Professional trigger | Immediate action |
|---|---|---|---|
| Surface growth, 1-10 sq. ft., sound plywood | Usually suitable | Growth returns after source repair | Isolate cabinet and fix moisture |
| Swollen MDF or particleboard, 1-4 sq. ft. | Cleaning may fail | Crumbling, delamination, sagging | Remove damaged panel or cabinet floor |
| Visible growth above 10 sq. ft. | Avoid DIY | Large-area contamination | Obtain remediation assessment |
| Sewage or drain-backup water | Avoid DIY | Any contaminated porous material | Stop use and contact restoration contractor |
| Occupant with severe asthma or immune suppression | Avoid DIY exposure | Any visible household mold | Have the person leave the area |
| Odor with no visible source | Limited inspection only | Wall, floor, or cavity involvement | Investigate hidden moisture |
People with asthma, severe allergies, chronic lung disease, or immune suppression should not perform mold disturbance. The CDC and EPA both emphasize reducing exposure, controlling dampness, and using professional help when health risk or contamination exceeds household cleaning capacity.
Before You Start: Supplies, Cost, and Time
A small cabinet cleanup typically requires $30-$75 in supplies, 2-4 hours of active labor, and 24-48 hours for drying. The success factor is source control: do not begin scrubbing until the leak is stopped or the condensation problem is addressed.
| Item | Typical quantity | Typical USA cost | Purpose |
|---|---|---|---|
| N95 respirators | 2-5 masks | $8-$18 | Reduce inhalation of disturbed particles |
| Nitrile or rubber gloves | 1-2 pairs | $5-$12 | Protect hands from mold and cleaner |
| Safety goggles | 1 pair | $6-$15 | Protect eyes during spraying and scrubbing |
| Disposable plastic sheeting | 1 roll | $5-$12 | Isolate adjacent surfaces |
| Detergent or labeled mold cleaner | 16-32 oz. | $6-$20 | Clean surface soil and growth |
| Stiff nylon brush | 1 | $4-$10 | Mechanical removal |
| Paper towels and contractor bags | 1 pack each | $5-$12 | Waste handling |
| Moisture meter, optional | 1 | $25-$60 | Compare damp and dry materials |
Do not mix cleaners. Never combine bleach with vinegar, ammonia, acids, or other products because hazardous gases can form. Read the product label for dwell time, ventilation, surface compatibility, and disposal instructions.
How Do You Remove Mold Under a Kitchen Sink Cabinet?
Use six steps: isolate the cabinet, stop moisture, contain the work area, clean the surface, dry the material, and repair or seal only after confirming dryness. The process takes about 2-4 hours of active labor for a small accessible patch, but porous material replacement can extend the project to one or two days.
Step 1: Empty and Isolate the Cabinet
Remove cleaning products, cookware, paper goods, cardboard, shelf liners, and stored food. Discard porous items with visible mold, strong persistent odor, or water saturation; washable plastic containers can be cleaned separately with detergent and water.
Keep children, pets, and people with respiratory conditions away from the work area. Wear gloves, goggles, and a properly fitted N95 respirator before disturbing dry growth.
Cover the floor outside the cabinet with plastic sheeting. Close nearby interior doors. Do not use a household vacuum or sweep dry mold because both actions can distribute spores.
Success checkpoint: The cabinet is empty, the work zone is isolated, and protective equipment is on before mold is touched.
Common mistake: Starting with a dry brush. Lightly misting a small surface with the labeled cleaner can reduce dust, but do not saturate damaged wood.
Step 2: Find and Stop the Moisture Source
Turn the shutoff valves clockwise if water is actively leaking, then dry standing water with towels. If a valve will not close, shut off the home’s main water supply and call a plumber.
Run the faucet, drain the sink, operate the disposal, and run the dishwasher if its connection is inside the cabinet. Use tissue around joints and inspect the sink rim from below. A failed sink strainer or rim seal often leaves a curved water stain beneath the countertop.
Repair plumbing before cleaning. Replace cracked supply hoses, tighten or replace P-trap washers, reseal the basket strainer, and correct dishwasher hose routing as needed. A cabinet mat cannot compensate for an active leak.
Success checkpoint: Tissue remains dry through a complete sink-use test, and no new droplets appear after 15 minutes.
Common mistake: Tightening every fitting aggressively. Over-tightening plastic traps and compression fittings can damage threads or seals.
Step 3: Contain the Cleaning Area
Keep cabinet doors closed when leaving the work area. If the cabinet is open, use plastic sheeting to limit movement of dust and debris into the kitchen.
Ventilate outdoors when practical, but do not point a fan directly at mold. A fan blowing across contaminated material can spread particles into the room. An outward-facing exhaust fan may help only when it does not pull air through the moldy cabinet and distribute contamination elsewhere.
Do not operate central HVAC during active disturbance if the cabinet is near a return grille. Never seal a floor vent with material that blocks required combustion air or creates a safety hazard.
Success checkpoint: Air moves out of the room without crossing the contaminated surface, and nearby food-preparation surfaces are covered.
Common mistake: Treating ventilation as unrestricted airflow. The goal is controlled exhaust, not maximum air movement.
Step 4: Clean the Accessible Surface
For finished, sealed, or otherwise sound surfaces, clean first with detergent and water, then apply a product labeled for mold or mildew according to its instructions. Mechanical removal lifts residue; a chemical product alone cannot remove embedded cabinet fibers or damaged material.
A 3% hydrogen peroxide solution is commonly used on some household surfaces, but test an inconspicuous area because it can lighten finishes. Commercial products such as Concrobium Mold Control may be appropriate when the label permits use on the cabinet material. Vinegar is an option for some light surface growth, although its odor and finish compatibility limit its usefulness.
| Cleaner or method | Typical use | Main limitation | Material caution |
|---|---|---|---|
| Detergent and water | Surface soil and washable residue | Does not restore rotten material | Keep plywood from prolonged soaking |
| 3% hydrogen peroxide | Light growth on compatible surfaces | Can discolor finishes | Test paint, laminate, and veneer |
| White vinegar, 5% acetic acid | Small nonporous or tolerant surfaces | Less useful in deep porous damage | Avoid unverified finish contact |
| Concrobium Mold Control | Label-approved cabinet surfaces | Requires complete drying | Follow label dwell and residue directions |
| Chlorine bleach | Limited nonporous disinfection | Poor penetration into porous wood | Never mix with acids or ammonia |
Apply enough product to keep the surface visibly wet for the label’s contact time, often around 10 minutes, without flooding seams or particleboard. Scrub with a nylon brush, wipe with disposable towels, and place waste directly into sealed bags.
Success checkpoint: Visible growth and residue are removed, and the substrate remains intact rather than soft, furry, or delaminated.
Common mistake: Using bleach to whiten a porous cabinet. A lighter stain does not prove that embedded growth or moisture damage is gone.
Step 5: Dry the Cabinet Completely
Use towels first, then a dehumidifier or gentle room-temperature airflow. Avoid high heat from a portable heater because concentrated heat can warp laminate, damage finishes, and create a fire hazard near plastic plumbing.
Leave doors open while drying. Typical drying takes 24-48 hours, but saturated particleboard, hidden wall cavities, and humid rooms take longer. A moisture meter is useful when it shows the suspect area approaching the reading of a known dry cabinet panel.
Success checkpoint: The material feels dry, has no cool damp spots, produces no new moisture on tissue, and has no expanding stain or odor after another day.
Common mistake: Painting or caulking after the surface feels dry to the hand. Porous cores can retain water after the exterior appears dry.
Step 6: Repair, Replace, or Seal the Material
Replace cabinet flooring, drywall, insulation, or particleboard that is swollen, soft, crumbling, delaminated, or deeply stained after cleaning. Surface coating cannot restore lost structural strength or reliably remove growth inside a porous core.
Sound, dry wood can receive a compatible mold-resistant primer or coating after cleaning, drying, and label-approved preparation. Sanding is optional and should be avoided when it would create substantial dust or expose contaminated material; wet cleaning and replacement are safer choices for small cabinet interiors.
Cut replacement plywood accurately, support its edges, and seal plumbing penetrations with an appropriate flexible sealant after the leak is repaired. Do not permanently trap a wet cavity behind a new panel.
Success checkpoint: The replacement or coating is applied only to dry, stable material, and all plumbing remains accessible for future inspection.
Common mistake: Covering active discoloration with paint. If odor or growth returns, remove the coating from the affected area and investigate concealed moisture.
Which Cabinet Material Should You Repair?
Sound plywood usually offers the best repair surface, while swollen particleboard and MDF are poor candidates for restoration. A replacement decision depends on structural condition, contamination depth, and the cost of gaining access, not on mold color.
| Cabinet material | Water response | Repair suitability | Typical replacement material |
|---|---|---|---|
| Solid hardwood | Surface staining, limited swelling | Often cleanable when sound | Sealed hardwood or plywood |
| Exterior-grade plywood | Moderate edge swelling | Usually repairable if layers remain bonded | 1/2-inch or 3/4-inch plywood |
| Melamine-faced particleboard | Core swells after edge exposure | Poor after saturation | Sealed plywood or PVC panel |
| MDF | Rapid fiber swelling | Poor after wetting | PVC sheet or plywood |
| Drywall behind cabinet | Absorbs and holds moisture | Replace when moldy or soft | New moisture-resistant drywall where suitable |
Marine-grade plywood is water-resistant and durable, but it is often unnecessary for a normal cabinet repair. Exterior-grade plywood with sealed cut edges usually provides a more proportionate USA residential repair. PVC panels resist water well but may need additional support because they do not behave like structural plywood.
Which Cleaning Approach Fits the Situation?
The best cleaning approach is detergent and controlled mechanical removal for sound surfaces, followed by a labeled antimicrobial product when appropriate. No cleaner is a substitute for replacing saturated porous material or repairing the plumbing.
Choose hydrogen peroxide or a commercial labeled product when finish compatibility is confirmed. Choose simple detergent cleaning for washable, sealed surfaces with minimal growth. Avoid relying on vinegar for deeply embedded growth and avoid bleach on porous wood.
One practitioner rule matters here: cleanability follows porosity and structural condition, not appearance. A small black mark on sealed laminate may be easier to remediate than a pale, musty patch inside swollen MDF.
How Much Does Under-Sink Mold Remediation Cost?
Typical USA costs range from $30-$75 for a small DIY cleanup, $500-$1,500 for localized professional remediation, and $2,000-$5,000 or more when cabinetry, drywall, flooring, and plumbing require coordinated replacement. Local labor rates, access, containment, disposal, and water damage determine the final invoice.
| Project scope | Typical USA cost | Typical duration | Main cost drivers |
|---|---|---|---|
| DIY surface cleanup | $30-$75 | 1 day plus drying | PPE, cleaner, towels, primer |
| Plumber repair only | $150-$500 | 1-4 hours | Access, valve, trap, strainer, hose |
| Cabinet floor replacement | $200-$800 | 1-2 days | Material, carpentry, finish matching |
| Localized professional remediation | $500-$1,500 | 1-2 days | Containment, labor, HEPA equipment |
| Cabinet and drywall rebuild | $2,000-$5,000+ | 2-7 days | Demolition, cabinetry, flooring, permits |
Air testing is not automatically necessary for a small visible patch. The EPA generally recommends visual inspection and moisture correction rather than routine sampling when the source and extent are clear. Testing becomes more relevant when legal disputes, unexplained health concerns, hidden cavities, or conflicting professional assessments exist.
What Prevents Mold From Returning?
Prevent recurrence by repairing every water source, drying leaks immediately, inspecting plumbing monthly, and keeping the cabinet interior accessible. A raised plastic sink mat provides secondary protection, but it cannot stop water from entering behind the cabinet or through the wall.
Use these prevention measures:
- Place a waterproof mat with raised edges under the plumbing.
- Leave a small clearance around shutoff valves and the P-trap.
- Check the cabinet after dishwasher cycles and heavy sink use.
- Replace brittle supply hoses before failure, following manufacturer guidance.
- Seal exposed cabinet-floor edges after they are dry and sound.
- Keep paper, cardboard, and absorbent shelf liners out of the plumbing zone.
- Use a kitchen exhaust fan during boiling and dishwashing.
- Maintain indoor humidity below 60%, with 30%-50% commonly recommended for comfort and moisture control.
Inspecting the cabinet once a month catches slow leaks before particleboard absorbs repeated moisture. The highest-value prevention step is access: an overfilled cabinet hides the exact fittings that need inspection.
What Should You Do in Special Situations?
Renters
Renters should photograph mold, water stains, swollen materials, and plumbing fittings before moving items or cleaning extensively. Notify the landlord or property manager in writing, describe the suspected leak, and keep copies of the notice, photographs, and repair responses.
Tenant duties vary by state and lease. Do not assume that every mold problem is automatically the landlord’s legal responsibility, but plumbing defects and building leaks commonly require owner action. Avoid cutting cabinets or removing drywall without written authorization.
Health-Sensitive Occupants
People with asthma, significant mold allergy, chronic lung disease, or immune suppression should avoid DIY mold cleanup. Arrange for another adult to handle inspection, or hire a qualified remediation contractor who follows the project’s applicable state requirements and recognized industry procedures.
A contractor should explain containment, source repair, damaged-material removal, drying verification, and final cleaning. Certification alone does not guarantee quality, so request a written scope rather than paying for unexplained air tests or chemical fogging.
Food, Cookware, and Cleaning Supplies
Discard cardboard, paper, and visibly moldy porous packaging stored in the cabinet. Wash intact plastic, glass, or metal containers with detergent and water, then dry them fully before reuse.
Do not store food directly beneath a leaking trap. Mold on a cabinet surface does not automatically contaminate every item in the kitchen, but strong odor, visible growth, or sewage contact warrants conservative disposal of porous goods.
What If Mold Keeps Coming Back?
Recurring mold usually means that moisture remains hidden, the cabinet was not dried deeply, or porous material was left in place. Recheck the sink rim, dishwasher hose, wall penetration, cabinet toe-kick, and underside of the countertop before applying another cleaner.
| Symptom after cleanup | Likely cause | Recommended response | Escalation point |
|---|---|---|---|
| Musty odor after 48 hours | Hidden back panel or wall growth | Inspect accessible cavities and plumbing wall | Restoration contractor if odor persists |
| New spotting within 7 days | Active leak or wet core | Repeat tissue test and moisture check | Plumber plus material removal |
| Cabinet base sags | Structural delamination | Stop loading cabinet and replace base | Carpenter or cabinet professional |
| Dark line at sink edge | Failed sink-rim seal | Dry, remove failed sealant, reseal correctly | Countertop or plumber assistance |
| Condensation on pipes | High humidity or cold-water sweating | Insulate compatible pipes and reduce humidity | HVAC or moisture specialist if unresolved |
A borescope can inspect a concealed cavity through an existing opening, but drilling into a cabinet or wall can damage plumbing and electrical components. Use noninvasive inspection first, and never treat a camera image as a substitute for correcting moisture.
Common Mistakes and How to Fix Them
Scrubbing before stopping the leak: Cleaning removes visible growth while water continues to feed the substrate. Stop the leak, dry the cabinet, then remediate.
Using a household vacuum: A standard vacuum can redistribute fine particles. Use disposable towels for a small job, or a professional HEPA system for larger contamination.
Directing a fan at the mold: Airflow can spread contamination. Use controlled outdoor exhaust or a dehumidifier positioned to dry without blasting the growth.
Painting over damp staining: Coating traps moisture and hides recurrence. Remove unstable material, verify dryness, and apply primer only to sound surfaces.
Keeping swollen particleboard: A sealed face can conceal a wet, expanded core. Replace the panel when it is soft, crumbly, delaminated, or persistently odorous.
Assuming black color means toxic mold: Color does not identify species or health risk. Base the decision on area, material, moisture, contamination type, and occupant vulnerability.
Frequently Asked Questions
Can I leave mold under the sink if it is only a small spot?
No. A small spot still identifies a moisture condition that needs correction. If the growth covers less than about 10 square feet, the material is sound, and no sewage contamination or vulnerable occupant is involved, careful DIY cleaning may be appropriate after the source is repaired.
Does mold under a kitchen sink mean I need to replace the whole cabinet?
Usually not. Replace only the portions that are swollen, soft, crumbling, delaminated, or inaccessible for adequate cleaning. Sound plywood or sealed laminate can often remain after cleaning and drying, while MDF and particleboard frequently fail after saturation.
How long can mold survive after the cabinet dries?
Mold spores can remain dormant on dry surfaces for long periods, but active growth requires available moisture. Drying stops expansion; it does not remove contaminated residue. Clean the surface, remove damaged porous material, and prevent renewed wetting before considering the area resolved.
Should I test the mold before cleaning it?
Routine species testing is usually unnecessary for a small, visible household patch because the cleanup decision depends more on moisture, area, material, and health conditions. Testing can help with hidden contamination, legal documentation, unexplained illness concerns, or disagreement about the source.
Will a plastic under-sink mat stop cabinet mold?
A plastic mat can catch small spills and delay water reaching the cabinet floor, but it cannot stop leaks behind the cabinet, sink-rim seepage, wall moisture, or condensation. Inspect plumbing regularly and remove water from the mat rather than allowing it to evaporate inside a closed cabinet.
When should I call a mold remediation company?
Call a professional when visible growth exceeds approximately 10 square feet, sewage or contaminated floodwater was involved, mold extends into drywall or flooring, the cabinet is structurally damaged, the odor persists after drying, or a health-sensitive person occupies the home.
The Bottom Line
Mold under a kitchen sink cabinet is a moisture-control and material-condition problem, not a color-identification problem. Stop the leak, protect occupants, clean only sound accessible surfaces, replace porous structural material that has swollen or crumbled, and verify complete drying before sealing. For a small DIY project, expect $30-$75 in supplies and 24-48 hours of drying; hire a professional when the area, contamination, hidden growth, or occupant health makes disturbance unsafe.