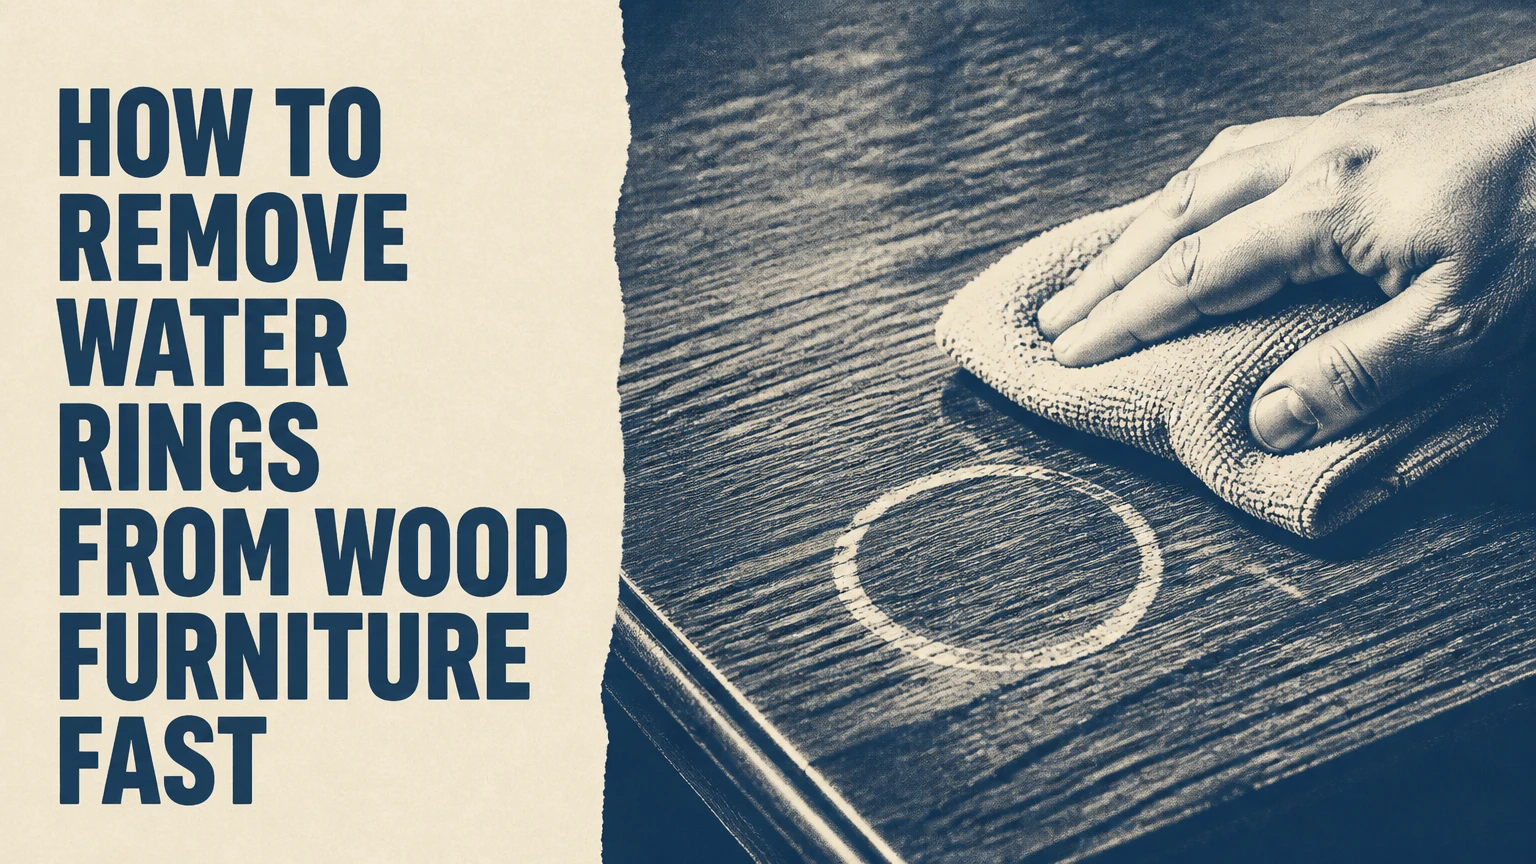
How to Remove Water Rings From Wood Furniture Fast
To remove water rings from wood furniture, first identify whether the mark is white and finish-level or dark and embedded in the wood. Use gentle, dry heat for a fresh white ring, then try a small amount of petroleum jelly if heat fails. Dark brown or black rings usually require localized finish removal, wood bleach, and refinishing.
Key Facts at a Glance
- A white or cloudy water ring usually affects the clear finish, while a dark ring indicates moisture reached the wood fibers.
- A hair dryer is the lowest-risk first treatment for a white ring on modern finished furniture.
- A dry iron can work faster, but steam, excessive heat, or a stationary iron can melt lacquer or scorch wood.
- Mayonnaise and petroleum jelly may improve a cloudy mark by altering its appearance, but neither repairs deeply damaged wood.
- Oxalic acid is intended for dark discoloration in bare wood, not for an intact finished surface.
- Veneer, antique finishes, swelling, bubbling, and valuable furniture require more caution than solid modern hardwood.
What Type of Water Ring Is It?
The stain color and surface condition determine the correct repair method. A white, gray, or cloudy ring is usually trapped moisture or finish haze, while a brown or black ring signals discoloration below the topcoat.
White or gray rings
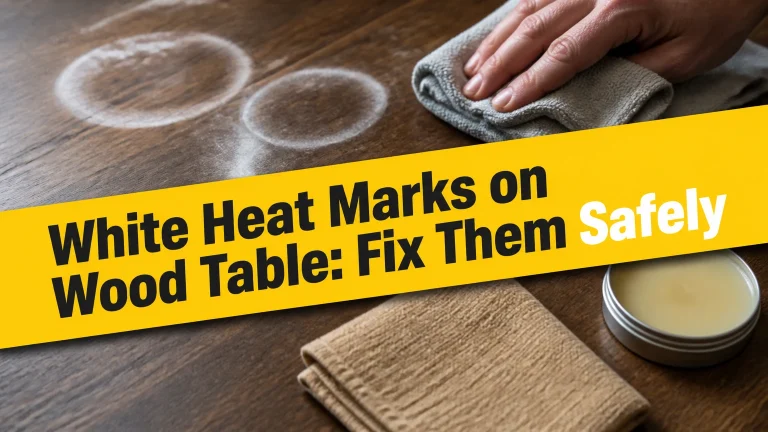
White rings often form when a cold glass, wet plant pot, or hot serving dish leaves moisture on lacquer, shellac, varnish, or polyurethane. The finish becomes hazy because moisture changes the way light passes through its upper layer. The wood beneath may remain unaffected.
A white ring with a smooth surface is the best DIY candidate. A ring that feels rough, sticky, cracked, or raised may indicate finish failure rather than simple trapped moisture.
Brown or black rings
Dark marks form when water passes through a damaged or porous finish and discolors the wood below. Iron-tannin reactions, oxidation, dirt carried into the wood, and prolonged moisture exposure can all contribute to a dark stain.
Dark discoloration cannot usually be removed with furniture polish. The affected finish must often be removed locally, followed by bleaching, drying, color matching, and a new protective coat.
When the mark is not a water ring
White marks can also come from heat, silicone contamination, dried cleaning product, candle wax, or a finish that has begun to blush. A ring that remains unchanged after careful dry-heat treatment may not contain moisture at all.
| Appearance | Likely location | Typical cause | First response |
|---|---|---|---|
| Milky white, smooth | Clear finish | Condensation under finish | Dry hair dryer |
| Gray-white, dull | Clear finish or wax | Moisture, heat, or polish residue | Clean, then test gentle heat |
| Brown, sharply defined | Wood below finish | Water penetration and oxidation | Professional or bleach repair |
| Black, rough, swollen | Wood and finish | Long exposure or rot risk | Stop DIY and inspect damage |
How Do You Remove a White Water Ring?
Remove a white water ring by cleaning the surface, testing a hair dryer on medium heat, and moving the warm air continuously for 5-10 minutes. If the haze remains, use a dry iron through a plain cotton cloth in 10-20 second passes, checking the finish after every pass.
Step 1: Clean and inspect the surface
Remove objects from the furniture. Wipe the area with a dry microfiber cloth, then inspect it under angled light.
Do not begin with vinegar, alcohol, acetone, or a commercial solvent. Those products can soften shellac, dull lacquer, or remove wax before the stain has been diagnosed.
Check for these conditions:
- Bubbling or lifting veneer
- Cracked, flaking, or sticky finish
- A rough edge around the ring
- Swollen wood or an open joint
- A dark center beneath a white border
If any of those conditions appear, skip heat and move to the professional-repair section.
Step 2: Test gentle dry heat
Set a hair dryer to medium or warm airflow. Hold it 8-10 inches from the surface and keep it moving in broad circles across the entire mark rather than concentrating heat at the center.
Work for 60 seconds, then stop and inspect. Continue in one-minute cycles for up to 5-10 minutes. The finish should remain comfortable to touch, never hot enough to soften.
You will know the method is working when the cloudy area becomes smaller or more transparent. The common mistake is parking the dryer over one spot, which can create a gloss difference or soften a lacquer film.
Step 3: Use a dry iron only when necessary
Empty the iron completely. Disable steam, set the iron to low heat, and place a clean, plain white cotton cloth over the ring.
Touch the iron to the cloth for 10-20 seconds while moving it continuously. Lift the cloth and inspect the mark after every pass. Never leave the iron stationary, and never use a printed, dyed, damp, or synthetic cloth.
Stop immediately if the finish becomes tacky, glossy, wrinkled, or darker. A dry iron can remove stubborn moisture haze, but it can also permanently deform lacquer and shellac.
| Heat method | Setting | Distance or contact | Working cycle | Main risk |
|---|---|---|---|---|
| Hair dryer | Medium, no attachment | 8-10 inches | 60 seconds | Uneven gloss from concentrated heat |
| Dry iron on lacquer | Low | Cotton barrier | 10 seconds | Finish softening |
| Dry iron on varnish | Low to medium | Cotton barrier | 10-20 seconds | Scorching or imprinting |
| Steam iron | Any setting | Direct contact | Do not use | Adds moisture and enlarges haze |
Step 4: Restore the sheen
After the mark disappears, let the surface cool for 30 minutes. Wipe away any residue, then apply a small amount of the furniture’s existing maintenance product.
Use paste wax only when the piece already has a compatible waxed finish. Avoid applying oil to polyurethane as a universal remedy, because oil may create an uneven film without repairing the underlying haze.
Which Water-Ring Removal Method Should You Choose?
Choose a hair dryer first for a white ring on a modern finished table, use a dry iron only for a stubborn finish haze, and reserve oxalic acid for dark discoloration in exposed wood. Oil-based home remedies are lower risk than sanding, but their improvement may be temporary or purely cosmetic.
| Method | Best stain | Typical time | DIY risk | Suitable furniture |
|---|---|---|---|---|
| Hair dryer | Fresh white haze | 5-10 minutes | Low | Modern finished wood |
| Dry iron and cloth | Persistent white haze | 1-5 minutes | Medium | Stable varnish or lacquer |
| Petroleum jelly | Dry cloudy finish | 1-12 hours | Low to medium | Nonvaluable finished furniture |
| Oxalic acid | Dark bare-wood stain | 1-2 days plus cure | High | Solid wood with refinishing skill |
| Professional spot repair | Deep or uncertain damage | 1-5 days | Low for owner | Veneer, antiques, heirlooms |
When should you use oil or petroleum jelly?
Use petroleum jelly only after dry heat has failed on a white, smooth ring and after testing an inconspicuous area. Apply a thin film, leave it for 1-2 hours, and remove all residue with a clean cloth.
Mayonnaise is a less controlled substitute because it contains water, acids, salt, egg, and oil. It may temporarily improve a cloudy appearance by filling microscopic surface irregularities or changing the finish’s gloss, but there is no reliable basis for claiming that oil physically pushes water out of every finish.
Do not use cigarette ash. Ash particle size and composition vary, and rubbing it into a finish can create scratches or deposit alkaline residue.
Is toothpaste or baking soda safe?
Toothpaste and baking soda are not first-choice treatments for wood furniture. Both can act as abrasives, and their effect depends on particle size, pressure, finish hardness, and gloss level.
A mild abrasive can remove a tiny amount of finish along with a mark, creating a permanent low-gloss patch. Gel toothpaste, whitening toothpaste, charcoal toothpaste, and baking soda mixtures are especially poor choices because additives and uneven particles can damage lacquer or veneer.
How Do You Remove a Dark or Black Ring?
Remove a dark or black ring by exposing the discolored wood, applying oxalic acid wood bleach according to its label, rinsing and drying the area, then restoring the color and finish. This process is invasive because sanding removes the local topcoat and may expose veneer or create a visible repair boundary.
Step 1: Confirm that the wood is repairable
Determine whether the furniture is solid wood or veneer. Look at an unfinished edge, drawer opening, or underside. Veneer may be only about 1/32 to 1/16 inch thick, so aggressive sanding can cut through it.
Do not bleach swollen wood, loose veneer, moldy material, or a joint that has opened from moisture. Those conditions involve structural or biological damage rather than a simple stain.
Step 2: Remove finish locally
Work in ventilation and wear chemical-resistant gloves and eye protection. Sand only the affected area with 220-grit paper, following the grain, until the clear finish disappears.
Feather the perimeter lightly so the new finish can transition into the old one. Avoid sanding a broad circle around the mark, because a sharply lighter or thinner patch will remain visible after refinishing.
Step 3: Apply oxalic acid wood bleach
Mix the product exactly as its manufacturer directs. Commercial oxalic acid crystals vary in concentration, and a stronger solution is not automatically more effective.
Apply the solution to the darkened wood with a disposable nylon brush. Allow the stated reaction time, commonly 15-30 minutes, then assess the color. A second controlled application is safer than leaving a strong solution on the surface for hours.
Oxalic acid is useful for iron and tannin discoloration, but it will not rebuild missing wood, reverse swelling, or restore a damaged clear coat.
Step 4: Rinse, dry, and refinish
Neutralize or rinse only as the product label directs. Some products specify clean water, while others permit a mild baking soda solution. Never mix oxalic acid with chlorine bleach, ammonia, vinegar, or another cleaner.
Allow the wood to dry fully, often 24-48 hours depending on humidity and porosity. Sand lightly with 320-grit paper, test a matching stain on scrap wood, and apply compatible sealer and topcoat in thin coats.
| Refinishing stage | Typical material | Typical duration | Checkpoint |
|---|---|---|---|
| Local finish removal | 220-grit abrasive | 10-30 minutes | Dark wood exposed |
| Bleach application | Label-directed oxalic solution | 15-30 minutes | Color lightens evenly |
| Drying | Ventilated indoor area | 24-48 hours | Wood feels dry and stable |
| Final preparation | 320-grit abrasive | 5-15 minutes | Surface feels smooth |
| Topcoat curing | Matching varnish or lacquer | 2-7 days | Finish no longer feels soft |
How Does Furniture Finish Change the Repair?
Furniture finish determines how much heat, solvent, or abrasion the surface can tolerate. Polyurethane usually resists mild oils but can haze or melt under heat, while shellac and lacquer respond quickly to alcohol, heat, and friction.
| Finish or construction | Common clue | Heat tolerance | Main repair concern |
|---|---|---|---|
| Polyurethane | Thick, hard, modern surface | Medium | Heat haze or gloss mismatch |
| Lacquer | Smooth, thin, sprayed finish | Low to medium | Softening and solvent damage |
| Shellac | Older, warm amber appearance | Low | Alcohol and heat damage |
| Waxed wood | Soft, satin, easily marked | Low | Smearing and uneven sheen |
| Thin veneer | Grain layer over substrate | Low for sanding | Sand-through and bubbling |
| Painted MDF or wood | Opaque color | Variable | Ring may be in paint film |
Can polyurethane furniture develop white rings?
Yes. Polyurethane furniture can develop white rings when moisture reaches defects, edges, or microscopic flaws in the finish. Because cured polyurethane is relatively resistant to surface oils, mayonnaise or petroleum jelly may produce little improvement.
Start with a hair dryer at a safe distance. Do not sand through polyurethane unless you are prepared to match the entire repair area, because a small clear patch can look shinier or duller than the surrounding surface.
How should you treat veneer furniture?
Treat veneer furniture with low heat, minimal pressure, and no aggressive sanding. A hair dryer is preferable to an iron, and any chemical repair should begin only after confirming that the veneer is firmly attached.
Veneer damage often appears as bubbling, lifting edges, or a soft patch. Heat can worsen adhesive failure, and sanding can expose the substrate in seconds. A furniture repair specialist is usually cheaper than replacing a damaged veneer panel.
What should you do with antique furniture?
Do not experiment with heat, toothpaste, vinegar, or oxalic acid on valuable antique furniture. Shellac, French polish, wax, and historically significant patina can be damaged by a treatment that would be acceptable on a modern side table.
Photograph the piece, identify its approximate age and finish, and consult a furniture conservator or experienced restorer. The goal for an antique is often controlled stabilization and visual integration, not making every mark disappear.
What Supplies Do You Need?
A low-risk white-ring treatment requires only a microfiber cloth, hair dryer, cotton cloth, and a compatible finishing product. A dark-ring repair requires personal protective equipment, abrasives, labeled wood bleach, stain, and a compatible topcoat.
| Repair level | Required supplies | Typical quantity | Typical USA cost |
|---|---|---|---|
| White-ring test | Microfiber cloth | 2 cloths | $3-$8 |
| Gentle heat | Hair dryer | 1 household unit | $0-$35 |
| Iron treatment | Plain cotton cloth | 1 piece | $2-$8 |
| Oil test | Petroleum jelly | 1 teaspoon | Under $5 |
| Dark stain repair | 220- and 320-grit paper | 2-4 sheets | $3-$8 |
| Chemical bleaching | Oxalic acid wood bleach | 4-8 ounces | $10-$25 |
| Refinish | Matching stain and topcoat | 2-8 ounces each | $12-$35 |
How Much Does Water-Ring Repair Cost?
DIY water-ring repair typically costs $0-$35 when household tools are available. Professional spot repair commonly costs about $150-$400 for a small table, while extensive refinishing for a large dining table often reaches $400-$1,200 in the United States.
Prices vary with finish complexity, travel, veneer work, color matching, and whether the entire top must be stripped. A conservator may charge more than a general furniture repair service when historic materials or original surfaces require preservation.
| Repair situation | Typical USA price | Typical elapsed time | Best provider |
|---|---|---|---|
| Fresh white ring, household tools | $0-$10 | 10-30 minutes | Owner |
| White ring requiring supplies | $10-$35 | 1-12 hours | Owner or repair shop |
| Small dark spot on solid wood | $150-$400 | 1-3 days | Furniture repairer |
| Large dining-table refinish | $400-$1,200 | 3-7 days | Refinishing shop |
| Valuable antique or French polish | $300-$1,500+ | 1-8 weeks | Conservator |
These are typical planning ranges, not guaranteed quotes. Ask whether the estimate includes pickup, finish matching, materials, drying time, and protection of adjacent surfaces.
What Mistakes Make Water Rings Worse?
The most damaging mistakes are adding steam, overheating one location, sanding before diagnosing the mark, and applying chemicals without identifying the finish. Recovery becomes harder when the repair removes surrounding finish or creates a color and gloss mismatch.
Common failure modes
- Steam from an iron enlarges the mark. Empty the water reservoir and disable steam before using any iron method.
- A stationary iron melts finish. Use short passes through cotton and inspect after each pass.
- Circular abrasive scrubbing creates haze. Follow the grain with minimal pressure, or avoid abrasives entirely.
- Over-sanding cuts through veneer. Inspect construction before using 220-grit paper.
- Solvents strip the finish. Test alcohol, acetone, and commercial cleaners only when the finish is known and the product is compatible.
- Bleach is used on a finished surface. Oxalic acid must reach the affected wood, but removing finish creates a refinishing obligation.
- A damp cloth is left on the table. Even a successful repair can recur if moisture remains at edges, seams, or damaged finish.
What if the ring becomes a dull patch?
A dull patch usually means the surface gloss changed, not that the wood became permanently lighter. Stop applying heat, allow the surface to cool, and compare the patch with an adjacent area under the same light.
If the finish is intact, a compatible paste wax may reduce the visible difference. If the finish is softened, scratched, or partially removed, further polishing can enlarge the defect; local finish repair is then safer.
What if nothing works?
If a white ring does not change after one careful hair-dryer treatment and a controlled iron test, stop repeating the same method. The mark may be beneath the topcoat, caused by heat or chemical damage, or located in a finish that does not respond to surface treatment.
A dark center, swelling, lifting veneer, or persistent tackiness requires inspection rather than stronger chemicals. Repeated treatment increases damage without improving diagnosis.
How Can You Prevent New Water Rings?
Prevent new water rings by using coasters with an absorbent or sealed underside, wiping spills promptly, and keeping hot or wet objects away from finished wood. Maintain stable indoor humidity and repair damaged finish before moisture reaches exposed fibers.
Use felt, cork, leather, or silicone coasters that do not trap condensation against the tabletop. Place trivets beneath items above approximately 140°F, including hot mugs, cookware, and serving dishes.
Do not leave plant saucers, damp towels, snow-covered objects, or cold bottles directly on furniture. Wipe standing water within minutes, especially near joints and veneer edges where moisture can travel below the finish.
When Should You Call a Professional?
Call a professional when the furniture is valuable, veneered, antique, swollen, structurally loose, or marked by a dark stain larger than a few inches. Professional help is also appropriate after a heat treatment creates melting, blistering, color loss, or a visible gloss boundary.
A modern mass-produced table with a small white ring is a reasonable DIY project. An heirloom is not a suitable surface for trial-and-error repair, because preserving original finish and patina can matter more than removing one blemish.
FAQ
Can I remove a water ring overnight?
You can sometimes improve a white water ring overnight with a thin layer of petroleum jelly, but the result is not guaranteed. Apply it only to a clean, smooth finish, test first, and remove all residue the next morning. Dark rings will not usually disappear through an overnight oil treatment.
Does vinegar remove water stains from wood?
Vinegar is not a dependable water-ring remover and can dull or soften some finishes. Acetic acid may also spread moisture into exposed wood. Use dry heat for a white ring and a finish-specific repair for a dark ring instead of applying vinegar indiscriminately.
How long should I use a hair dryer on a water ring?
Use a hair dryer for 5-10 minutes total, divided into 60-second inspection cycles. Keep the dryer 8-10 inches away, use medium heat, and move the airflow continuously. Stop if the finish becomes hot, tacky, glossy, or visibly distorted.
Will a water ring disappear on its own?
A fresh white ring may fade as moisture slowly leaves the finish, but a dark ring rarely disappears without treatment. Waiting is safest for a valuable piece if the wood is dry and stable, because aggressive experimentation can cause more damage than the original mark.
Can water rings be removed from unfinished wood?
Unfinished wood may require sanding, controlled bleaching, or both because moisture enters the fibers directly. Start with fine abrasive paper along the grain, inspect the color change frequently, and avoid sanding through veneer. Seal the surface after the stain is removed.
Should I use commercial water-ring remover?
Commercial water-ring removers can be reasonable for a modern, nonvaluable piece when the label identifies compatible finishes. Test in a hidden area first, follow the dwell time exactly, and avoid products that require unverified mixing with bleach, solvents, or abrasives.
The Bottom Line
The safest way to remove water rings from wood furniture is to match the treatment to the mark: use moving dry heat for a smooth white ring, use oil-based remedies only as cautious cosmetic tests, and reserve sanding with oxalic acid for dark discoloration in exposed solid wood. Stop when veneer, antique finish, swelling, or structural damage is involved.