Why Is Paint Cracking on Walls? Causes and Lasting Fixes
Paint cracks on walls when the dried coating becomes less flexible than the wall beneath it, or when the paint loses adhesion to the surface. Common causes include thick application, incompatible paint layers, poor surface preparation, moisture, rapid drying, aging, drywall movement, and structural settlement.
Key Facts at a Glance
Hairline cracks limited to the paint film are usually cosmetic and often respond to scraping, filling, priming, and repainting.
Alligatoring indicates incompatible or repeatedly layered coatings, especially a hard oil-based film over a softer coating.
Mud cracking usually develops when paint or primer is applied too thickly and dries unevenly.
Moisture must be corrected before painting because a new coating can trap water and fail again.
A crack that continues through drywall, plaster, masonry, or a joint requires substrate repair, not paint alone.
Typical USA repair costs range from $150 for a small cosmetic patch to more than $2,500 for extensive wall or structural work.
Why Is Paint Cracking on Walls?
Paint cracking occurs when stress inside the coating exceeds the paint film’s strength or its bond with the wall. Temperature changes, humidity, building movement, ultraviolet exposure, and drying shrinkage all create stress, while brittle paint, contamination, excessive thickness, or poor priming reduces the coating’s ability to absorb it.
A paint film contains a binder, pigments, additives, and carrier liquids. As the water or solvent leaves, the binder particles form a continuous film. A well-prepared acrylic coating remains sufficiently flexible for normal interior movement. An aged or incorrectly applied film can become rigid, shrink unevenly, and fracture.
The failure often progresses from microscopic fissures to visible cracks. Moisture then enters the openings, weakens the coating-to-wall bond, and lifts the edges. Cracking and peeling are therefore related, but they are not identical: cracking describes fracture, while peeling describes loss of adhesion.
How does paint-film failure develop?
The typical failure sequence begins with a weak or aging coating and ends with visible fracture or delamination:
- Film loses flexibility: Aging, heat, ultraviolet exposure, or incompatible chemistry makes the binder harder.
- Surface fissures form: Small cracks develop where stress concentrates around corners, joints, or defects.
- Water enters: Humidity, condensation, leaks, or wet cleaning reach the fissures.
- Stress increases: The wall and coating expand or contract at different rates.
- Cracks widen: Fine fissures become visible lines, polygons, or web-like patterns.
- Adhesion fails: Moisture and movement lift the coating, producing blisters, curling, or peeling.
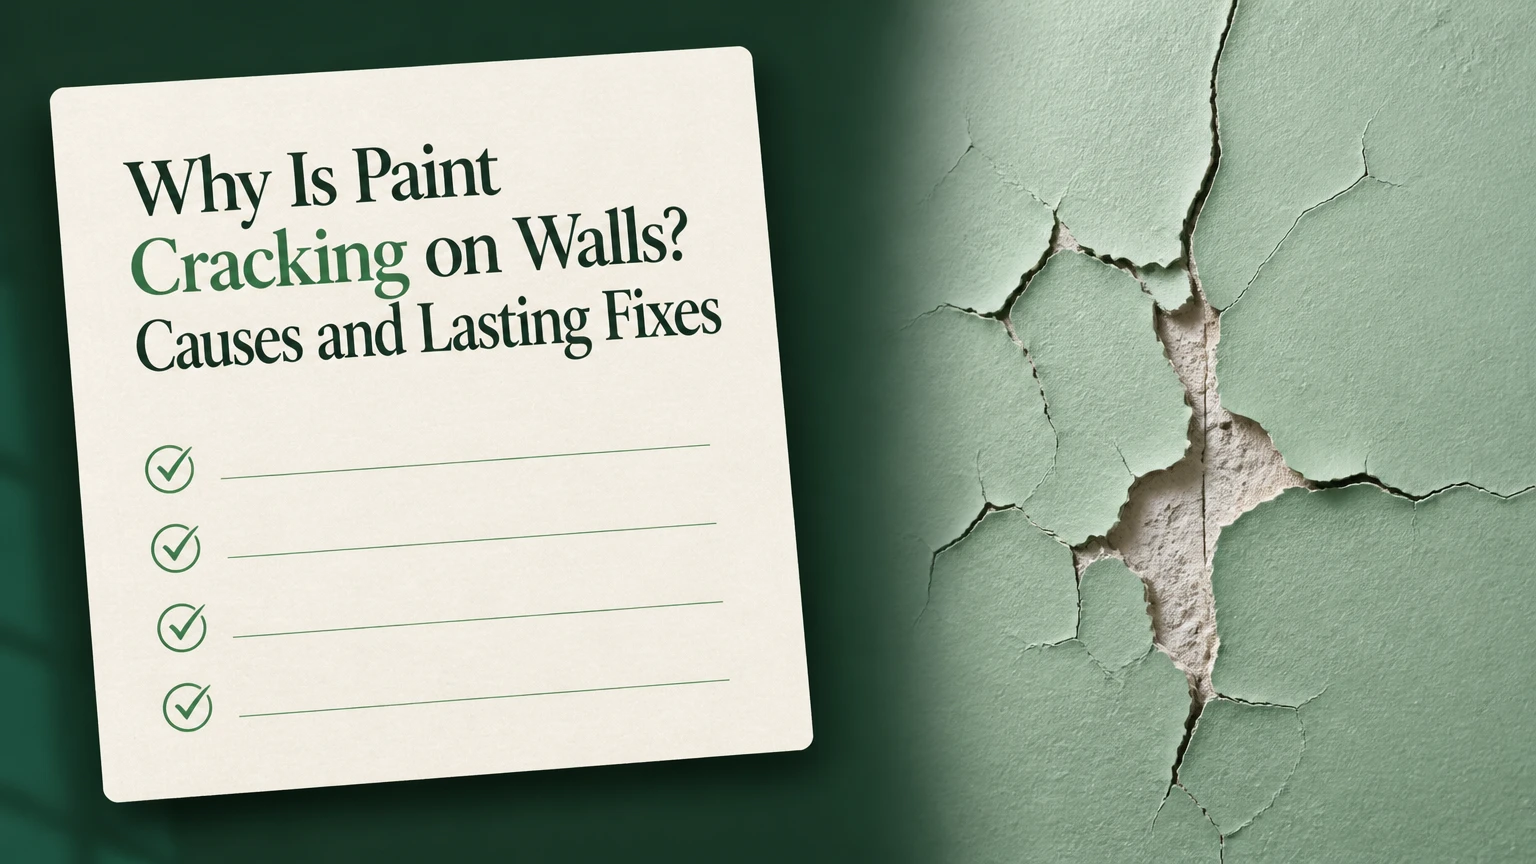
Sherwin-Williams describes alligatoring as “a cracked pattern resembling alligator skin.” The appearance matters because the pattern often identifies the failure mechanism more reliably than the paint color or brand.
What Type of Crack Is Present?
The crack pattern, depth, location, and surrounding damage usually distinguish hairline cracking, alligatoring, mud cracking, joint movement, and structural movement. A fingernail test and a small scrape at an inconspicuous location can reveal whether the fracture is confined to paint or continues into the wall.
| Visual pattern | Most likely cause | Typical depth | First diagnostic action |
|---|---|---|---|
| Fine isolated lines | Aging, thin coating, minor movement | Surface film | Scrape a 1-inch area |
| Spiderweb network | Brittle topcoat or aged paint | Topcoat to undercoat | Check layer hardness |
| Reptile-skin polygons | Incompatible coating layers | Multiple paint layers | Test for loose adhesion |
| Irregular deep polygons | Thick application or fast drying | Wet film and primer | Measure affected area |
| Straight vertical line | Drywall seam or settlement | Paint and joint compound | Check both sides of wall |
| Diagonal line from corner | Framing or foundation movement | Paint, plaster, or masonry | Monitor width and direction |
| Horizontal line near ceiling | Joint movement or water damage | Paint and substrate | Inspect attic or plumbing |
| Cracks with bubbles | Moisture or heat | Paint and substrate | Check moisture source |
What do hairline paint cracks mean?
Hairline paint cracks usually mean the surface coating has aged, dried too quickly, or failed to flex with minor wall movement. When the cracks are shallow, stable, and limited to one room’s paint film, the condition is generally cosmetic rather than structural.
Hairline cracking can result from a thin coat over porous drywall compound, repeated repainting, or a low-flexibility coating. It is common around window trim, inside corners, and ceiling transitions because those areas experience small changes in movement.
Press a strip of painter’s tape across a suspected crack, mark the ends, and photograph it with the date. If the line grows beyond the tape or the gap widens, the wall may be moving beneath the paint. A stable hairline network can usually receive localized preparation rather than complete paint removal.
What causes alligatoring paint?
Alligatoring develops when a rigid upper coating shrinks or moves differently from a softer lower coating. A common example is a hard oil-based or alkyd layer applied over latex paint without suitable preparation, although repeated coats, heat, and aging can produce the same reptile-skin appearance.
The upper film may dry and contract while the lower film remains more flexible. Stress then concentrates in a network of angular fractures. Painting another coat over the pattern rarely solves the adhesion problem because the unstable layer remains underneath.
A small test scrape is informative. If the coating lifts in sheets, sounds hollow when tapped, or reveals several weak layers, remove loose material back to a firmly bonded surface. A bonding primer matched to the existing coating may work for sound layers, but widespread alligatoring often justifies more extensive removal.
Why does thick paint form mud cracks?
Mud cracking occurs when a thick coating skins over while material beneath it remains wet. As the lower material loses moisture and shrinks, the hardened surface cannot contract evenly, so deep irregular polygons open across the film.
This defect can affect paint, drywall primer, joint compound, skim coat, and textured coatings. Applying a heavy coat to hide surface defects increases the risk. Direct heat, strong airflow, cold temperatures, and high humidity make drying even less uniform.
The practical control is film thickness. Many interior wall paints are designed for approximately 4 mils wet film thickness, which dries to roughly 1.5 mils, but the manufacturer’s technical data sheet controls. A wet-film comb is more reliable than judging thickness by appearance.
Is the Substrate Cracking Too?
A crack that reaches drywall, plaster, masonry, or a joint is a substrate problem as well as a paint problem. Paint-only repairs are appropriate when the fracture disappears after scraping and does not reopen, while recurring or widening cracks need investigation below the coating.
| Test or observation | Cosmetic paint failure | Substrate movement | Moisture-related failure |
|---|---|---|---|
| Crack width | Under 1/32 inch | 1/32 inch or wider | Variable |
| Crack shape | Web or shallow lines | Straight or diagonal | Blistered or irregular |
| Surface feel | Firm after scraping | Gap or displaced edge | Soft, swollen, or stained |
| Change over time | Stable for months | Grows seasonally | Returns after cleaning |
| Nearby evidence | No staining | Doors or windows bind | Musty odor or efflorescence |
| Correct repair | Fill and repaint | Repair joint or structure | Stop water, dry, then coat |
Drywall seams often crack as framing lumber dries, floor systems flex, or joint compound loses its bond. Nail pops and screw pops can also break the paint film, but they appear as small raised circles rather than continuous wall cracks.
Plaster may crack because of seasonal movement, lath separation, vibration, or water damage. Masonry cracks can indicate settlement, thermal movement, or mortar deterioration. The coating cannot permanently bridge significant movement unless a compatible flexible system is specified for that substrate.
Is cracked paint a sign of foundation problems?
Cracked paint alone does not prove a foundation problem. Foundation movement becomes more concerning when cracks are wider than approximately 1/8 inch, increase in length or width, run diagonally from window and door corners, continue through masonry, or accompany sticking doors, sloping floors, or displaced surfaces.
These dimensions are screening guidelines, not engineering diagnoses. A stable 1/8-inch crack may be less urgent than a narrow crack that grows quickly. Place a dated width gauge over the opening and record changes for 30-60 days when no immediate hazard exists.
Call a qualified structural engineer or experienced building professional when cracks widen rapidly, cross several materials, show displacement, admit water, or appear with foundation symptoms. Do not cover those signs with elastomeric paint before the cause is documented.
Which Room Conditions Cause Wall Paint to Crack?
Bathrooms, kitchens, basements, and exterior-facing walls experience more coating stress because moisture and temperature change faster in those locations. Condensation, plumbing leaks, roof leaks, and poor ventilation can all damage paint even when the original application was correct.
| Location | Common trigger | Confirming clue | Durable response |
|---|---|---|---|
| Bathroom ceiling | Steam and condensation | Cracks after showers | Exhaust moisture outdoors |
| Kitchen wall | Grease and heat | Sticky or yellow residue | Degrease and prime |
| Basement | Vapor migration | Damp odor or white salts | Correct water entry |
| Exterior wall | Rain and thermal cycling | Cracking near joints | Repair water path |
| Window reveal | Condensation or failed caulk | Dark edge staining | Improve air circulation |
| Ceiling below plumbing | Intermittent leak | Brown ring or softness | Repair leak first |
The U.S. Environmental Protection Agency recommends controlling indoor relative humidity, generally keeping it below 60 percent and ideally between 30 and 50 percent, to reduce condensation and mold risk. A small hygrometer can reveal conditions that are invisible during a brief inspection.
Paint cracking near a cold exterior wall may reflect condensation rather than a defective paint product. Warm, moist indoor air reaches the cold surface, deposits water, and repeatedly wets the coating. Ventilation, insulation, air sealing, and heating balance may matter more than a new topcoat.
Can Cracked Paint Be Painted Over?
Cracked paint should be painted over only when the existing coating is firmly attached, the crack is superficial, and the wall is dry and clean. New paint cannot stabilize loose layers, bridge active structural movement, or stop water, so painting directly over failed material usually shortens the repair interval.
Step 1: Identify the failure boundary
Inspect at least 12 inches beyond the visible crack. Probe edges with a putty knife, look for chalking, and check for stains, soft drywall, bubbling, or a powdery white deposit. Remove all loose coating before deciding whether the repair is localized.
Step 2: Remove unstable paint
Wear eye protection and a suitable dust mask while scraping. Use a carbide scraper or stiff putty knife, and stop when the remaining coating resists lifting. Homes built before 1978 may contain lead-based paint, so avoid dry sanding and use EPA lead-safe practices or a certified contractor.
Step 3: Smooth the transition
Sand the edge between bare wall and intact paint with 120-150 grit abrasive. Feathering prevents a ridge from telegraphing through the new finish. Vacuum dust and wipe the area with a clean, slightly damp cloth.
Step 4: Fill the defect
Use lightweight spackling for small stationary surface cracks and setting-type joint compound for deeper drywall repairs. Do not use rigid filler across a joint that is still moving. Apply thin layers, allowing each layer to dry according to the product label.
Step 5: Prime the repair
Prime exposed drywall paper, joint compound, stains, and glossy paint with the appropriate primer. A water-based acrylic bonding primer suits many sound latex surfaces, while an oil-based or shellac-based stain-blocking primer may be needed for persistent water marks, subject to ventilation and label requirements.
Step 6: Repaint the wall
Apply two compatible finish coats rather than one heavy coat. Maintain the manufacturer’s temperature, humidity, recoat time, and thinning limits. Stop painting if the wall feels damp or the coating remains tacky beyond the stated drying period.
The repair is successful when the surface stays firm, the filled area is invisible under raking light, and the crack does not reopen after one heating and cooling cycle. A new crack within days indicates that the underlying cause remains active.
Which Repair Method Fits the Damage?
Localized patching is the best choice for stable hairline cracking, while broad coating removal is better for alligatoring, widespread peeling, or multiple incompatible layers. Structural movement and active moisture require corrective work before either method can provide a durable finish.
| Repair approach | Suitable damage | Typical USA material cost | Typical elapsed time |
|---|---|---|---|
| Spot scrape and repaint | One small hairline area | $20-$75 | 4-8 hours |
| Fill, prime, and repaint | Several shallow cracks | $40-$150 | 1-2 days |
| Joint tape and compound | Drywall seam movement | $60-$250 | 2-4 days |
| Broad coating removal | Widespread alligatoring | $150-$600 | 2-5 days |
| Moisture remediation | Damp or stained wall | $100-$2,000+ | 1 day to several weeks |
| Structural correction | Recurrent displaced cracks | $500-$10,000+ | Several days to months |
Chemical strippers can soften some coatings but create fumes, waste, and substrate damage if misused. Heat guns can scorch drywall, ignite nearby materials, or release hazardous fumes from old coatings. Mechanical scraping and controlled sanding are often safer for small interior repairs, while large areas may require professional containment.
Elastomeric coatings can bridge limited exterior hairline movement, but they are not a substitute for repairing failed masonry, leaks, or unstable joints. They may also reduce vapor transmission on walls that need to dry toward the interior. Product selection must match the wall assembly.
What Do Wall Crack Repairs Cost in the USA?
Typical USA homeowner costs range from $150-$400 for a small cosmetic wall repair, $400-$1,200 for extensive paint removal and repainting in one room, and $1,000-$2,500 or more when drywall replacement, leak repair, or structural inspection is involved. Regional labor rates, access, lead controls, and finish matching change the total.
| Project scope | Typical labor and materials | Typical time | Cost drivers |
|---|---|---|---|
| Small patch under 2 square feet | $150-$300 | 4-8 hours | Matching texture and sheen |
| One cracked drywall seam | $250-$700 | 1-3 days | Tape, compound, drying |
| One-room repaint after failure | $600-$1,500 | 2-4 days | Scraping and wall preparation |
| Lead-safe preparation | $800-$2,500+ | 2-7 days | Containment and testing |
| Leak-damaged drywall | $500-$3,000+ | 2 days to 2 weeks | Plumbing, drying, replacement |
| Structural crack investigation | $300-$1,500 | 1-4 weeks | Engineer and monitoring |
These are typical planning ranges, not fixed quotations. A contractor should inspect the failure area, test adhesion, identify moisture, and specify preparation before pricing extensive work.
What Mistakes Make Paint Crack Again?
Most recurring paint cracks result from coating over contamination, applying incompatible layers, using excessive thickness, or ignoring moisture. Repairers also create failures by sanding only the visible line while leaving loose paint around it.
- Painting over dust or grease: Clean kitchen walls with a suitable degreaser, rinse residue, and allow complete drying.
- Skipping primer: Prime porous compound, glossy surfaces, stains, and sharply different substrates.
- Over-thinning paint: Add water or solvent only when the product label permits it and specifies the limit.
- Applying one heavy coat: Use two normal coats with the listed recoat interval.
- Forcing dry with a heater: Maintain moderate airflow without directing intense heat at wet paint.
- Ignoring a leak: Repair plumbing, roof flashing, or condensation before replacing the finish.
- Using rigid filler on movement: Use compatible flexible joint or caulk products where the joint remains active.
- Mixing chemistries without testing: Perform a small adhesion test before recoating oil, alkyd, latex, or specialty finishes.
A useful practitioner rule is to enlarge a failed test area until the edge remains firmly bonded. Repairing only the visible crack leaves hidden debonding that can cause a larger failure after repainting.
Another practical rule is to judge dryness by both time and condition. A surface may feel dry while the compound or thick primer below still contains moisture. Color uniformity, firmness, and the product’s recoat window should all agree before the next layer is applied.
How Can You Prevent Future Wall Cracking?
Prevent future cracking by controlling moisture, preparing the substrate, using compatible coatings, applying the correct film thickness, and allowing each layer to dry under stable conditions. Paint flexibility helps with minor movement, but no interior paint can correct major settlement, persistent leaks, or poorly bonded drywall compound.
Use a hygrometer in bathrooms, basements, and laundry rooms. Keep indoor relative humidity near 30-50 percent when practical, exhaust bathroom steam during use, and run the fan for about 20 minutes afterward. Maintain consistent indoor temperature rather than rapidly heating a cold, damp room.
Buy enough paint from the same product line and batch when possible. Record the color, sheen, primer, and application date. A maintenance record helps distinguish a product or preparation failure from a new moisture or movement event.
Test suspicious surfaces before committing to a full room. Apply primer and finish to a 1-square-foot sample, allow the full cure period, then press painter’s tape firmly and remove it at a steady angle. Significant coating transfer indicates an adhesion problem that needs more preparation.
When Should You Call a Professional?
Call a professional when cracks widen, cross masonry, recur after proper preparation, accompany water damage, or appear in a pre-1978 home with suspected lead paint. Professional evaluation is also appropriate when the wall feels soft, the crack has visible displacement, or several rooms show similar movement.
A painter can diagnose coating failure and drywall preparation. A plumber, roofer, or building-envelope contractor should address active water entry. A structural engineer is the appropriate specialist for suspected foundation movement, load-path concerns, or cracks with measurable displacement.
Paint cracking is usually safe to repair when the wall is dry, stable, and free of hazardous coatings. Do not scrape aggressively around electrical outlets, plumbing penetrations, or damaged drywall without confirming what lies behind the surface.
Frequently Asked Questions
Does low-quality paint cause wall cracking?
Low-quality paint can crack sooner when its binder provides limited flexibility or when the coating has poor resistance to cleaning and humidity. However, premium paint cannot overcome grease, damp drywall, excessive thickness, incompatible layers, or active movement. Surface preparation and environmental control usually influence durability more than price alone.
Why is fresh paint cracking after one coat?
Fresh paint often cracks because the coat is too thick, the wall was damp, the surface was contaminated, or the underlying joint compound was not fully cured. Rapid heating and strong airflow can dry the surface faster than the material below. Scrape a test area to determine whether the defect is only in the new coat.
Can humidity crack paint without a leak?
Humidity can crack paint without a plumbing leak when condensation repeatedly wets a cold wall or ceiling. Bathrooms, basements, and poorly ventilated kitchens are common locations. Measure relative humidity, inspect for staining and mold, improve ventilation, and allow the substrate to dry before priming and repainting.
Is caulk or spackle better for wall cracks?
Spackle is better for small, stable holes and superficial cracks in drywall. Paintable acrylic-latex caulk is better at inside corners and trim joints that experience minor movement. Neither product is suitable for a widening structural crack, a wet wall, or a large damaged drywall seam without additional repair.
How long should a repaired wall crack be monitored?
Monitor a repaired crack for at least 30-60 days when movement is suspected, recording its width and length weekly. Seasonal or temperature-related movement may take longer to appear. If the crack grows, displaces the surface, or returns through a sound repair, stop repainting and arrange a building inspection.
The Bottom Line
Why is paint cracking on walls? The coating has usually become too brittle, too thick, poorly bonded, moisture-damaged, or unable to accommodate movement beneath it. Identify the pattern first, scrape to a sound edge, correct water or movement, use compatible filler and primer, and apply controlled coats under stable conditions. A stable surface-only crack needs paint repair; a growing crack through drywall, plaster, masonry, or a joint needs professional diagnosis before repainting.