Cracks Where Wall Meets Ceiling: Causes and Fixes
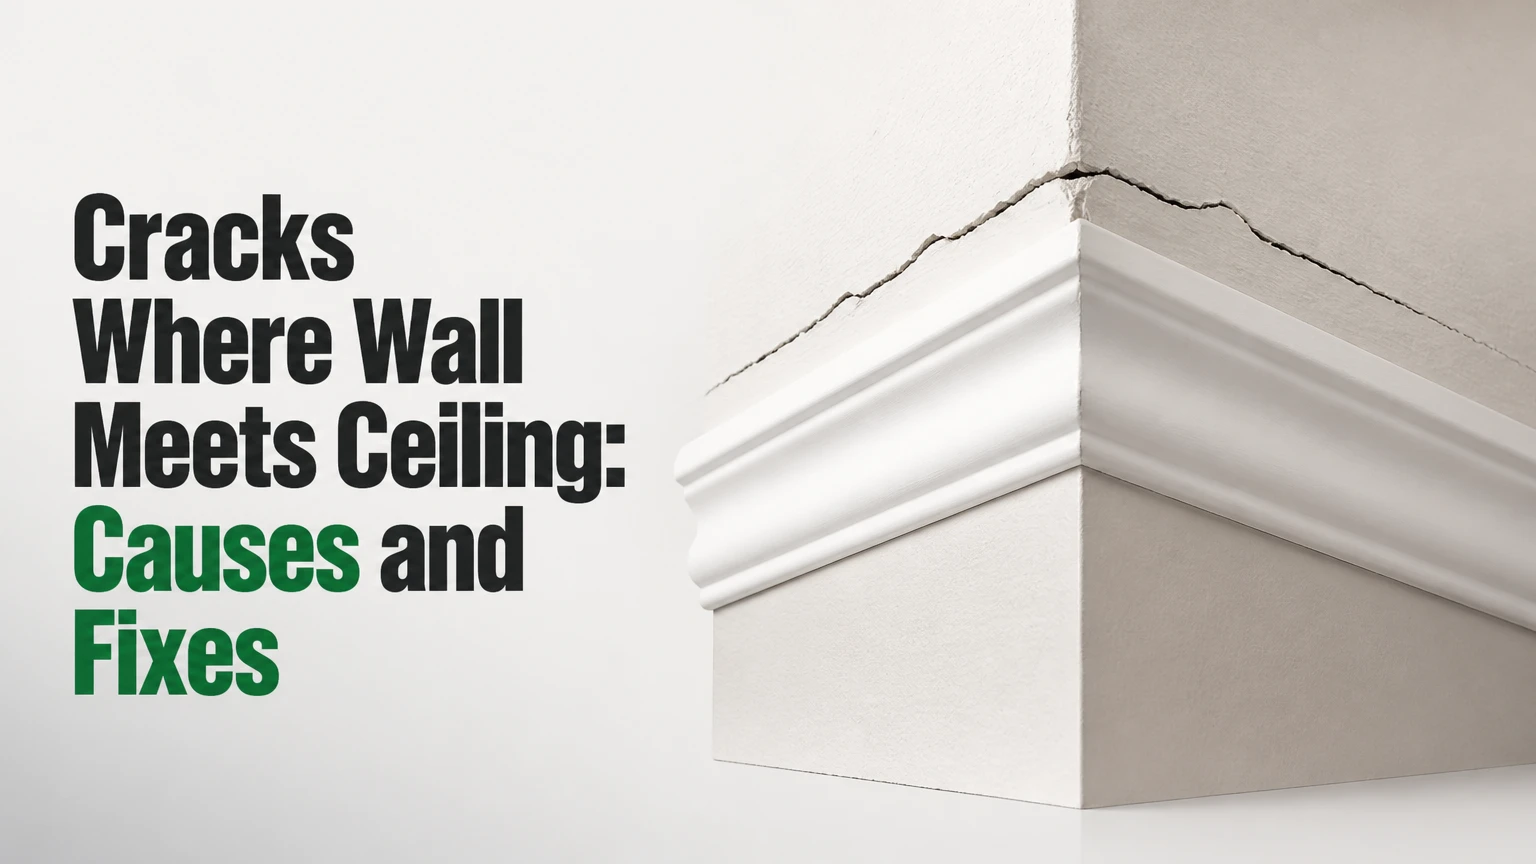
Cracks where wall meets ceiling usually result from drywall joint movement, seasonal framing changes, tape failure, water damage, or structural settlement. A narrow crack that opens during winter and closes in warmer weather often indicates truss uplift, while a stained, soft, widening, or sagging joint requires prompt moisture or structural investigation.
Key Facts at a Glance
- A ceiling-wall joint crack is commonly called corner-joint separation or a drywall stress crack.
- Seasonal cracks often repeat at the same interior corners and change width with temperature or humidity.
- Truss uplift affects homes with roof trusses, but ordinary joist movement, poor taping, and settlement can look similar.
- Yellow staining, soft drywall, bubbling paint, or a sagging ceiling indicate possible water intrusion.
- Flexible paintable acrylic-latex caulk suits a stable hairline gap, but it cannot correct structural movement or wet drywall.
- A crack wider than about 1/8 inch, a rapidly changing crack, or a crack accompanied by displacement deserves professional evaluation.
What Causes Cracks Where a Wall Meets a Ceiling?
Cracks at a wall-ceiling joint form when the wall and ceiling surfaces move differently or when the joint compound and tape lose adhesion. The visible line is often a failed finish connection rather than a crack through the entire building frame, but appearance alone cannot prove that distinction.
Drywall panels meet at an inside corner. Installers cover that junction with paper tape or specialized corner material embedded in joint compound. The tape bridges two planes, so repeated movement concentrates stress along a narrow line. Low-quality surface preparation, inadequate compound, fast drying, or a rigid repair can make the defect return.
Common causes include:
- Seasonal wood movement from changing moisture content.
- Roof-truss uplift in cold, dry weather.
- New-home framing shrinkage during the first several heating seasons.
- Water leaking from roofing, flashing, plumbing, or HVAC equipment.
- Foundation or framing movement.
- Vibration from nearby construction or heavy mechanical equipment.
- Poor drywall fastening near a moving truss or joist.
A straight crack following the corner is usually a finish-joint problem. A diagonal crack extending down the wall, a displaced corner, or several related cracks across the room changes the diagnosis.
How Does Seasonal Truss Uplift Create a Corner Crack?
Truss uplift occurs when roof-truss components change moisture content at different rates, causing the truss to deflect and lift the ceiling drywall near an interior partition. The wall framing remains comparatively stable, so the drywall corner separates when the ceiling plane moves independently.
The common explanation that the bottom chord expands in winter is oversimplified and can be wrong for a particular attic assembly. In many cold-climate homes, the bottom chord remains warmer and more humid because insulation covers it, while the top chords experience cold, dry attic conditions; differential shrinkage and expansion can arch the truss upward at its center. Building orientation, ventilation, insulation depth, and wood moisture determine the actual direction and amount of movement.
The mechanism typically follows this sequence:
- Outdoor conditions change attic temperature and wood moisture.
- Truss chords respond differently because insulation separates the lower chord from the attic.
- The roof truss deflects relative to the wall partition.
- Ceiling drywall moves with the truss.
- Wall drywall stays attached to wall studs.
- Tape or joint compound tears at the inside corner.
A seasonal pattern is strong evidence, not absolute proof. A roof leak can become more visible in winter, and a settlement crack may appear to change because lighting or paint shadows change.
Which clues point to truss uplift?
| Clue | Typical truss-uplift pattern | Alternative explanation |
|---|---|---|
| Location | Interior partition corners | Exterior corners may indicate settlement or framing movement |
| Timing | Opens in winter, narrows in humid weather | A leak may worsen after rain or snow |
| Shape | Straight horizontal or corner separation | Diagonal branching suggests movement elsewhere |
| Ceiling position | Ceiling remains flat | Sagging suggests moisture, overloading, or framing failure |
| Attic structure | Engineered roof trusses above partition | Conventional rafters may produce different movement |
| Repetition | Same corners recur annually | Isolated occurrence may be tape or compound failure |
Roof-truss manufacturers and drywall-industry guidance commonly recommend floating the ceiling drywall near partition walls so the truss can move without tearing the finished corner. The repair must follow the actual framing system and manufacturer instructions.
How Can You Diagnose the Crack Before Repairing It?
Diagnose the joint by recording its width, pattern, moisture condition, timing, and relationship to nearby defects. A flashlight held across the surface, a ruler, and dated photographs usually provide enough initial information to choose between cosmetic repair and professional assessment.
Measure the widest visible opening with a plastic crack gauge or ruler. Mark both ends lightly in pencil and photograph the crack beside a ruler. Repeat the measurement after heavy rain, during cold weather, and during a humid period. Do not press a screwdriver into the joint to “test” its depth.
| Observation | Likely interpretation | First action | Urgency |
|---|---|---|---|
| Hairline opening under 1/32 inch | Paint or compound shrinkage | Clean and monitor | Low |
| Opening about 1/32-1/8 inch | Joint movement or failed tape | Check seasonality and attic | Moderate |
| Opening over 1/8 inch | Significant movement or damaged drywall | Arrange professional inspection | High |
| Yellow, brown, or gray stain | Roof, plumbing, or HVAC moisture | Find and stop the leak | High |
| Soft, swollen, or crumbling drywall | Saturated gypsum board | Avoid patching; remove damaged material | High |
| Diagonal wall crack with displacement | Settlement or framing movement | Inspect related walls and foundation | High |
| Sagging ceiling or popped fasteners | Wet, overloaded, or deflected ceiling | Keep people clear and call a professional | Immediate |
Joint compound may crack while the underlying gypsum remains sound. Conversely, a neat surface crack can conceal wet insulation, deteriorated framing, or a moving foundation. Diagnosis should therefore include the attic above the area when safe access exists.
When Is a Crack at the Ceiling-Wall Joint Dangerous?
A ceiling-wall crack is potentially dangerous when it accompanies water, sagging, rapid widening, structural displacement, or multiple connected cracks. A stable hairline corner crack without staining or movement is usually a finish-maintenance issue, not an emergency.
Call a qualified contractor, building inspector, structural engineer, or roofing professional when:
- The ceiling surface bows downward or separates from framing.
- Drywall feels damp, soft, swollen, or crumbly.
- The crack grows noticeably over days or weeks.
- The opening exceeds approximately 1/8 inch.
- Doors or windows bind at the same time.
- Floors slope, masonry cracks, or basement walls show related movement.
- A crack crosses a load-bearing wall or continues through several rooms.
- Water enters near electrical fixtures, smoke alarms, or recessed lights.
Turn off power to a wet electrical area only if the panel and access are dry and safe. Do not climb into an attic on wet insulation, step between joists, or disturb suspected asbestos-containing texture. Homes built before 1978 may also contain lead-based paint, so sanding painted surfaces requires appropriate containment and testing decisions.
Which Repair Should You Choose?
Choose flexible caulk for a narrow, dry, stable cosmetic joint; retape a failed but otherwise sound drywall corner; use a floating drywall detail for recurring truss movement; and correct the leak or structural cause before repairing the finish. Crown molding can conceal a recurring joint, but it is a concealment method rather than a structural repair.
| Repair method | Suitable crack | Typical USA material cost | Main limitation |
|---|---|---|---|
| Paintable acrylic-latex caulk | Dry gap up to about 1/8 inch | $5-$15 | Poor choice for loose tape or movement over its elasticity |
| Paper retaping | Torn tape, sound drywall | $15-$40 | Requires 2-3 drying days and careful finishing |
| Drywall replacement | Wet, swollen, crumbling board | $30-$150 DIY materials | Leak must be corrected first |
| Floating corner detail | Repeated truss uplift | $20-$100 materials | Requires attic access and framing knowledge |
| Crown molding | Cosmetic concealment | $100-$1,200 typical installed room | Can hide warning signs and must allow movement |
| Professional inspection | Unclear or progressive damage | $150-$500 typical visit | Does not include repair work |
Rigid spackle is a poor choice for a moving inside corner because it has little tolerance for repeated displacement. Pure silicone is also unsuitable when the surface must be painted, since most paints do not adhere reliably to cured silicone.
How Do You Repair a Small, Dry Hairline Crack?
Repair a small, dry hairline crack with flexible paintable caulk after confirming that the drywall is firm and no moisture source exists. The active work usually takes 30-60 minutes, followed by the manufacturer’s drying period and touch-up painting.
Before You Start
| Requirement | Typical value |
|---|---|
| Skill level | Basic DIY |
| Active time | 30-60 minutes |
| Drying time | 2-24 hours, product dependent |
| Materials | 1 tube paintable acrylic-latex caulk, primer, matching paint |
| Tools | Putty knife, vacuum, damp cloth, caulk tool |
| Surface condition | Dry, firm, free of loose tape and dust |
Step 1: Remove Loose Finish
Scrape only loose paint and crumbling compound with a sharp 1-1/2-inch putty knife. Do not widen a sound joint unnecessarily, because a larger repair requires more compound and creates a broader paint transition.
Vacuum dust from the corner, then wipe the surface with a barely damp cloth. Allow the joint to dry completely.
Success checkpoint: The remaining edges feel firm when lightly pressed.
Common mistake: Applying caulk over powdery compound, which causes early peeling.
Step 2: Apply Paintable Caulk
Cut the nozzle at a small angle, leaving an opening roughly 1/8 inch wide. Run a continuous bead through the corner without filling the joint excessively; a thin, flexible seal performs better than a large soft ridge.
Tool the bead with a damp finger or caulk tool in one steady pass. Keep pressure light enough to leave material in the joint.
Success checkpoint: The corner has a continuous concave seal without pinholes.
Common mistake: Using painter’s caulk that dries hard instead of a flexible acrylic-latex or elastomeric formulation.
Step 3: Cure, Prime, and Paint
Follow the tube’s cure time rather than relying on a universal two-hour rule. Temperature, humidity, bead thickness, and ventilation can extend curing from several hours to a full day.
Prime exposed compound or stained areas with a compatible primer, then apply two thin paint coats if needed. Paint the ceiling and wall separately with controlled cut lines.
Success checkpoint: The repaired line remains closed after normal room-temperature changes.
Common mistake: Painting while the caulk is still soft, which can pull the bead from the corner.
How Do You Retape a Torn Drywall Corner?
Retape a torn drywall corner when the paper tape has detached but the drywall remains dry, flat, and securely fastened. The repair takes about 3-4 active hours spread across 2-3 days because joint compound needs drying time between coats.
Step 1: Cut Out Damaged Tape
Score both sides of the failed tape with a utility knife and peel away the loose section. Cut back to firmly bonded tape, but avoid cutting into intact gypsum paper.
Remove ridges and loose compound. If the gap is deeper than about 1/8 inch, prefill it with setting-type compound according to the product’s mixing instructions.
Step 2: Embed New Paper Tape
Apply all-purpose joint compound to both sides of the corner with a 4- or 6-inch knife. Press paper tape into the wet compound, crease it accurately, and remove excess compound without starving the tape.
Paper tape generally provides a stronger inside corner than ordinary mesh tape because the paper creates a continuous folded reinforcement. Mesh can work with compatible setting compounds, but product instructions matter.
Step 3: Build and Feather the Finish
Apply a second coat after the first coat is firm or dry. Use a 6- or 8-inch knife, then apply a final thin coat feathered 6-8 inches onto both surfaces.
Sand lightly with 180-220 grit abrasive or use a damp sponge. Excessive sanding can expose tape and create a visible weak line.
Step 4: Seal and Paint
Prime the repaired compound before painting. Unprimed joint compound can absorb paint unevenly and produce a dull, flashing patch under side lighting.
Professional rule of thumb: A corner repair that looks perfect under direct light may remain visible under a window’s grazing light. Feather farther and apply thinner coats when the wall receives strong side illumination.
Can Floating Drywall or Crown Molding Stop Recurring Cracks?
A floating drywall corner can reduce recurring truss-uplift damage by allowing ceiling drywall to move independently of the wall partition. Crown molding can hide the gap when attached to the wall only, but it should not be used to conceal active water damage or substantial structural movement.
A floating detail may involve drywall clips, framing blocks, or a fastening layout specified by the drywall or truss manufacturer. The exact method depends on whether the ceiling drywall is attached to roof trusses, ceiling joists, or engineered framing. Removing fasteners near a wall without understanding the assembly can damage fire separation, insulation, or ceiling support.
Crown molding requires equally careful installation. Fasten the molding to wall studs or wall framing, and avoid rigidly fastening its upper edge to the moving ceiling when truss uplift is the cause. Leave a controlled shadow line or movement gap where the design permits.
| Prevention or concealment method | Movement accommodation | Attic access | Best application |
|---|---|---|---|
| Floating drywall clips | High when correctly installed | Usually required | Recurrent truss uplift |
| Wall-only crown molding | Moderate visual accommodation | Not required | Dry, recurring cosmetic corner |
| Rigid caulk and compound | Low | Not required | Stable, nonmoving finish only |
| Humidity control | Indirect, variable | Not required | Homes with large indoor humidity swings |
| Correct attic insulation and ventilation | Indirect, assembly dependent | Usually required | New construction or attic correction |
A counterintuitive point matters here: adding more screws near the ceiling edge can worsen truss-uplift cracks. Extra fasteners restrain the drywall where movement needs to occur, transferring the force into the finished corner.
What Does Repair Cost in the USA?
A small caulk repair commonly costs $5-$50 as a DIY project, while professional drywall retaping often costs $150-$500 for a small room or localized repair. Water remediation, ceiling replacement, attic correction, engineering review, and painting can raise the total substantially.
| Project type | DIY materials | Typical professional total | Typical duration |
|---|---|---|---|
| Hairline caulk repair | $10-$30 | $150-$300 minimum visit | 1 day |
| Local retaping | $20-$60 | $200-$600 | 2-3 days |
| Drywall patch after leak | $40-$150 | $400-$1,500 | 2-5 days |
| Crown molding in one room | $100-$400 | $500-$1,500 | 1-2 days |
| Attic movement correction | $50-$250 | $500-$2,000 | 1-2 days |
| Structural or foundation investigation | Not usually DIY | $500-$2,500 or more | 1-4 weeks for follow-up |
These are typical USA planning ranges, not fixed bids. Metropolitan labor rates, ceiling height, furniture removal, texture matching, minimum service charges, and repainting often determine the final price more than the crack itself.
Get separate line items for leak detection, drying, drywall replacement, finishing, painting, and the underlying repair. A low bid that includes only cosmetic patching may leave the actual cause untouched.
How Do Water Damage and Settlement Change the Repair?
Water damage requires source control and removal of compromised material, while settlement requires movement assessment before cosmetic finishing. Neither condition should receive a simple caulk bead as the first repair.
For a suspected leak, inspect roof penetrations, flashing, valleys, plumbing above the ceiling, bathroom fixtures, and HVAC condensate lines. Moisture meters can locate elevated readings, but a meter does not identify the leak path. Water can travel along framing before appearing at the corner.
For settlement, inspect whether the crack continues down the wall, appears at door and window openings, or coincides with uneven floors and sticking doors. A dated crack monitor can establish movement, but a ruler mark is not an engineering diagnosis.
What if the wall is plaster instead of drywall?
Plaster corner cracks require a different repair when the plaster has detached from its lath or substrate. Hairline surface cracks can receive compatible plaster repair material, but hollow-sounding, bulging, or loose plaster needs stabilization before filling.
Do not force drywall joint tape and compound into a historic plaster corner without testing adhesion and texture compatibility. In older USA homes, preserve significant decorative plaster and consult a plaster specialist when the finish has architectural value.
Common Mistakes and How Do You Fix Them?
The most common repair failures come from treating every corner crack as a paint defect. Correcting the wrong substrate, moisture condition, or movement pattern guarantees a short-lived result.
- Patching over a leak: Stop the leak, dry the assembly, and replace soft gypsum before refinishing.
- Using rigid spackle: Remove failed filler and use flexible caulk for a narrow moving joint.
- Retaping over loose tape: Cut back to bonded material before embedding new tape.
- Sanding through paper tape: Add a thin compound coat instead of grinding deeper.
- Fastening molding to both planes: Attach primarily to the wall when the ceiling moves.
- Removing attic fasteners casually: Confirm the framing and use a manufacturer-compatible floating detail.
- Ignoring indoor humidity: Maintain a reasonable winter relative humidity, often around 30-40% in cold climates, while avoiding condensation on windows and exterior walls.
- Painting before cure: Wait for the compound or caulk to harden according to its label.
A practical inspection rule is to repair after the seasonal movement has reached its widest stable position, provided no water or safety hazard exists. Painting during the narrowest part of the cycle can expose the new finish when the joint opens again.
Which Action Fits Your Situation?
A renter should photograph the defect, report stains or movement promptly, and use only removable cosmetic measures with written permission. A homeowner can monitor a dry hairline crack, but recurring seasonal separation may justify a floating detail rather than annual retaping.
| Situation | Recommended action | Avoid | Decision basis |
|---|---|---|---|
| Renter, dry hairline crack | Notify landlord; request approved caulk repair | Cutting tape or attic work | Lease and liability restrictions |
| New home, first two years | Document and request builder inspection | Repeated cosmetic patching alone | Framing shrinkage or warranty issue |
| Older home, stained corner | Find leak before patching | Painting over stain | Moisture can destroy gypsum |
| Annual winter recurrence | Confirm truss or joist movement | Rigid compound repair | Movement will repeat |
| Wide diagonal crack | Obtain building assessment | Assuming truss uplift | Pattern may indicate settlement |
| Sagging or wet ceiling | Keep clear and call qualified help | DIY ceiling removal below hazard | Collapse and electrical risks |
Insurance coverage varies by policy and cause. Sudden accidental water damage may receive different treatment from long-term seepage, wear, or foundation movement. Photograph conditions before demolition and keep invoices for emergency mitigation.
FAQ
Are hairline cracks between walls and ceilings normal?
Hairline cracks can be normal finish movement when they remain narrow, dry, stable, and limited to the joint. Seasonal wood movement and drywall compound shrinkage commonly produce this pattern. A hairline crack is not automatically harmless if it has staining, soft drywall, rapid growth, displacement, or related cracks across the structure.
Why do cracks appear in the same corner every year?
The same corner often cracks annually because that partition lies beneath a roof truss that moves differently from the interior wall. Winter temperature and moisture changes can lift the truss relative to the wall, stressing the taped joint. Confirm the pattern by photographing and measuring the opening in different seasons.
Should I use mesh tape or paper tape on an inside corner?
Paper tape is usually the stronger choice for a conventional inside drywall corner because its folded center forms a continuous reinforcement. Mesh tape can work with compatible setting-type compounds, but ordinary premixed compound may not provide the same bond or crack resistance. Follow the tape and compound manufacturer’s compatibility instructions.
Can I fill a ceiling-wall crack with expanding foam?
Expanding foam is generally unsuitable for a finished inside corner because it expands unpredictably, remains difficult to trim cleanly, and does not create a durable taped finish. Foam may have limited use around hidden air leaks when specified for that purpose. Use flexible caulk or a properly retaped joint for the visible crack.
How long should I monitor a widening crack?
Monitor a minor, dry crack for several weeks by recording its width and photographing it from the same position. Do not wait through a monitoring period when the ceiling sags, water is present, the crack grows rapidly, or the opening exceeds about 1/8 inch. Those conditions warrant prompt professional evaluation.
Can humidity alone cause the drywall corner to crack?
Humidity changes can cause wood framing and drywall materials to expand or contract, but humidity alone does not explain every corner crack. Large indoor humidity swings, poor ventilation, attic condensation, and roof-truss movement can interact. Measure indoor relative humidity and inspect the attic before assigning the cause to normal seasonal change.
The Bottom Line
Cracks where wall meets ceiling are most often drywall joint separation caused by material movement, failed tape, or seasonal truss uplift. A dry hairline joint can receive flexible paintable caulk, while torn tape needs retaping and recurring truss movement may need a floating drywall detail. Stains, soft drywall, sagging, rapid widening, or connected structural cracks require investigation before cosmetic repair.