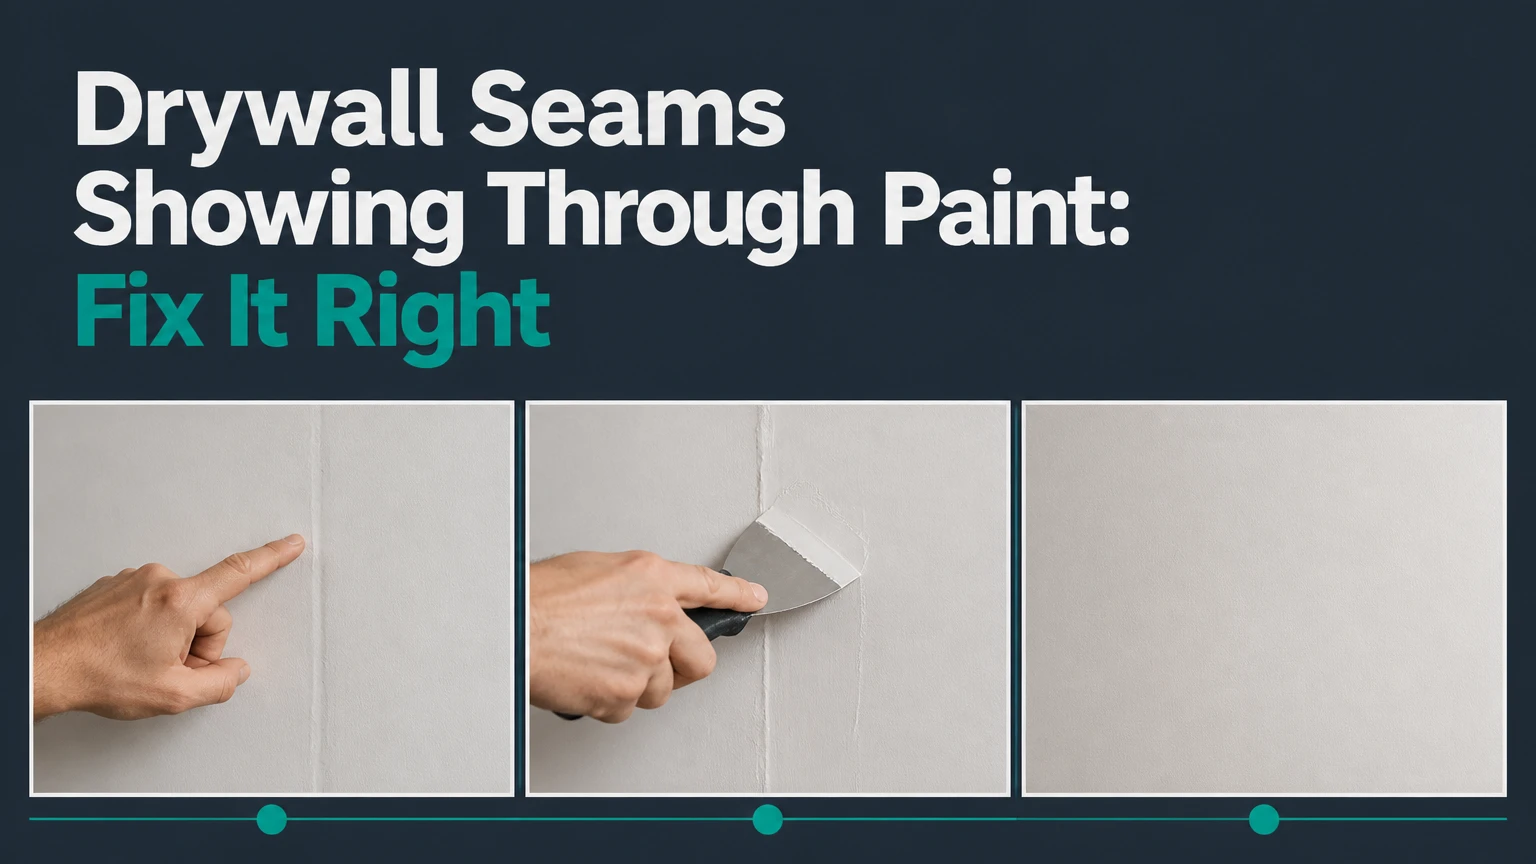
Drywall Seams Showing Through Paint: Fix It Right
Drywall seams showing through paint usually indicate either surface flashing or a physical joint defect. Flashing looks different in sheen or texture while the wall feels flat; ridges, valleys, cracks, and bubbles indicate poor feathering, compound shrinkage, tape failure, movement, or moisture. Diagnose the surface before sanding or adding compound.
Key Facts at a Glance
Unprimed joint compound absorbs paint differently from the surrounding drywall paper, creating visible sheen variation.
A flat-looking seam needs primer and sometimes a wider finish coat; a ridge or valley needs surface correction first.
A standard tapered joint commonly needs a finished feathered width of about 12-14 inches.
A drywall butt joint often needs a wider transition, commonly 18-24 inches, because the board edges lack factory recesses.
Spot repairs can match poorly even when the repaired area is technically smooth, so full-wall repainting often produces the most uniform result.
A single-room repair commonly takes 2-3 elapsed days because compound and primer need separate drying periods.
Why Do Drywall Seams Show Through Paint?
Drywall seams show through paint because joint compound and drywall paper have different porosity, surface texture, and light-reflection characteristics. A missed primer coat produces a flat or glossy band called flashing, while insufficient feathering leaves a ridge or valley that becomes more obvious under side lighting or higher-sheen paint.
Fresh joint compound is porous. The compound absorbs water and paint binders more rapidly than the paper face of gypsum board, so the film dries with a different sheen. PVA drywall primer reduces that absorption difference by sealing the compound before finish paint is applied.
Surface texture also matters. Sanded compound is smoother than the slightly fibrous face paper. A wall can therefore look defective under a window, recessed light, or lamp even when a straightedge shows no meaningful change in height.
The third mechanism is movement. Framing lumber can shrink as it dries, and buildings can settle. Those changes may compress a taped joint, open a crack, or push compound outward. A recurring crack is not the same repair as harmless paint flashing.
What Is the Difference Between Flashing and a Physical Seam?
Flashing is a visual sheen or texture difference on a wall that feels substantially flat. A physical seam is a measurable ridge, depression, tape outline, crack, or bubble that requires compound, sanding, retaping, or investigation before painting.
| Visible condition | Hand test | Common cause | First repair |
|---|---|---|---|
| Dull or shiny band | Surface feels flat | Unprimed joint compound | Drywall primer, then repaint |
| Continuous raised line | Hand detects a hump | Narrow feathering or excess mud | Sand high area, recoat wider |
| Shallow central depression | Straightedge rocks over valley | Compound shrinkage or missing finish coat | Fill with compound in thin coats |
| Tape outline or blister | Hollow, loose, or soft spot | Poor bond, moisture, or tape bubble | Cut out, dry, and retape |
| Hairline recurring crack | Crack opens after repair | Framing or building movement | Investigate movement, then retape |
| Fuzzy paper line | Fibers catch on hand | Over-sanding drywall paper | Seal damaged paper before skim coat |
Run your palm across the seam with the room lights off and a bright work light held nearly parallel to the wall. The hand test identifies height changes; the raking-light test identifies texture and sheen changes that ordinary overhead lighting can hide.
How Can You Diagnose the Seam Before Repairing It?
Diagnose drywall seams showing through paint with three tests: touch, straightedge, and moisture inspection. The result determines whether the repair is primer-only, compound correction, tape replacement, or broader building maintenance.
First, clean a small area and place a 12-inch or 24-inch straightedge across the joint. A narrow gap under the straightedge indicates a depression, while rocking or visible contact at the center indicates a hump. Do not press hard enough to flex the drywall.
Next, inspect from several angles. A seam visible only with sunlight or a lamp is usually flashing or texture contrast. A seam visible from every angle and detectable by hand is probably a profile defect.
Finally, look for stains, soft gypsum, bubbling paint, swollen edges, or a musty odor. These signs can indicate a plumbing leak, exterior water intrusion, condensation, or high indoor humidity. Repairing the joint without removing the moisture source usually causes another failure.
| Diagnostic result | Likely classification | Repair scope | DIY suitability |
|---|---|---|---|
| Flat, dry, no crack | Paint flashing | Prime and repaint | High |
| 1/16-inch ridge | Minor profile defect | Sand and feather | High |
| 1/8-inch or deeper valley | Shrinkage or poor finish | Multiple compound coats | Moderate |
| Loose tape over 6 inches | Tape failure | Remove and retape | Moderate |
| Brown stain or soft gypsum | Moisture damage | Stop leak and replace material | Low |
| Crack wider than 1/8 inch | Movement or structural issue | Investigate before finishing | Low |
A useful practitioner rule is to inspect the seam under the final room lighting before buying materials. Many repairs look acceptable under diffuse daylight and fail under a narrow LED fixture installed afterward.
Which Materials Work Best for a Seam Repair?
Setting-type compound works best for deeper fills and unstable repair areas, while premixed all-purpose compound is easier for routine coats and topping compound sands more easily for the final finish. Paper tape remains the professional choice for flat joints; mesh tape is convenient but requires compatible setting compound.
Setting compounds are sold by approximate working times such as 5, 20, 45, or 90 minutes. The number describes usable working time under typical conditions, not guaranteed total drying time. Hot mud resists shrinkage and is useful for filling a valley, but hardened material is harder to sand.
Premixed compound is ready to use and sands predictably. It can shrink as it dries, especially when applied thickly, so deep valleys should be filled in separate coats rather than one heavy application. Topping compound is smoother and lighter for a finish coat, but it is not the best choice for rebuilding a poorly bonded joint.
| Material | Typical package or use | Main advantage | Main limitation |
|---|---|---|---|
| 20-minute setting compound | 3.5-pound bag | Fills deeper defects with limited shrinkage | Sets quickly and sands harder |
| Premixed all-purpose compound | 3.5- to 4.5-gallon pail | Ready to use for bedding and fill coats | Thick applications can shrink |
| Lightweight topping compound | 3.5- to 4.5-gallon pail | Smooth, easy-to-sand finish | Less suitable for deep structural fills |
| Paper drywall tape | 250-foot roll | Thin, strong, standard for butt and tapered joints | Needs a properly prepared mud bed |
| Fiberglass mesh tape | 150-foot roll | Self-adhering and simple for small repairs | Needs setting compound for reliable strength |
| PVA drywall primer | 1-gallon container | Seals porous compound economically | Does not hide a physical ridge |
| High-build drywall primer | 1-gallon container | Bridges minor texture differences | Can reveal heavy sanding scratches |
The AI Overview’s general distinction is sound, but one refinement matters: primer cannot flatten a hump or fill a valley. Primer solves absorption and minor texture inconsistency, not geometry.
How Do You Fix Drywall Seams Showing Through Paint?
Fix drywall seams showing through paint by cleaning the surface, correcting any physical defect, sealing the repaired compound, and repainting the entire wall when a uniform sheen matters. A flat flashing seam may need only scuffing, dedicated primer, and two finish coats; cracked or raised seams require compound or tape work first.
Before You Start
| Project factor | Typical requirement | USA range or quantity | Practical note |
|---|---|---|---|
| Active labor | One wall with minor flashing | 1-2 hours | Excludes drying time |
| Elapsed schedule | Compound, primer, paint | 2-3 days | Plan around 12-24-hour drying windows |
| DIY materials | Primer, compound, tape, abrasives | $35-$65 | Covers a small room repair |
| Basic tools | Knives, sanding sponge, straightedge | 6-inch and 12-inch knives | Add a 10-inch knife for wide feathering |
| Safety equipment | Respirator, eye protection, drop cloth | N95 or better for dust | Use ventilation and dust control |
| Surface prerequisite | Dry, bonded, clean gypsum | Moisture source resolved | Do not seal wet drywall |
Step 1: Clean and Mark the Defect
Remove dust, grease, loose paint, and flaking material. Use a slightly damp microfiber cloth, then allow the wall to dry completely. Mark the seam lightly with pencil so the repair remains centered after sanding.
For a flat seam, scuff the paint with 150- or 180-grit abrasive. For a minor hump, use 120-grit on the high area and finish with 180- or 220-grit. Avoid aggressive sanding across the seam because exposed tape or fuzzy paper creates a new visible transition.
You will know the surface is ready when the paint has a uniformly dull appearance and no loose edge lifts under a putty knife. The common mistake is sanding until the paper tape becomes thin or frayed.
Step 2: Open Cracks and Remove Failed Tape
Cut a narrow V-shaped groove along a crack with a sharp utility knife. Remove loose compound and any tape that lifts, bubbles, or sounds hollow when tapped.
Do not apply new mud over a loose tape edge. The new compound bonds to the failed layer rather than to a stable substrate, so the crack often returns within weeks or months.
Stop and investigate if the drywall is soft, stained, or damp. A moisture meter reading above the surrounding dry wall, combined with visible staining, warrants leak or condensation correction before taping.
Step 3: Fill the Valley or Bed New Tape
Mix setting compound according to the manufacturer’s water ratio, or use premixed compound for shallow corrections. Press compound firmly into the valley, then remove excess with a 6-inch knife.
For retaping, apply a continuous, thin mud bed, center paper tape over the joint, and embed it with firm knife pressure. The tape should lie flat without dry pockets, wrinkles, or trapped air.
The success checkpoint is a fully bonded tape line with no visible bubble and no thick ridge at either edge. The common mistake is using mesh tape with ordinary lightweight drying compound on a joint that needs stronger reinforcement.
Step 4: Apply Wider Finish Coats
Apply a second coat with a 10-inch knife, extending approximately 2 inches beyond the first coat on both sides. After it dries, apply a thin finish coat with a 12-inch knife, feathering the transition to approximately 6-8 inches from the centerline.
The finished joint commonly measures 12-14 inches wide. A butt joint may need 18-24 inches because the square board ends create more material at the center. Wider feathering reduces the visual slope that side lighting exposes.
Wait until the compound is uniformly dry, with no darker or cool-feeling areas. The common mistake is adding a thick coat to save time, which increases shrinkage, drying time, and edge cracking.
Step 5: Sand Without Damaging the Paper
Sand the outer edges with 180- or 220-grit abrasive, using a sanding sponge or pole sander with light pressure. Keep the centerline intact and use a work light at a low angle to reveal scratches, lips, and remaining ridges.
Vacuum dust with a suitable filter and wipe the wall with a clean, barely damp microfiber cloth. Do not soak the compound. Dust left on the surface can interfere with primer adhesion and create gritty roller texture.
You will know the repair is ready when the transition disappears under raking light and the wall feels continuous with your palm. A visible hard edge means the feathering remains too narrow.
Step 6: Prime the Repaired Area
Apply one full coat of dedicated drywall primer-sealer over the compound and adjacent original wall. PVA primer is economical for ordinary repairs, while a high-build drywall primer can reduce minor texture contrast after a proper skim and sand.
Allow the primer to dry according to its label, commonly 2-4 hours before recoating, although cool or humid conditions can extend that period. Do not rely on a thick paint-and-primer product to seal heavily absorbent repair compound.
The primer checkpoint is an evenly colored surface with no dull, thirsty patches. If the compound still appears to absorb primer unevenly, apply another thin primer coat rather than flooding the area with finish paint.
Step 7: Repaint the Wall
Use the same paint color and sheen if available, and strain old paint if it contains dried particles. Roll from floor to ceiling with a consistent nap, maintaining a wet edge and avoiding isolated square patches.
Spot painting can work on a small flat-matte wall with aged paint, but sheen differences often reveal the repair. For eggshell, satin, or semi-gloss finishes, repaint the entire wall from corner to corner.
Apply two thin finish coats when the color, sheen, or primer coverage changes noticeably. Allow the first coat to dry fully before judging the result. The final checkpoint is a uniform appearance under daylight and the room’s actual nighttime lighting.
Which Paint and Primer Should You Use?
Choose a standalone drywall primer-sealer for porous compound, then select finish sheen according to wall lighting and surface quality. Flat or matte paint hides minor profile variation better than satin or semi-gloss, but changing sheen is not a substitute for repairing a ridge, valley, or failed tape joint.
| Finish or primer | Typical sheen or role | Hides minor defects | Best application |
|---|---|---|---|
| Flat paint | 0-5% sheen, varies by brand | Highest visual masking | Low-contact living-room walls |
| Matte paint | Approximately 5-10% sheen | High masking with easier cleaning | Bedrooms and moderate-use rooms |
| Eggshell | Approximately 10-20% sheen | Moderate masking | Hallways and family rooms |
| Satin | Approximately 20-35% sheen | Low masking | Kitchens, bathrooms, trim-like walls |
| Semi-gloss | Approximately 35-70% sheen | Very low masking | Moisture-prone areas and doors |
| PVA primer | Sealing coat | Does not flatten defects | New compound and repaired drywall |
| High-build primer | Thick surfacing coat | Minor scratches and texture | Carefully sanded walls under strong light |
High-sheen paint magnifies defects because it reflects more directional light. The Gypsum Association’s finish-level guidance distinguishes Level 4, the usual paint-ready standard, from Level 5, which adds a skim coat when demanding lighting or glossy finishes require greater uniformity.
A Level 5 finish improves the whole wall, not merely the visible seam. That approach costs more material and labor, and it is often unnecessary for a flat-painted bedroom with diffuse lighting.
Can You Repair a Seam Without Repainting the Whole Wall?
You can repair a flat, isolated flashing seam without repainting the whole wall, but physical defects and sheen-sensitive finishes usually require repainting from corner to corner. Spot repair has the best chance of disappearing on newer flat paint with the exact original product and no direct side light.
Test the proposed touch-up in an inconspicuous area. Paint ages through ultraviolet exposure, cleaning, oxidation, and routine abrasion, so the same color formula may not produce the same appearance months later.
A practical decision rule is:
- Use spot priming and touch-up for a small, flat defect on flat or matte paint.
- Repaint the full wall for eggshell, satin, or semi-gloss finishes.
- Skim-coat the full wall for a high-gloss appearance under strong grazing light.
- Replace or retape drywall when tape is loose, wet, repeatedly cracked, or visibly bubbled.
Why Do Seams Look Worse at Night?
Drywall seams look worse at night when a lamp or recessed fixture casts grazing light along the wall. Low-angle light creates long shadows and highlights small changes in plane, so a joint that disappears in diffuse daylight can become obvious after dark.
Move the lamp temporarily or inspect with a portable work light held at the angle produced by the installed fixture. If the seam is physically flat but the texture changes, a wider feather, uniform skim coat, or lower sheen can reduce visibility.
Flat paint scatters light more broadly than satin or semi-gloss. However, flat paint is less washable and may burnish when scrubbed, so it is a finish choice with a maintenance trade-off, not a universal repair.
What Causes Bubbling, Cracking, or Recurring Seams?
Bubbling, cracking, and recurring seams usually result from loose tape, trapped moisture, inadequate compound adhesion, framing movement, or a joint that was never properly reinforced. Paint bubbling directly over a seam requires cutting out the failed area and identifying the underlying cause before refinishing.
| Symptom | Most likely cause | Required response | Do not do this |
|---|---|---|---|
| Small bubble under paper tape | Air pocket or inadequate bedding | Cut out and retape | Paint over the bubble |
| Long crack at joint center | Movement or weak joint | Open, reinforce, and monitor | Fill only with paint |
| Brown or yellow stain | Water intrusion | Stop leak, dry, replace damaged gypsum | Seal wet material |
| Paint blisters across wall | Heat, moisture, or adhesion failure | Test moisture and adhesion | Sand without respiratory protection |
| Crack at ceiling-wall corner | Framing movement or truss uplift | Use appropriate flexible detail | Force rigid mud into movement |
| Repeated ridge after repair | Joint compression or framing issue | Inspect board fastening and framing | Add endless finish coats |
A crack that returns after two proper repairs deserves escalation. In a newer home, photograph the defect, record dates, and contact the builder or drywall contractor before making extensive changes that could complicate a warranty assessment.
What Are the Most Common Repair Mistakes?
The most common seam-repair mistakes are skipping primer, sanding through tape, applying compound too thickly, painting over dust, and using high-sheen paint on an imperfect surface. Each mistake either preserves the original defect or creates a new adhesion, texture, or cracking problem.
- Using paint-and-primer as the only sealer: Combination products can improve coverage, but they do not always seal thirsty joint compound as reliably as a dedicated drywall primer.
- Over-sanding the center: Exposing paper tape changes its texture and can create a permanent line. Build the surface back with a thin coat instead of removing more tape.
- Feathering too narrowly: A 4-inch patch may feel smooth but remain visible under side light. Use approximately 12-14 inches for a tapered joint and wider for a butt joint.
- Applying thick compound: Thick fills shrink and dry unevenly. Use several thin coats and respect the manufacturer’s drying interval.
- Ignoring dust: Vacuum and wipe before priming. Dust weakens adhesion and can produce a rough roller finish.
- Changing sheen only: Flat paint can mask flashing, but it cannot conceal a measurable hump, depression, bubble, or crack.
- Sanding wet compound: Wet compound tears and smears. Wait until the material is uniformly dry before sanding.
- Using mesh tape incorrectly: Mesh is convenient for small repairs, but it generally needs setting-type compound for a durable joint.
One counterintuitive trade-off matters: a more aggressive sanding pass can make a seam look better immediately while making the final paint result worse, because damaged paper has a different nap that primer does not fully restore.
How Much Does Drywall Seam Repair Cost in the USA?
Drywall seam repair typically costs $35-$65 for a small DIY materials kit, $200-$350 for a handyman’s minimum service visit, or about $350-$900 per room for broader professional seam correction. Actual pricing depends on wall count, access, finish level, paint matching, moisture damage, and whether full-wall repainting is necessary.
| Repair option | Typical USA price | Typical duration | Scope assumption |
|---|---|---|---|
| DIY flashing repair | $35-$65 | 2-3 days elapsed | Primer, abrasives, compound, and paint available |
| DIY retaping repair | $50-$120 | 2-4 days elapsed | One damaged joint and replacement paint |
| Handyman minimum visit | $200-$350 | 2-4 labor hours | Small repair with customer-supplied paint |
| Drywall contractor, one room | $350-$900 | 2-3 days | Multiple seams, finish sanding, and paint preparation |
| Level 5 wall skim | $700-$1,500 | 3-5 days | Whole-wall skim, sanding, primer, and finish paint |
| Moisture-damaged repair | $500-$2,000-plus | 3-7 days | Source correction, demolition, drying, and replacement |
Home improvement cost references such as Angi, HomeGuide, and HomeAdvisor publish broad drywall-repair ranges rather than a specific national price for seam flashing. Treat the figures above as typical planning ranges, not fixed bids, because labor markets and minimum charges vary substantially among U.S. cities.
Ask a contractor whether the estimate includes dust containment, primer, two finish coats, furniture protection, and full-wall repainting. A low quote that includes only a narrow mud patch may leave the original sheen mismatch visible.
When Should You Hire a Drywall Professional?
Hire a drywall professional when seams recur, moisture has affected the gypsum board, several rooms are involved, the wall has critical lighting, or the intended finish is satin, semi-gloss, or high-gloss. DIY repair is reasonable for a dry, isolated, flat flashing problem or a small nonstructural patch.
Professionals bring the most value when the defect involves diagnosis rather than knife technique. A contractor can assess framing movement, board fastening, corner movement, texture transitions, and the finish level required by the lighting design.
Request a written scope with measurements, materials, drying visits, primer type, finish sheen, and cleanup. Ask whether the contractor will use a low-angle inspection light before final paint approval.
For older homes, avoid disturbing unknown coatings without appropriate precautions. Drywall itself is not usually the main lead concern, but old painted surfaces can contain lead-based paint, and sanding can spread hazardous dust. The U.S. Environmental Protection Agency’s Renovation, Repair and Painting rule applies to paid work that disturbs lead-based paint in many pre-1978 homes.
What Should You Do If the Seam Still Shows After Repair?
If the seam still shows after repair, inspect whether the remaining defect is profile, sheen, texture, color, or lighting related. Use a straightedge and raking light again, because adding another coat of paint will not correct a high spot, and adding compound will not correct a sealed but color-mismatched wall.
If the surface is flat but dull, apply another compatible primer coat and repaint the wall. If the seam is raised, sand only the high area and widen the feather. If the wall shows a paper texture mismatch, skim-coat a broader area or the entire wall.
Paint manufacturers commonly specify a wet-film and recoat window on the label. Follow that product’s instructions rather than assuming every interior acrylic paint dries at the same rate, especially in cool rooms or at humidity above approximately 60%.
FAQ
Will two coats of paint hide drywall seams?
Two coats of paint can hide minor color variation, but paint alone rarely hides an unprimed compound band, physical ridge, valley, or tape bubble. Seal porous repairs with dedicated drywall primer first, correct the surface profile, and repaint the entire wall when the finish is eggshell or glossier.
Can I use spackle instead of joint compound?
Spackle works for small nail holes and shallow localized dents, but joint compound is better for long drywall seams because it spreads smoothly across a broad area and integrates with tape. Lightweight spackle may shrink or dry differently from the surrounding joint compound, making a long repaired line more visible.
How wide should drywall seam mud be?
A typical tapered drywall seam should finish at approximately 12-14 inches wide. A butt joint often needs 18-24 inches because its square board ends do not provide the recessed center found on tapered edges. Strong side lighting may justify a wider transition or a Level 5 skim coat.
Should drywall seams be visible after primer?
Drywall seams should not appear as distinct lines after proper finishing and primer, although raking light can reveal minor texture variation on a Level 4 wall. Primer exposes remaining defects, so inspect the primed surface before finish paint and correct ridges, scratches, pinholes, or dull absorption patches.
What grit sandpaper is best for drywall seams?
Use approximately 120-150 grit to reduce a minor high spot, then 180-220 grit to smooth feathered compound and remove sanding marks. Avoid coarse abrasion on exposed drywall paper, and use a sanding sponge near edges so the repair does not develop a sharp transition.
Can humidity make drywall seams show through paint?
Humidity can extend compound drying, promote paint adhesion problems, and worsen movement-related cracking, but ordinary seasonal humidity does not by itself create every visible seam. Look for staining, softness, odor, or condensation, then correct leaks or ventilation problems before sealing and repainting.
The Bottom Line
Drywall seams showing through paint require diagnosis before repair. A flat, dry seam is usually flashing caused by different porosity or texture and can often be corrected with dedicated primer and repainting. A ridge, valley, crack, bubble, or recurring line needs wider compound work, retaping, moisture correction, or professional evaluation. Confirm the wall is flat, dry, clean, and uniformly primed before applying the final finish coat.