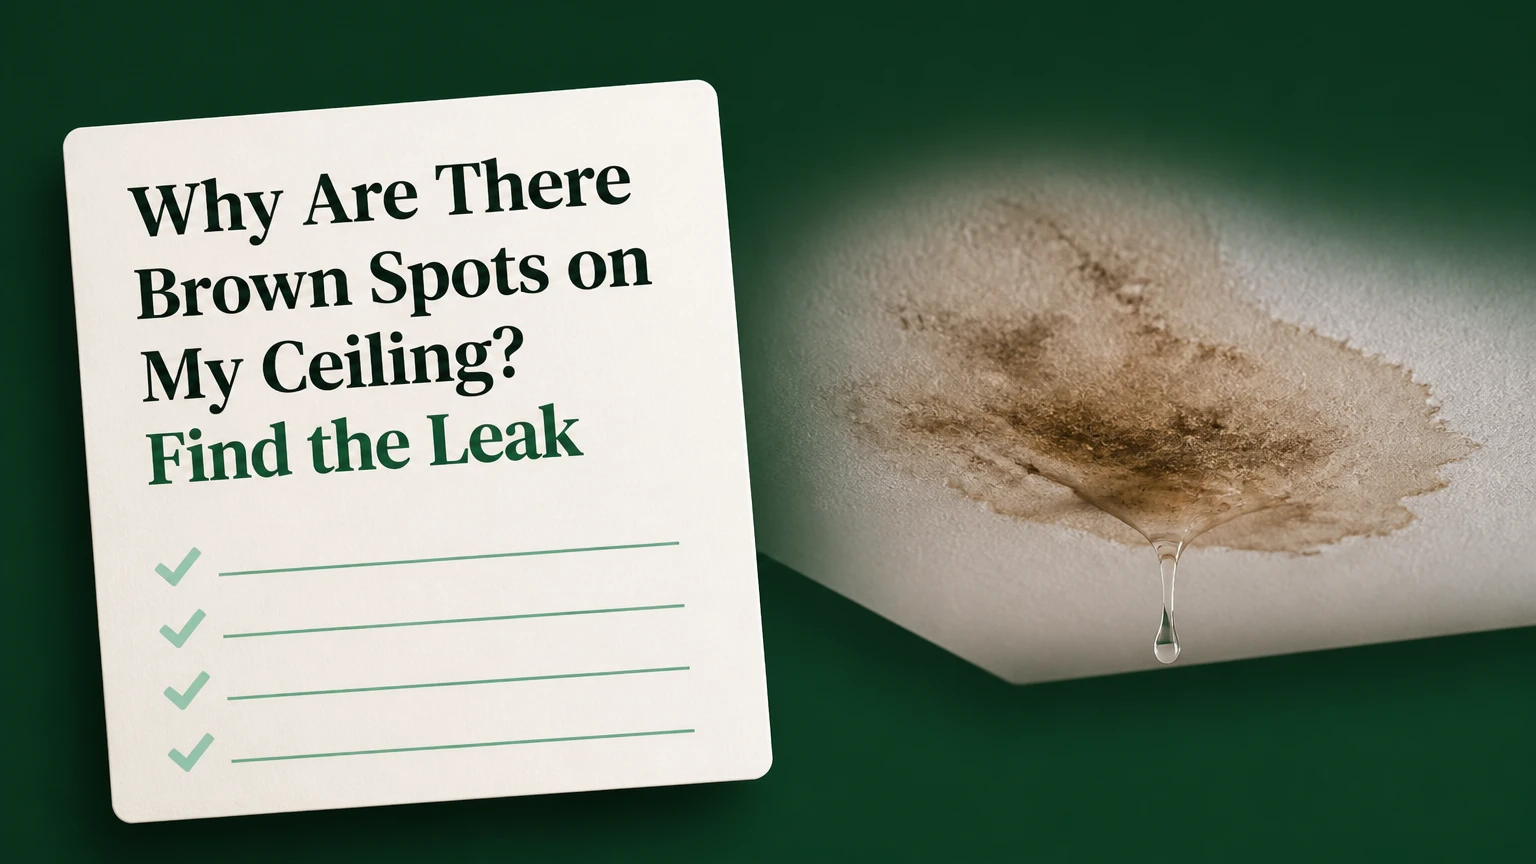
Why Are There Brown Spots on My Ceiling? Find the Leak
Brown spots on a ceiling usually indicate a past or ongoing water intrusion from a roof, plumbing fixture, HVAC system, or condensation. Water dissolves dirt, wood tannins, rust, minerals, and degraded building materials, then leaves the discoloration behind as it evaporates. A dry spot can still mark an unresolved intermittent leak.
Key Facts at a Glance
- A brown ceiling stain is evidence of moisture movement, but the stain itself does not identify the exact source.
- Roof leaks usually change after rain, while plumbing leaks often change after a fixture or appliance operates.
- Water can travel along framing, wiring, ducts, and drywall seams, so the visible mark may be several feet from the entry point.
- EPA guidance recommends drying wet materials within 24-48 hours when possible, but mold growth depends on moisture, temperature, material, and contamination.
- Standard ceiling paint rarely hides a water stain permanently; a stain-blocking primer is normally required after the leak is fixed.
- Sagging drywall, active dripping, bulging, cracking, or water near a light fixture requires urgent action rather than cosmetic repair.
Why Are There Brown Spots on My Ceiling?
Brown ceiling spots form when contaminated water reaches porous paint, drywall, plaster, or textured ceiling material and then evaporates. The water may carry rust from fasteners, tannins from wood, dust from insulation, or minerals from masonry and plumbing, creating a yellow, tan, orange, or dark brown mark.
The border often appears darker because moisture spreads beyond the original wet center and deposits dissolved material as drying occurs. A ring shape is common, but shape alone cannot reliably distinguish a roof leak from a plumbing failure. A small plumbing leak can create a ring, and a roof leak can create an irregular streak.
The most useful diagnostic attributes are moisture, timing, position, weather, and activity in rooms above the ceiling. A ceiling stain that enlarges after rainfall points toward the building exterior, whereas a stain that darkens after a shower points toward plumbing or a bathroom ventilation problem.
What Does the Color Mean?
Color provides supporting evidence rather than a diagnosis. Yellow or tan usually reflects diluted water staining, orange may indicate rust, and dark brown often reflects concentrated organic material or a long-standing leak.
Black or green areas may indicate microbial growth, but color cannot identify mold species or establish a health risk. A qualified inspector or laboratory analysis is needed for species identification, although species testing is often less useful than correcting the moisture source.
What Causes Brown Ceiling Spots?
The leading causes are roof penetration, plumbing leakage, HVAC condensate, attic condensation, and occasionally chimney or exterior-wall failures. The most reliable way to narrow the cause is to compare the stain’s position and behavior with rain, plumbing use, temperature, and indoor humidity.
| Likely cause | Typical location | Timing clue | Common source |
|---|---|---|---|
| Roof leak | Ceiling below attic, roof valley, or chimney | Darkens after rain or snowmelt | Flashing, shingle, roof valley, pipe boot |
| Plumbing leak | Below bathroom, kitchen, or laundry | Changes after fixture use | Supply pipe, drain, toilet seal, shower pan |
| HVAC condensate | Below attic air handler or duct | Appears during cooling season | Clogged drain, frozen coil, cracked pan |
| Condensation | Exterior ceiling or joist lines | Worsens during cold or humid periods | Poor insulation, air leakage, high humidity |
| Chimney intrusion | Ceiling near chimney chase | Appears after wind-driven rain | Counterflashing, masonry joint, chimney cap |
| Appliance leak | Below upstairs laundry or kitchen | Follows washer or dishwasher cycles | Hose, valve, drain connection, overflow |
Can a Roof Leak Cause a Brown Spot Without Dripping?
Yes, a roof leak can stain a ceiling without producing an indoor drip. Small exterior openings may wet insulation or roof framing during rain, then dry before enough water accumulates to fall visibly into the room.
Roof leaks commonly enter at damaged shingles, valleys, roof penetrations, plumbing vent boots, skylights, and step flashing. Wind can push rain sideways under roofing materials, so the leak may appear only during certain wind directions. Inspect attic sheathing and framing for darkened wood, water trails, rusty nails, compressed insulation, or daylight around penetrations.
Can a Bathroom Leak Appear Away From the Bathroom?
Yes, water from an upstairs bathroom can travel along joists, subflooring, pipes, and ceiling framing before appearing below a different part of the room. A ceiling mark directly below a bathroom is a strong clue, not proof that the fixture immediately above is leaking.
Check the toilet base, supply valve, sink trap, tub overflow, shower valve, and shower pan. A shower pan may leak only when the shower is used, while a pressurized supply line can leak continuously. Do not remove a ceiling section until the upstairs fixtures and the attic or interstitial space have been inspected.
How Can You Tell Which Leak Caused the Spot?
You can usually narrow the cause by recording when the stain changes, checking the space above it, and measuring moisture at several points. No single visual feature proves the source because building materials can redirect water horizontally.
| Observation | Most likely explanation | Confirmation test | Recommended response |
|---|---|---|---|
| Spot grows after rain | Roof or chimney leak | Inspect attic during or after rainfall | Roofing inspection and temporary exterior protection |
| Spot grows after shower use | Shower, drain, or supply leak | Run fixtures separately while observing | Plumber or controlled fixture test |
| Spot sits below air handler | Condensate failure | Check pan, drain, and filter | Shut off cooling if water is near wiring |
| Parallel dark lines | Condensation or ghosting | Check humidity and insulation pattern | Improve air sealing, insulation, and ventilation |
| Rust-colored center | Fastener or pipe corrosion | Inspect attic framing and plumbing | Repair source, then assess substrate |
| Musty smell with soft drywall | Persistent moisture and possible mold | Moisture meter and cavity inspection | Drying, removal, or professional remediation |
A simple log is more useful than guessing. Photograph the stain with a ruler beside it, record rainfall, note shower or appliance use, and recheck the same points after 12-24 hours. If the mark expands only under one condition, that condition becomes a valuable diagnostic trigger.
Where Should You Inspect First?
Inspect the nearest accessible space above the stain, then trace framing, pipes, ducts, and roof penetrations outward. Start with the attic, upstairs bathroom, kitchen, laundry area, mechanical closet, or neighboring apartment, depending on the building layout.
Water follows gravity, but building assemblies redirect it. Joists can carry water laterally, and a sloped roof deck can move water several feet before it drops. The visible stain therefore identifies the water’s exit point, not necessarily its entry point.
Is a Brown Ceiling Spot an Emergency?
A brown ceiling spot becomes an emergency when water is active, the ceiling is deforming, electrical equipment is nearby, or the affected area is large and soft. A small, dry, firm stain is usually not an immediate collapse event, but it still requires source investigation.
| Condition | Risk level | Action within | Do not do |
|---|---|---|---|
| Active drip near light | High | Turn off circuit if safe, then call help | Touch wet fixture or switch |
| Bulging drywall | High | Keep people out immediately | Puncture without controlling water |
| Soft area under bathroom | Moderate to high | Stop fixture use and inspect | Paint over soft material |
| Small dry firm stain | Moderate | Investigate within 1-3 days | Assume the leak ended |
| Musty stain with visible growth | Moderate | Control moisture and assess area | Disturb extensive growth |
| Large spreading ceiling mark | High | Arrange leak detection promptly | Use the room below normally |
Turn off electricity at the breaker only if the panel and floor are dry and you can do so safely. If water is entering a light fixture, ceiling fan, smoke alarm, or electrical box, keep clear and contact an electrician or emergency professional.
A bulging ceiling can contain substantial water. Evacuate the area beneath it, move furniture only if safe, and avoid standing on a wet floor near electrical equipment. Ceiling collapse can occur without a long warning period.
How Long Does a Ceiling Water Stain Take to Appear?
A ceiling stain can appear within hours to several days after water reaches the ceiling assembly, while an intermittent leak may take weeks to become visible. The timing depends on water volume, paint type, drywall porosity, insulation, temperature, and airflow.
| Stage | Typical time range | Visible or hidden change | Main concern |
|---|---|---|---|
| Initial intrusion | 0-12 hours | Wet framing or insulation may be hidden | Ongoing water entry |
| Backside saturation | 6-24 hours | Drywall feels cool or soft | Loss of material strength |
| Visible staining | 1-7 days | Yellow or brown mark emerges | Contaminated moisture |
| Dry surface, hidden damage | 2-14 days | Stain remains while cavity stays damp | Mold or wood deterioration |
| Repeated wetting | Weeks to months | Rings, peeling, sagging, odor | Progressive repair cost |
The often-repeated “48-hour rule” is an oversimplification. The U.S. Environmental Protection Agency states, “The key to mold control is moisture control,” and recommends drying wet areas within 24-48 hours when practical. That guidance is a useful target, not a guarantee that mold will or will not grow at a precise hour.
How Do You Test a Brown Spot Safely?
Test the stain by touch, visual measurement, moisture readings, and inspection above the ceiling, while avoiding unnecessary holes or electrical contact. A pin or pinless moisture meter can help locate damp areas, but readings vary by material, temperature, salts, and meter calibration.
Use these steps:
- Photograph and measure the stain. Record its longest width, approximate shape, and nearby fixtures.
- Check for active moisture. Do not press hard on a bulging or soft ceiling.
- Compare surfaces. Take readings at the stain, its edge, and a dry area of the same material.
- Inspect above. Look for wet insulation, dark framing, corrosion, plumbing drips, and roof penetrations.
- Run controlled tests. Operate one fixture at a time while another person watches the ceiling, provided no electrical hazard exists.
- Recheck after weather or use. A second reading after rain or plumbing activity is often more informative than one isolated measurement.
Moisture-meter readings are not universal pass-fail numbers. A reading above approximately 16% may justify further investigation in some wood products, but drywall meters use different scales, and salts can produce false elevations. Treat the reading as a pattern across the area, not a diagnosis by itself.
Does Infrared Imaging Find the Leak?
Infrared imaging can reveal temperature patterns associated with damp materials, but an infrared camera does not directly see water or guarantee the leak’s entry point. Thermal imaging works best when moisture creates a measurable temperature difference and the operator understands the building assembly.
A camera may miss equilibrated moisture, insulated cavities, or small leaks. Pin meters, borescopes, attic inspection, plumbing tests, and controlled water tests remain valuable. Professional leak detection is most useful when the stain is large, recurring, inaccessible, or separated from the suspected source.
Can You Fix a Brown Ceiling Spot Yourself?
A homeowner can repair a small, dry, structurally sound stain after confirming and correcting the source. Cosmetic repair should wait until the ceiling is dry, firm, odor-free, and free from active leakage.
Before You Start
| Requirement | Typical specification | Why it matters | Stop condition |
|---|---|---|---|
| Area | Less than 12 inches across | Small surface damage is manageable | Stain expands or exceeds this size |
| Drying time | At least 24-48 hours after source repair | Reduces trapped moisture | Meter remains elevated |
| Materials | 1 quart primer, 1 gallon ceiling paint | Covers one small repair area | Drywall requires replacement |
| Tools | Gloves, eye protection, scraper, roller | Limits dust and chemical exposure | Visible mold exceeds a small patch |
| Cost | $40-$150 DIY materials | Typical USA retail range | Source repair needs a trade |
Step 1: Correct the Water Source
Repair the roof, plumbing fitting, HVAC drain, or ventilation defect before touching the stain. A primer can hide discoloration, but it cannot stop water entering the ceiling cavity.
You will know the source is controlled when the stain does not enlarge after the relevant rain event, fixture test, or HVAC cycle. The common mistake is repairing the interior first and then having the same stain return through fresh paint.
Step 2: Dry and Assess the Ceiling
Allow airflow through the room and inspect for softness, sagging, blistered paint, crumbling drywall, or a persistent musty odor. Remove damaged drywall when the gypsum core has lost strength, rather than sealing a weak substrate under primer.
You will know the surface is ready when it is firm, dry relative to an unaffected area, and free from active odor. Do not use high heat directly on wet drywall, because rapid heating can damage finishes and drive moisture deeper into adjacent materials.
Step 3: Clean Only Limited Surface Growth
For a small area of surface contamination on a hard, intact painted surface, use detergent and water, then dry completely according to EPA guidance. Porous drywall with embedded growth may require removal because bleach does not reliably penetrate the material.
Wear gloves, eye protection, and suitable respiratory protection for dusty work. The common mistake is spraying a bleach mixture across a porous ceiling, which can damage paint, spread liquid, and fail to remove contamination inside the drywall.
Step 4: Seal the Discoloration
Apply a shellac-based or oil-based stain-blocking primer according to the product label, with ventilation and compatible cleanup materials. Water-based ceiling paint alone commonly allows tannin and rust staining to bleed through again.
You will know the seal is effective when the primer dries without brown migration and the substrate remains firm. Apply a second primer coat if the manufacturer permits and the first coat does not fully block the stain.
Step 5: Repaint the Ceiling Plane
Paint the repaired area with a matching ceiling coating, or repaint the entire ceiling plane when sheen, texture, or color variation makes a patch visible. Blend texture only after the substrate is stable and dry.
You will know the repair is complete when the finish matches under daylight and artificial light and the stain remains unchanged after normal use. The common mistake is matching only the paint color while ignoring different sheen or ceiling texture.
When Should Damaged Drywall Be Replaced?
Ceiling drywall should usually be removed when it is sagging, crumbly, swollen, persistently damp, contaminated by sewage, or affected by extensive mold. Firm drywall with a dry surface stain may be sealable, but porous material that has lost structural integrity is not a painting problem.
| Damage condition | Typical treatment | Labor or project time | Typical USA cost |
|---|---|---|---|
| Dry stain, firm drywall | Clean, prime, repaint | 1-2 days | $40-$150 DIY |
| Small damaged patch | Cut, replace, tape, texture | 1-3 days | $300-$800 |
| Several ceiling sections | Drying and drywall replacement | 3-7 days | $800-$2,500 |
| Large saturated area | Restoration and reconstruction | 1-3 weeks | $2,500-$10,000+ |
| Structural or mold remediation | Specialist investigation and repair | 1-4 weeks | $5,000-$20,000+ |
These are typical planning ranges, not national price guarantees. Labor rates, access, ceiling texture, insurance requirements, asbestos risk, local permitting, and the cost of repairing the original leak can change the total substantially.
Homes built before 1981 may contain asbestos in some textured ceiling materials, joint compounds, or insulation. Do not sand, scrape, or cut suspect materials until local requirements and professional testing have been addressed.
What Does Brown Ceiling Stain Repair Cost?
In the United States, cosmetic repair commonly costs $40-$150 for a careful DIY job, while professional interior restoration often costs $300-$2,500 for limited damage and $2,500-$10,000 or more for extensive saturation. Source repair is separate from ceiling finishing.
| Source repair | Typical USA cost | Typical duration | Cost driver |
|---|---|---|---|
| Minor roof flashing repair | $200-$600 | 2-6 hours | Roof access and flashing condition |
| Plumbing fitting repair | $150-$650 | 1-4 hours | Pipe access and replacement parts |
| HVAC condensate repair | $150-$750 | 1-5 hours | Drain blockage, pan, or coil access |
| Shower pan or hidden pipe | $800-$4,000+ | 1-5 days | Demolition and reconstruction |
| Ceiling drywall patch | $300-$800 | 1-2 days | Texture and paint matching |
| Extensive water restoration | $2,500-$10,000+ | 1-3 weeks | Drying, insulation, framing, finish work |
Get separate estimates for leak detection, source repair, drying, demolition, and reconstruction. Combining those categories into one vague price makes it harder to identify whether a contractor corrected the cause or merely covered the symptom.
What Should Renters and Homeowners Do First?
Renters should photograph the spot, report it in writing immediately, and avoid painting or opening the ceiling. Homeowners should document the stain, control immediate hazards, and arrange source investigation before authorizing cosmetic work.
Renters should include the date, room, approximate size, moisture status, odor, and any change after rain or upstairs plumbing use. Keep copies of maintenance requests and avoid testing fixtures if water is near electrical equipment.
Homeowners should check insurance policy requirements before discarding damaged materials, while recognizing that gradual maintenance failures may receive different coverage from sudden accidental losses. A licensed plumber, roofer, electrician, or water-restoration professional is appropriate when the source is inaccessible or the damage is expanding.
How Can You Prevent Brown Ceiling Spots?
Prevent brown ceiling stains by controlling roof penetrations, plumbing connections, indoor humidity, attic airflow, and HVAC condensate drainage. Prevention is more reliable when maintenance targets the source conditions rather than repainting recurring marks.
| Prevention task | Recommended interval | Specific check | Failure it prevents |
|---|---|---|---|
| Roof and flashing inspection | Annually and after major storms | Valleys, boots, sealants, chimney flashing | Rain intrusion |
| HVAC drain inspection | Before cooling season | Pan, trap, drain line, filter | Condensate overflow |
| Bathroom exhaust check | Every 6-12 months | Exhausts outdoors, not attic | Attic condensation |
| Attic insulation review | Every 2-5 years | Gaps, compression, air bypasses | Cold-surface condensation |
| Plumbing inspection | Annually | Toilet seals, hoses, traps, valves | Slow hidden leaks |
| Indoor humidity measurement | Weekly in humid seasons | Hygrometer readings around 30%-50% | Condensation and mold conditions |
Do not vent a bathroom fan into an attic. Warm, moisture-laden air can condense on cold roof sheathing and create widespread staining that resembles multiple roof leaks.
What If the Brown Spot Is Dry but Keeps Returning?
A dry ceiling spot that returns usually indicates an intermittent water source, such as rain-dependent roof damage, shower use, seasonal HVAC condensate, or cold-weather condensation. Dryness describes the surface at one moment and does not prove that the building assembly is dry.
Track the stain against weather and household activity for at least one week if no urgent warning signs exist. A recurring mark deserves source testing even when the ceiling feels firm, because repeated wetting can deteriorate insulation, fasteners, framing, and drywall.
What If There Is No Visible Leak?
No visible drip does not rule out a leak because water can evaporate, remain within insulation, or travel along framing before reaching the ceiling. Inspect the attic, plumbing fixtures, HVAC equipment, roof penetrations, and bathroom exhaust route rather than relying on the stain’s center.
Thermal imaging can narrow the search, but it is not a substitute for moisture readings and physical inspection. If the stain repeatedly returns and the source remains hidden, professional leak detection is often cheaper than repeated patching.
Frequently Asked Questions
Are brown spots on a ceiling always caused by water?
Most brown ceiling spots are water-related, but smoke residue, nicotine, old adhesive, rust transfer, and fungal growth can also discolor a ceiling. Water becomes more likely when the mark has a ring, streak, softened texture, musty odor, or connection to rain, plumbing use, HVAC operation, or attic condensation.
Can I paint over a brown ceiling stain?
You can repaint a brown ceiling stain only after fixing the moisture source and confirming that the substrate is dry and firm. Use a compatible shellac-based or oil-based stain-blocking primer first, because ordinary water-based ceiling paint often allows tannins, rust, and mineral discoloration to bleed back through.
Should I poke a hole in a bulging ceiling?
Do not puncture a bulging ceiling unless a qualified professional has controlled the water and assessed electrical hazards. A bulge may contain trapped water, and opening it can release water unpredictably or weaken an already damaged ceiling. Keep people away and contact an appropriate emergency or restoration service.
Does a brown ceiling spot mean there is mold?
A brown spot does not prove that mold is present. Mold risk increases when porous materials remain damp, particularly in warm conditions, but color alone cannot identify mold. EPA guidance centers on moisture control and rapid drying, followed by removal or cleaning appropriate to the affected material.
How do I know whether a stain is from condensation?
Condensation is more likely when several faint stains follow ceiling joists, roof framing, or exterior-wall lines and worsen during cold weather or high indoor humidity. Check attic insulation, air leaks, bathroom exhaust ducts, and indoor humidity with a hygrometer before assuming the roof is leaking.
Will a ceiling water stain disappear on its own?
The moisture may dry, but the discoloration usually remains because dissolved dirt, tannins, rust, and minerals stay in the porous ceiling material. A stain that stops changing still requires an investigation when the source is uncertain, since intermittent leaks can dry between rainstorms or plumbing use.
The Bottom Line
The answer to “why are there brown spots on my ceiling” is usually water intrusion, but the source may be above the ceiling, several feet away, or intermittent. Check moisture, timing, weather, plumbing activity, HVAC operation, and attic conditions before repairing the finish. Treat active water, electrical proximity, sagging, and soft drywall as urgent conditions, then dry, replace damaged material when necessary, prime with a stain blocker, and repaint only after the cause is controlled.