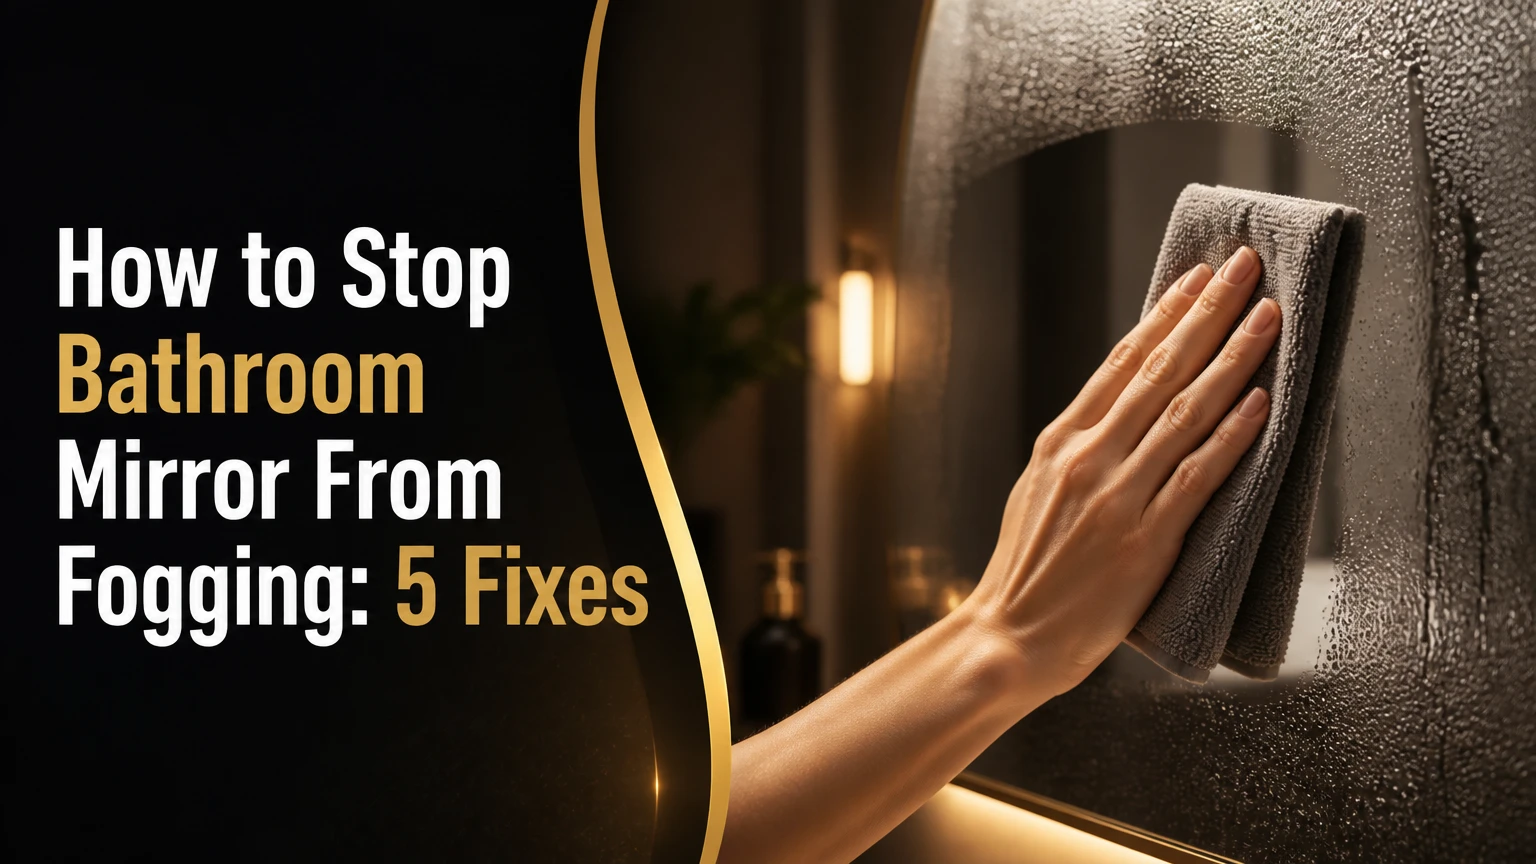
How to Stop Bathroom Mirror From Fogging: 5 Fixes
To stop a bathroom mirror from fogging, lower bathroom humidity with an exhaust fan, warm the mirror above the dew point, or apply a thin hydrophilic anti-fog film. For an immediate low-cost fix, clean and buff a small amount of shaving cream or purpose-made anti-fog spray onto the glass. A heated demister pad provides the most reliable permanent result.
Key facts at a glance
Bathroom mirror fog forms when humid shower air condenses on glass colder than the air’s dew point.
A bathroom exhaust fan works best when it runs during the shower and for about 20 minutes afterward.
Shaving cream and dish soap can reduce visible fog, but their effect usually lasts days rather than weeks.
Purpose-made anti-fog sprays commonly last about 1-4 weeks, depending on cleaning and humidity.
A demister pad heats the mirror from behind and normally clears only the area covered by the heating element.
Never confuse hydrophilic anti-fog treatment with hydrophobic automotive water-repellent products.
Why Bathroom Mirrors Fog
Bathroom mirrors fog because water vapor condenses into microscopic droplets on glass that is below the surrounding air’s dew point. Hot shower water increases the air’s moisture content, while the mirror usually remains near the cooler wall or room temperature. The droplets scatter light, so the reflected image looks white or cloudy.
The U.S. Environmental Protection Agency recommends keeping indoor relative humidity between 30% and 50% to help control condensation and moisture problems. A shower can temporarily push a small bathroom far above that range, especially when the door is closed, the exhaust fan is undersized, or the fan vents into an attic instead of outdoors.
A mirror does not need to become visibly wet before condensation begins. A thin layer of water can scatter enough light to impair the reflection. Cleaning residue, skin oil, hard-water minerals, and dust make the surface less uniform, so a dirty mirror often appears to fog faster and clear more slowly.
What actually prevents condensation?
Three variables control the result: humidity, glass temperature, and surface behavior. Ventilation removes moist air, heating raises the glass temperature, and a hydrophilic coating encourages condensed water to spread into a more transparent layer instead of forming separate droplets.
A surface treatment does not remove moisture from the room. It changes how moisture sits on the mirror. That distinction matters because a treated mirror may remain damp even when the reflection stays usable.
| Control method | Physical action | Typical result | Main limitation |
|---|---|---|---|
| Exhaust fan | Removes humid air | Slows new condensation | Cannot instantly heat cold glass |
| Heated demister | Raises glass temperature | Clears covered zone | Requires power and correct installation |
| Anti-fog spray | Forms a hydrophilic film | Flattens water droplets | Requires periodic reapplication |
| Shaving cream | Leaves a temporary surfactant film | Reduces visible fog | Can smear or attract residue |
| Anti-fog film | Adds a durable hydrophilic layer | Protects a defined area | Edges and bubbles can remain visible |
Before You Start
The fastest reliable process takes about 10-15 minutes for cleaning and treatment, with roughly 2 minutes of active product application. The difficulty is low for a spray or shaving-cream method, moderate for film installation, and high for any electrical retrofit.
| Requirement | Typical value | Notes |
|---|---|---|
| Active cleaning time | 5-8 minutes | Includes degreasing and drying |
| Treatment time | 2-5 minutes | Spray or shaving cream |
| Film installation | 15-30 minutes | Larger films need more alignment |
| Cost for temporary fix | $0-$20 | Existing shaving cream through commercial spray |
| Tools | 2 microfiber cloths, cleaner | Use lint-free, fabric-softener-free cloths |
| Electrical work | Licensed electrician | Required for new hardwired circuits in many USA jurisdictions |
Before applying anything, check whether the mirror has a special decorative coating, antiqued finish, painted border, or damage at the edges. Liquids can migrate behind a mirror through chips or unsealed edges and damage the reflective backing.
Step 1: Improve Ventilation Before and After Showering
Turn on the bathroom exhaust fan before running hot water, keep it operating throughout the shower, and leave it on for approximately 20 minutes afterward. Open the bathroom door slightly if privacy and home layout allow it, because replacement air helps the fan move moisture out of the room.
The U.S. Department of Energy advises using bathroom exhaust fans to remove moisture at its source and ensuring that fans vent outdoors. A fan that merely recirculates air, terminates in an attic, or has a blocked duct will not control humidity effectively.
Check whether the fan is removing air
Hold a single square of toilet paper against the fan grille. A functioning exhaust fan should pull the paper toward the grille. This simple check does not measure airflow, but a weak pull indicates a dirty grille, blocked duct, failed motor, or inadequate fan capacity.
Clean the grille with a vacuum and verify that the exterior damper opens while the fan runs. If condensation persists despite strong airflow, measure relative humidity with an inexpensive hygrometer. Sustained readings above 60% after showering indicate a moisture-control problem rather than a mirror-only problem.
| Ventilation action | When to do it | Practical target | Failure sign |
|---|---|---|---|
| Start exhaust fan | 1-2 minutes before shower | Fan already moving air | Mirror fogs immediately |
| Run during shower | Entire shower | Continuous operation | Fan stops or rattles |
| Continue afterward | About 20 minutes | Moisture visibly declines | Walls remain wet |
| Clean grille | Every 3-6 months | Open intake surface | Weak toilet-paper pull |
| Inspect exterior vent | Annually | Damper opens outdoors | No outdoor airflow |
Step 2: Warm the Room and Mirror Gradually
Warm bathroom air and warmer glass reduce the temperature difference that drives condensation. Run the room’s heating system normally, avoid directing a strong stream of cold air toward the mirror, and keep the mirror away from an exterior wall when selecting a new installation location.
Do not use a hair dryer, portable heater, or heat gun near a wet sink or shower. Those methods introduce electrical shock, fire, and glass-stress risks. A purpose-built demister pad uses low-temperature resistance heating behind the mirror and is the safer permanent approach when installed according to its instructions.
A warmer room alone may not solve the problem. Shower vapor can still reach saturation, and a cold mirror can remain below the dew point even when the room feels comfortable.
Step 3: Apply a Temporary Anti-Fog Treatment
A thin, evenly buffed film works better than a thick layer. Use a purpose-made bathroom or eyewear anti-fog product when possible; shaving cream provides a short-term alternative for an existing mirror, while dish soap can work but often leaves more visible residue.
How to use shaving cream or anti-fog spray
- Clean the mirror. Remove fingerprints, hairspray, soap film, and mineral deposits with a mirror-safe cleaner. Do not soak the edges.
- Dry the glass completely. Use a clean microfiber cloth and inspect the surface under angled light.
- Apply a small quantity. Use a pea-sized amount of shaving cream for a small mirror section, or follow the spray label. Excess product creates haze.
- Spread the film. Cover the viewing area in overlapping circular motions, including the upper center where fog usually appears first.
- Buff until clear. Use a second dry microfiber cloth until no oily streaks remain.
- Test with shower humidity. Confirm that the reflection stays usable, then repeat only when fogging returns.
You will know the application worked when the mirror remains visually clear during a normal shower and shows no streaks under bathroom lighting. The common mistake is treating the mirror like a countertop and leaving a visibly wet layer of product on the glass.
Anti-fog products vary. Read the label for compatibility with coated, acrylic, tinted, or backlit mirrors. A car windshield product designed to repel rain may produce beads rather than a transparent film.
| Temporary treatment | Typical cost in USA | Active time | Typical service interval | Best use |
|---|---|---|---|---|
| Shaving cream | $0-$8 if already owned | 2-3 minutes | 3-7 days | Rental or emergency use |
| Dish soap | Under $5 | 2-3 minutes | 1-3 days | Small mirror section |
| Bathroom anti-fog spray | $7-$20 | 2-5 minutes | 1-4 weeks | Routine maintenance |
| Anti-fog wipe | $5-$15 per pack | 1-2 minutes | Several uses per pack | Travel or quick touch-up |
| White vinegar cleaning | Under $5 | 5-10 minutes | Does not create durable protection | Mineral-film removal |
Does vinegar stop a bathroom mirror from fogging?
White vinegar mainly removes mineral deposits and some soap residue; it is not a durable anti-fog coating. Vinegar can improve clarity by cleaning the glass, but the mirror can still fog during a humid shower after the water evaporates.
Never combine vinegar with chlorine bleach or products containing bleach. Use ventilation while cleaning, keep liquid away from mirror edges, and rinse or wipe according to the cleaner’s label.
Step 4: Install an Adhesive Anti-Fog Film
An anti-fog film provides longer service than shaving cream without requiring a wired electrical connection. Select a product explicitly rated for bathroom mirrors, confirm the film dimensions, and verify that the mirror surface is smooth, intact, and compatible with adhesive installation.
- Measure the viewing zone. Record width and height, then choose a film that covers the central area rather than leaving the usual eye-level zone unprotected.
- Clean and dry the mirror. Remove all lint and oil. Even a small fiber can create a permanent bubble.
- Prepare application solution. Use water with approximately one drop of dish soap in a spray bottle, unless the film manufacturer specifies another mixture.
- Wet the glass lightly. A fine mist lets the film slide during alignment without flooding the mirror edges.
- Peel and position. Remove the backing gradually, place the adhesive side against the wet glass, and align the film before pressing firmly.
- Squeegee from center outward. Push water and air toward the edges with a plastic squeegee or cloth-wrapped card.
- Dry the perimeter. Remove moisture from the edges and allow the film to cure for the label’s stated period, often about 24 hours.
The installation is successful when the film has a uniform appearance, no trapped lint, and no large bubbles visible at eye level. The main failure is applying the film to a dirty or dry surface, which prevents repositioning and traps defects.
| Film attribute | Typical value | Why it matters | Check before purchase |
|---|---|---|---|
| Common small size | 12 x 16 inches | Fits a face-level zone | Compare with mirror width |
| Common medium size | 20 x 28 inches | Covers much of a vanity mirror | Confirm flat glass |
| Installation time | 15-30 minutes | Includes cleaning and squeegeeing | Allow uninterrupted access |
| Cure period | About 24 hours | Adhesive stabilizes | Keep surface dry |
| Replacement interval | About 1-3 years | Coating eventually degrades | Check warranty terms |
| Visible edge | Usually present | Can affect appearance | Measure a recessed area |
Films are not ideal for heavily textured, cracked, antiqued, or badly silvered mirrors. A film may hide a small amount of cosmetic wear, but it cannot repair failing reflective backing or delamination.
Step 5: Choose a Heated Demister Pad for Permanent Performance
A demister pad is the most dependable hands-free method because it raises the mirror’s glass temperature instead of merely changing droplet shape. The pad attaches behind the mirror and normally operates with the bathroom light, a timer, a dedicated switch, or a manufacturer-provided control.
Typical residential pads draw roughly 20-50 watts per square meter, but actual power depends on the product’s dimensions and voltage. Many products begin clearing a mirror within 2-5 minutes, while cold rooms, thick glass, incomplete coverage, and high humidity can extend that time.
A pad must cover the area where the user needs a reflection. If the element covers only the lower half of a large mirror, the upper half can remain fogged even when the pad is operating normally.
What installation limitations matter?
A retrofit requires removing or safely accessing the mirror, confirming the adhesive and backing condition, routing the cable, and connecting the device to an appropriate bathroom circuit. In the United States, local electrical codes commonly require ground-fault circuit-interrupter protection in bathroom locations, and requirements differ by jurisdiction.
Have a licensed electrician perform hardwired connections. Do not place a plug, junction, or unapproved connection where it can be splashed. Never cut a manufacturer’s cable or bury a connection behind the mirror unless the installation instructions and local code allow it.
| Heated-mirror factor | Typical value or condition | Decision effect |
|---|---|---|
| Pad-only price | $15-$60 | Lowest permanent retrofit component cost |
| Integrated LED mirror | About $100-$400 or more | Simplifies factory integration |
| Clearing time | 2-5 minutes | Wire to light or timed control |
| Typical operating power | 20-50 W/m² | Low continuous load, but verify label |
| Service life | Often 10-15+ years | Depends on installation and component quality |
| Coverage requirement | At least central viewing zone | Compare pad dimensions with mirror |
An integrated anti-fog LED mirror is convenient for a renovation because the heating element, lighting, controls, and backing are designed together. Its limitation is replacement cost and installation complexity. A separate pad costs less, but poor placement or incompatible mirror backing can reduce reliability.
Which Fix Fits Your Bathroom?
The best solution depends on the cause, not simply the mirror’s size. Renters usually need a removable treatment and better ventilation, while homeowners who want automatic clearing should choose a correctly sized demister pad or a factory-built heated mirror.
| User situation | Recommended first choice | Typical cost | Why |
|---|---|---|---|
| Renter, no alterations | Anti-fog spray plus fan | $0-$20 | Removable and fast |
| Renter, small mirror | Film on central zone | $12-$30 | Longer interval between treatments |
| Homeowner, existing mirror | Rear demister pad | $15-$60 pad, plus labor | Hands-free result |
| Bathroom renovation | Integrated heated LED mirror | $100-$400+ | Combines lighting and defogging |
| Severe humidity problem | Ventilation repair first | Varies by repair | Treats the room, not only glass |
| Occasional guest bathroom | Shaving cream or wipe | $0-$15 | Low maintenance demand |
For a free fix, use a very thin shaving-cream film and run the exhaust fan longer. For the lowest recurring maintenance, choose a heated element. For a middle ground, use anti-fog film after confirming that visible film edges are acceptable.
No surface treatment is a substitute for correcting a bathroom that stays damp for hours. Persistent condensation on walls, ceilings, or windows can support mold growth and damage paint, drywall, cabinetry, and mirror backing.
Common Mistakes and How to Fix Them
Using the wrong Rain-X formula
Rain-X Exterior Glass Water Repellent is hydrophobic and designed to make water bead and run off moving vehicle glass. Beading can make a stationary bathroom mirror appear more distorted. Use a product specifically labeled anti-fog and suitable for interior glass instead.
Applying too much product
Thick shaving cream or spray residue causes haze, glare, and fingerprints. Re-wet the cloth lightly, remove the excess, and buff with a clean, dry microfiber cloth. Do not add more product to solve streaking.
Cleaning with contaminated cloths
Fabric softener, laundry detergent, dust, and skin oil can transfer back onto the mirror. Reserve two clean microfiber cloths for glass and wash them without fabric softener.
Ignoring the mirror edges
Liquid can migrate behind the glass and attack the reflective coating. Spray the cloth rather than the mirror, keep cleaner away from the perimeter, and wipe spills immediately.
Expecting a small pad to clear a large mirror
A demister clears its heated footprint, not the entire mirror automatically. Compare the pad’s dimensions with the central 70%-80% of the viewing area before installation.
Leaving a demister on continuously
A pad needs power only while the mirror must remain clear. A timer, light-switch control, or motion control reduces unnecessary operation, although the manufacturer’s wiring instructions should determine the final control method.
Treating hard-water film as fog
White spots that remain after the bathroom dries are mineral deposits, not condensation. Clean the deposits with a mirror-safe method first, because an anti-fog treatment cannot make mineral scale transparent.
Troubleshooting Persistent Fogging
A blurry treated mirror usually has excess product, an uneven film, or residue left from an earlier cleaner. Wipe the surface with a lightly damp microfiber cloth, use a compatible mirror cleaner if needed, dry fully, and reapply a smaller amount.
A film with bubbles needs controlled correction rather than force. Lift the nearest edge carefully, mist a small amount of approved application solution underneath, then push the bubble toward the edge with a squeegee. Large trapped fibers usually require removing and reinstalling the film.
A heated mirror that clears only in one section may have normal coverage limits. If the expected zone remains cold, check the control, circuit protection, cable connection, and product instructions, but leave electrical diagnosis to a qualified professional.
| Symptom | Likely cause | Corrective action | When to replace or call |
|---|---|---|---|
| Streaks after spray | Excess product | Damp wipe, then dry buff | Replace product if residue persists |
| Fog above heated zone | Pad too small | Accept limited zone or resize | Call installer for retrofit |
| Film bubbles | Dry or dirty installation | Lift edge and squeegee | Replace if lint is trapped |
| Fog returns within hours | Poor ventilation | Inspect fan and duct | Call contractor for duct fault |
| White spots remain | Hard-water deposits | Use mirror-safe mineral cleaner | Replace damaged glass |
| Backing turns black | Edge moisture or delamination | Stop wet cleaning at edges | Replace mirror |
| No heat at all | Control or power fault | Check safe user controls | Electrician diagnosis |
Cost and Maintenance Outlook
Temporary treatments are inexpensive but shift cost into repeated labor and product replacement. A demister pad has greater installation expense, yet its low operating load and long expected service period can make it more practical for a frequently used primary bathroom.
These figures are typical USA retail or practitioner ranges, not guaranteed quotes. Labor, electrical access, mirror size, local code requirements, and product quality can change the final price substantially.
| Option | Initial materials | Ongoing work | Expected interval | Total-use profile |
|---|---|---|---|---|
| Shaving cream | $0-$8 | Rebuff mirror | 3-7 days | Cheapest, highest maintenance |
| Anti-fog spray | $7-$20 | Reapply and buff | 1-4 weeks | Moderate recurring cost |
| Adhesive film | $12-$30 | Clean gently | 1-3 years | Low maintenance |
| Demister pad | $15-$60 pad | Electrical inspection if needed | 10-15+ years typical | Higher installation complexity |
| LED heated mirror | $100-$400+ | Clean and operate control | Product-dependent | Renovation-oriented choice |
The Bottom Line
To stop bathroom mirror from fogging quickly, clean the glass and buff on a very thin layer of shaving cream or interior anti-fog spray, then run the exhaust fan during the shower and for about 20 minutes afterward. For lasting hands-free performance, install a correctly sized demister pad or buy an integrated heated mirror, using a licensed electrician for hardwired bathroom connections.
The ventilation step controls the underlying moisture. The surface treatment controls visibility. The heated mirror controls glass temperature, which is why it remains the strongest long-term answer for a primary bathroom.
Frequently Asked Questions
Will opening the bathroom door stop the mirror from fogging?
Opening the bathroom door can reduce mirror fog when it allows humid air to escape and drier air to enter. The result depends on the home’s airflow, outdoor humidity, privacy requirements, and exhaust-fan performance. A door opening alone will not solve a fan that vents into an attic or has a blocked duct.
Can I use dish soap every day on a bathroom mirror?
Dish soap can provide a temporary anti-fog film, but daily use may leave surfactant residue and streaks. Apply only a trace amount, buff completely, and remove buildup with a compatible mirror cleaner. Purpose-made anti-fog spray is usually more consistent for frequent use.
Does a shower mirror need a different anti-fog product?
A mirror installed inside the shower needs a product labeled for wet, high-humidity conditions and compatible with its glass or acrylic surface. Ordinary shaving cream may wash away quickly under direct spray. A factory-treated shower mirror or sealed anti-fog film generally performs better.
Why does my mirror fog when the exhaust fan is running?
A running fan may have weak airflow, a dirty grille, a blocked duct, an exterior damper problem, or insufficient capacity for the room. Steam can also reach the mirror before the fan removes it. Test grille suction, inspect the outdoor termination, and measure humidity if fogging remains severe.
Can anti-fog coating damage a backlit mirror?
Anti-fog coating can damage a backlit mirror if liquid enters unsealed edges, reacts with the manufacturer’s finish, or interferes with a front-applied decorative coating. Check the mirror warranty and product instructions first. Apply cleaner to a cloth, avoid perimeter saturation, and test an inconspicuous area when permitted.
How long should a bathroom demister pad run?
A bathroom demister pad should run only during the period when the mirror must remain clear, commonly during the shower and for several minutes afterward. The exact schedule depends on its clearing time, room humidity, and manufacturer instructions. A timer or light-linked control can prevent unnecessary continuous operation.