Why Is My Wall Bubbling? Diagnose and Fix It
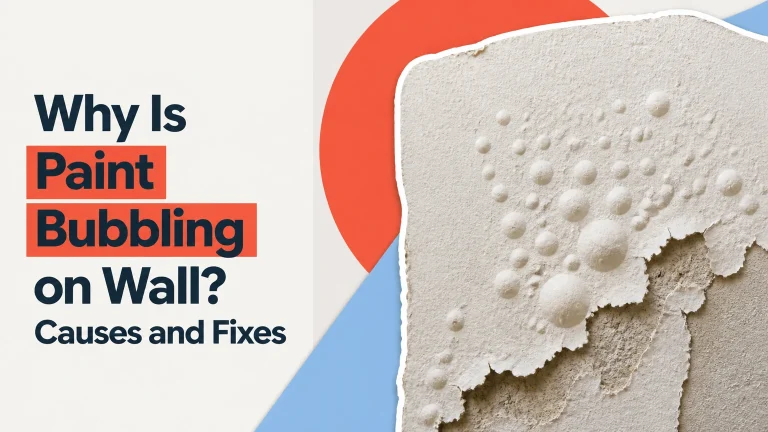
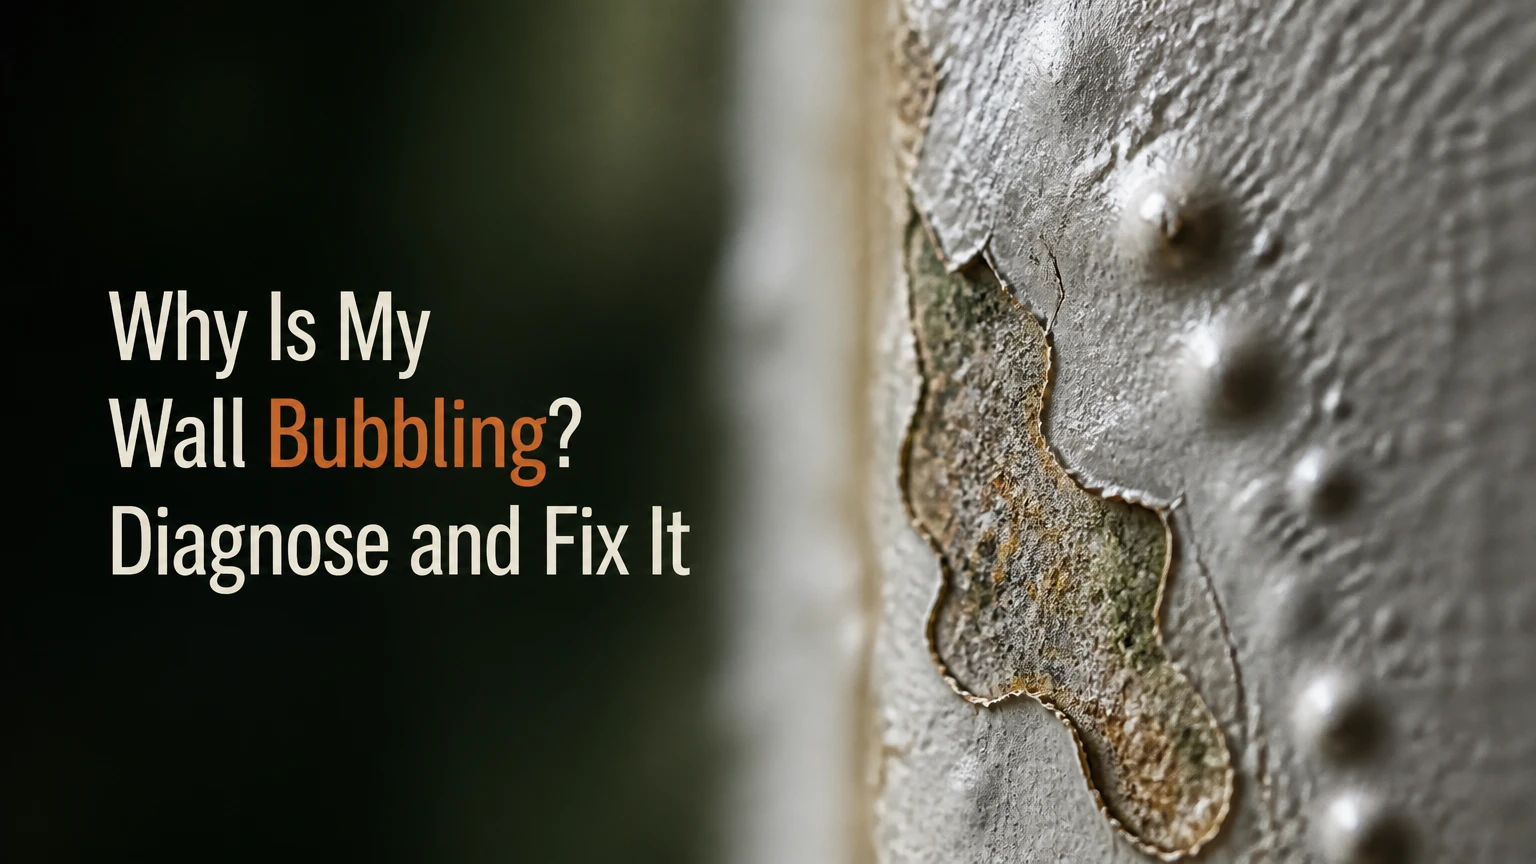
Wall bubbling usually means the paint film has lost adhesion and has been pushed away from drywall, plaster, or masonry by moisture, heat, trapped air, or coating incompatibility. Water-filled bubbles require source control before cosmetic repair, while dry bubbles often result from contamination, rapid drying, poor priming, or an uncured underlying coat.
Key Facts at a Glance
Bubbling paint is a symptom of adhesion failure, not a complete diagnosis.
A wet bubble points to moisture intrusion, condensation, plumbing leakage, or damp construction materials.
A dry bubble commonly indicates dust, grease, excessive heat, rapid drying, or incompatible paint layers.
Painting over a loose bubble does not restore the bond and usually causes renewed peeling.
Small, dry, isolated defects may suit DIY repair; recurring, wet, moldy, or widespread damage needs professional evaluation.
The repair sequence is source control, removal, cleaning, drying, patching, priming, and repainting.
Why Is My Wall Bubbling?
The most likely reason a wall is bubbling is that moisture or heat has weakened the bond between the coating and its substrate. The trapped material then expands, or the unsupported paint film loses tensile strength, creating a raised blister that may later crack, peel, or expose damaged drywall.
Paint is a layered system. The wall surface, sealer, primer, and topcoat must remain clean, dry, compatible, and mechanically sound. A failure in any layer can appear at the surface weeks or years after painting.
How Paint Blisters Form
Paint blistering follows three linked events: adhesion weakens, pressure develops below the film, and the film stretches outward. Moisture can move through porous plaster or drywall, while heat can expand air or accelerate solvent vapor formation beneath a coating that has skinned over.
The U.S. Environmental Protection Agency states, “The key to mold control is moisture control.” That principle applies to bubbling paint because repainting cannot permanently correct water that continues entering the wall assembly.
| Failure mechanism | Typical trigger | Visible result | Useful clue |
|---|---|---|---|
| Moisture intrusion | Pipe leak, roof leak, failed window seal | Soft blister, stains, peeling | Damp substrate or musty odor |
| Condensation | Bathroom steam, cold exterior wall | Repeated small bubbles | Worse after showers or winter cold |
| Surface contamination | Dust, grease, nicotine, sanding residue | Dry peeling or hollow blisters | Dirty or powdery paint underside |
| Thermal or solvent pressure | Direct sun, hot surface, thick coat | Sharp, dry blisters | Appears soon after painting |
| Coating incompatibility | Latex over glossy oil paint without primer | Wrinkling, lifting, sticky underside | Failure follows older coating |
What Causes Bubbling Paint on Interior Walls?
Interior wall bubbles come from four broad sources: water entering from somewhere, vapor condensing on a cold surface, a coating failing during application, or an unstable substrate such as damaged drywall or plaster. Location, timing, and the condition beneath the bubble usually identify the category.
Moisture Sources Behind the Wall
A plumbing leak is more likely when bubbling appears below a bathroom, kitchen, laundry area, radiator, or supply line. Exterior water intrusion is more likely near windows, roof lines, foundation walls, poorly sealed penetrations, or cracks in masonry.
Condensation creates a different pattern. Bathroom ceilings and exterior corners may develop repeated small defects even when no pipe leaks, because warm humid air meets a cold surface and deposits liquid water.
| Pattern or location | Most likely source | Confirming observation | First action |
|---|---|---|---|
| Below a bathroom or kitchen | Supply, drain, or shower leak | Moisture meter rises after fixture use | Stop water use and call a plumber |
| Around a window | Failed seal, flashing, or condensation | Stain follows jamb or sill | Inspect exterior caulk and indoor humidity |
| Bathroom ceiling | Steam and weak ventilation | Damage worsens after showers | Run exhaust fan during and after bathing |
| Basement foundation wall | Groundwater or masonry transmission | Efflorescence or damp masonry | Check grading, gutters, and waterproofing |
| Near roof or upper wall | Roof or flashing leak | Water mark enlarges after rain | Arrange roof inspection before painting |
| Exterior painted wall | Rain penetration or coating failure | Cracks, chalking, or open joints | Repair wall envelope and use exterior coating |
Can Bubbling Paint Mean Mold?
Bubbling paint does not prove mold, but persistent moisture behind paint creates conditions in which mold can grow. A musty smell, dark spotting, soft drywall, recurring dampness, or damage extending beyond the visible blister increases the need for a moisture and mold assessment.
Do not cut into a wall casually. Water may contact electrical wiring, and disturbing mold-contaminated material can spread particles. The EPA recommends professional judgment for larger mold areas, porous materials, and situations involving occupants with asthma, allergies, or immune suppression.
Why Does Paint Bubble After Painting?
Paint often bubbles after painting because the surface was damp, dirty, too hot, too cold, or incompatible with the new coating. Thick application, inadequate drying between coats, and painting in direct sunlight can also trap water or solvent beneath a rapidly formed surface skin.
A new bubble within hours may indicate application conditions or coating incompatibility. A bubble appearing days later can indicate residual moisture, insufficient substrate drying, or a leak that became active after the painting work.
Water-based latex paint should not be applied directly to glossy oil-based paint without preparation and a compatible bonding primer. Test an inconspicuous area when the previous coating is unknown, especially in older homes where multiple paint types may be layered.
How Can I Tell Whether a Wall Bubble Is Wet or Dry?
A wet wall bubble usually has a damp, cool, soft, stained, or musty surrounding area, while a dry bubble feels hollow and exposes dry, dusty, or clean material when loose paint is removed. Do not puncture a large bubble near an outlet, switch, light, or suspected pipe.
Begin with non-destructive checks. Photograph the area, note its size, press only the surrounding wall lightly, and inspect nearby plumbing, windows, ceilings, and exterior joints. A pinless moisture meter can map relative differences, but readings vary by meter, material, salts, metal fasteners, and wall thickness.
If inspection is safe, remove a small loose edge rather than deliberately piercing a tight blister. Wear eye protection and a suitable dust mask when scraping or sanding. Stop when the substrate is soft, visibly moldy, electrically hazardous, or structurally distorted.
| Observation | Likely interpretation | Confidence | Next diagnostic step |
|---|---|---|---|
| Clear liquid or damp paper | Active or recent moisture | High | Find leak or intrusion source |
| Brown or yellow ring | Water staining | Medium-high | Check plumbing and exterior exposure |
| Dry, powdery backing | Contamination or poor adhesion | Medium | Clean and test surrounding bond |
| Sticky underside | Uncured or incompatible coating | Medium-high | Identify old and new paint types |
| Soft or swollen drywall | Water-damaged gypsum core | High | Professional removal may be needed |
| White crystalline deposits | Efflorescence from masonry moisture | Medium-high | Address water migration before coating |
A meter reading is not a universal pass-fail rule. The often-repeated “below 12%” drywall threshold is not valid for every instrument because meters use different scales and calibration references; compare readings with an unaffected area and follow the meter manufacturer’s instructions.
Which Wall Bubbles Can You Repair Yourself?
DIY repair is reasonable for a small, isolated, completely dry paint defect with a firm substrate and no sign of active moisture. A typical suitable area is less than 1 square foot, with no electrical, plumbing, mold, or structural concern.
DIY repair is not a good choice for recurring bubbles, wet drywall, ceiling sagging, widespread peeling, suspected lead paint, or damage that returns after drying. Homes built before 1978 may contain lead-based paint, and sanding or scraping can create hazardous dust; use EPA lead-safe practices or hire a certified contractor.
| Condition | DIY suitability | Typical material | Recommended decision |
|---|---|---|---|
| Dry blister under 1 square foot | High | Putty knife, compound, primer | Repair after adhesion check |
| Damp spot under 1 square foot | Low | Moisture meter, containment supplies | Find source first |
| Soft drywall or sagging ceiling | None | Replacement gypsum, drying equipment | Hire a professional |
| Suspected mold under 10 square feet | Limited | PPE and containment materials | Follow EPA guidance |
| Pre-1978 unknown paint | Limited | Lead test kit, protective controls | Use lead-safe professional |
| Repeated failure after repainting | Low | Diagnostic inspection tools | Investigate hidden cause |
How Do You Fix Bubbling Paint Properly?
Fix bubbling paint by correcting moisture or adhesion failure first, then removing unstable material, drying the wall, restoring the surface, sealing the repair, and applying compatible paint. A localized dry repair usually requires 2-3 days of elapsed time because joint compound and coatings need curing time.
Before You Start
- Typical labor: 1-3 hours for a small cosmetic patch.
- Elapsed time: 2-3 days, including drying and curing.
- Typical DIY cost: $30-$75 for basic supplies and a small paint quantity.
- Tools: stiff putty knife, scraper, sanding block, 150-220 grit paper, brush, roller, and vacuum.
- Materials: mild detergent, patching compound, stain-blocking or bonding primer, matching paint, plastic sheeting, gloves, eye protection, and dust protection.
- Prerequisite: the wall must be dry, stable, and free from an unresolved water source.
Step 1: Find and Stop the Moisture Source
Repair the leaking pipe, roof, window seal, shower joint, gutter, or exterior crack before disturbing the finish. For condensation, reduce indoor humidity and improve air movement rather than relying on paint alone.
Use a bathroom exhaust fan during bathing and for about 20-30 minutes afterward when practical. The U.S. EPA generally recommends keeping indoor relative humidity below 60%, with 30-50% commonly preferred for comfort and moisture control.
Success checkpoint: the moisture source is repaired, and the affected area shows no increasing dampness after normal plumbing use or rainfall.
Common mistake: patching the stain while the leak remains active.
Step 2: Protect the Area and Remove Loose Paint
Cover floors and furniture. Scrape loose paint with a rigid putty knife until the remaining edges resist lifting; feather the transition rather than forcing sound paint away from the wall.
Do not dry-sand old paint until you have considered lead. Wear eye protection and respiratory protection appropriate to the dust, and use local containment when scraping produces chips.
Success checkpoint: no hollow, lifted, cracked, or flaking edge remains around the defect.
Common mistake: stopping at the visible center while leaving a weak perimeter that later peels.
Step 3: Clean the Exposed Substrate
Wash dust, grease, smoke residue, and surface salts with a damp sponge and mild detergent. Rinse residue with clean water, then allow the wall to dry; aggressive soaking can damage gypsum paper and prolong the repair.
Efflorescence on masonry should be brushed away after the moisture source is controlled. Do not seal active salt migration beneath a non-breathable coating.
Success checkpoint: the exposed area is firm, clean, and free of loose powder or greasy residue.
Common mistake: applying primer over detergent residue or chalky paint.
Step 4: Dry and Test the Wall
Drying time depends on wall thickness, humidity, temperature, and water volume. A fan and dehumidifier can help, but warm air alone may move moisture deeper or spread contaminated dust.
Compare the suspected area with an unaffected section using the same meter and setting. A dry-feeling surface is not proof that the wall core is dry, especially after a plumbing leak.
Success checkpoint: moisture readings trend toward the unaffected wall, and no new stain or cool damp zone appears over 24-48 hours.
Common mistake: treating a single meter number as a universal clearance value.
Step 5: Patch the Depression
Apply a compatible drywall joint compound or setting-type patching compound in thin coats. A deep repair should be built in layers rather than filled with one thick application, which can shrink, crack, or retain moisture.
For damaged drywall paper, seal exposed paper with a compatible problem-surface sealer before broad skim coating. Replace gypsum board when the core is swollen, crumbly, or delaminated.
Success checkpoint: the patch is level with the surrounding wall and remains firm after curing.
Common mistake: using joint compound to conceal soft or contaminated drywall.
Step 6: Sand and Remove Dust
Sand cured compound with 150-220 grit paper until the transition disappears under side lighting. Vacuum dust and wipe lightly with a clean, barely damp cloth before priming.
Do not over-sand surrounding paint. A wide feathered edge usually produces a less visible repair than a deep, sharply bounded patch.
Success checkpoint: the wall feels uniformly smooth, with no ridge around the former bubble.
Common mistake: priming while sanding dust still covers the surface.
Step 7: Prime the Repair
Use a stain-blocking primer for water marks and a bonding primer where adhesion or old glossy paint caused the failure. Seal bare drywall compound because porous patches absorb topcoat unevenly and can produce flashing.
Follow the product label for temperature, humidity, recoat time, and ventilation. Typical primer recoat times are 2-4 hours, but cool or humid rooms can require longer.
Success checkpoint: the repaired area has an even sealed appearance and does not soften or lift during light rubbing.
Common mistake: using ordinary wall paint as the first coat over a porous or stained patch.
Step 8: Repaint the Whole Visual Section
Match sheen and color, then apply two thin topcoats rather than one heavy coat. Extend the final coat to a natural break such as a corner or wall intersection when spot repair creates visible flashing.
Typical interior application conditions are 50-90°F, with the wall temperature inside the paint manufacturer’s stated range. Avoid direct sunlight, condensation, and high humidity while the coating cures.
Success checkpoint: the finish remains flat after 24-48 hours and matches the surrounding sheen under side lighting.
Common mistake: repainting as soon as the surface feels dry while the lower layer remains uncured.
Which Conditions Prevent Paint Bubbles?
Paint is least likely to blister when the substrate is clean, dry, stable, and within the manufacturer’s temperature and humidity limits. Relative humidity around 30-50% is a practical target for many interior projects, but the product label controls when its limits differ.
| Condition | Practical target | Why it matters | Measurement method |
|---|---|---|---|
| Indoor relative humidity | 30-50% preferred | Limits condensation and slows drying problems | Hygrometer |
| General EPA upper limit | Below 60% | Reduces mold-supporting moisture | Hygrometer |
| Air temperature | 50-90°F typical | Supports predictable curing | Room thermometer |
| Surface temperature | Within label range | Prevents rapid skinning or poor flow | Infrared thermometer |
| Primer recoat interval | 2-4 hours typical | Prevents solvent or water trapping | Product label |
| Joint compound cure | 12-24 hours typical per coat | Reduces shrinkage and trapped moisture | Product label and touch test |
These figures are practical ranges, not guarantees. A cold exterior wall can remain damp even when room humidity appears normal, and a newly repaired leak may leave moisture inside the wall for days or weeks.
How Much Does Bubbling Wall Repair Cost?
A small USA DIY repair typically costs $30-$75, cosmetic contractor work commonly costs $150-$350 per room, and professional moisture remediation often ranges from $500-$2,500 or more. Plumbing, roofing, demolition, mold treatment, and replacement materials can increase the total.
| Work scope | Typical USA cost | Typical elapsed time | Main cost driver |
|---|---|---|---|
| Small DIY paint patch | $30-$75 | 2-3 days | Drying and paint quantity |
| Local cosmetic contractor repair | $150-$350 per room | 1-2 days | Access and finish matching |
| Plumber leak diagnosis and repair | $150-$1,000+ | Same day to 3 days | Leak location and pipe access |
| Drywall replacement and drying | $500-$2,500 | 2-7 days | Area, demolition, equipment |
| Mold or water remediation | $1,000-$5,000+ | 3 days to several weeks | Containment and material loss |
The ranges are typical planning figures, not fixed quotations. A contractor should separate the cost of source repair, drying, demolition, mold treatment, surface restoration, and repainting so the cosmetic portion does not hide an unresolved building problem.
What Should You Do in Different Wall Locations?
The correct response depends on where the bubbling occurs because each location points toward a different moisture pathway. Bathroom ceilings favor condensation, window edges suggest seals or cold-surface moisture, and basement walls raise concern about groundwater or masonry transmission.
Bathroom Ceiling
Increase ventilation, inspect the ceiling after several days of normal use, and check for plumbing above the room. Bubbling limited to a shower zone can result from steam, but a brown expanding stain or soft gypsum requires leak investigation.
Near a Window
Check indoor condensation, failed caulk, flashing, siding joints, and the exterior sill. Condensation usually affects cold edges during cold weather, while rain intrusion often follows storms and leaves a directional stain.
Basement or Foundation Wall
Look for efflorescence, damp masonry, cracks, blocked gutters, poor grading, and downspouts that discharge beside the foundation. Interior paint may fail repeatedly if exterior water pressure remains unresolved.
Ceiling Below a Roof
Inspect the roof covering, flashing, attic insulation, and ventilation after rain. Do not assume a ceiling bubble comes from a plumbing line simply because it is indoors.
Exterior Painted Wall
Exterior blistering can result from rain entering through cracks, sun-heated surfaces, painting damp masonry, or trapped vapor behind an impermeable coating. Exterior repairs require weather-rated products and a dry weather window.
What Mistakes Cause Bubbling to Return?
Recurring wall bubbles usually result from painting over moisture, leaving weak paint at the perimeter, sealing damp materials, or using an incompatible primer and topcoat. A repair that fails again within weeks is evidence that the diagnosis was incomplete.
- Painting over an active bubble: remove the coating and identify moisture or adhesion loss first.
- Ignoring soft drywall: replace compromised gypsum instead of filling it with compound.
- Priming damp compound: scrape back, allow full cure, and follow the product recoat interval.
- Skipping surface cleaning: wash grease, dust, salts, and nicotine before priming.
- Using the wrong primer: use bonding primer for glossy or incompatible coatings and stain-blocking primer for water marks.
- Dry-sanding possible lead paint: stop work, test the coating, and use lead-safe controls.
- Closing a wet wall too quickly: monitor the area for recurring stains and compare moisture readings over time.
A practitioner rule is to diagnose the perimeter, not only the center. The largest visible bubble may be the downstream expression of a much larger moisture plume or adhesion failure.
When Should You Call a Professional?
Call a professional when the wall is wet, soft, moldy, structurally distorted, electrically risky, or repeatedly failing after repair. A plumber, roofer, building-envelope contractor, water-restoration company, mold professional, or painter may be appropriate depending on the evidence.
| Warning sign | Appropriate professional | Reason |
|---|---|---|
| Active pipe leak or water near wiring | Licensed plumber and electrician if needed | Controls water and electrical hazards |
| Sagging or swollen ceiling | Water-restoration contractor | Evaluates collapse and material removal |
| Recurring exterior-wall bubbling | Building-envelope or masonry contractor | Finds rain and vapor pathways |
| Extensive mold or contaminated porous material | Qualified remediation contractor | Uses containment and disposal controls |
| Pre-1978 deteriorated paint | EPA lead-safe certified contractor | Controls lead dust and waste |
| Large unexplained moisture area | Water-damage specialist | Maps drying and hidden material damage |
Renters should photograph the damage, record dates and weather or plumbing events, and notify the landlord before cutting, scraping, or opening the wall. Cosmetic repair may be minor, but the underlying building defect generally belongs to the property owner or manager to investigate.
The Bottom Line
Why is my wall bubbling? In most cases, moisture, heat, contamination, or incompatible coatings have caused paint adhesion to fail. Determine whether the defect is wet or dry, stop any water source, remove all unstable material, dry the substrate, patch and prime it correctly, then repaint under suitable conditions.
A small dry blister can be a manageable DIY project. Water, mold, soft drywall, recurring failure, ceilings, electrical proximity, and suspected lead paint change the decision and justify professional help.
Frequently Asked Questions
Will bubbling paint go away by itself?
Bubbling paint rarely returns to a sound bond by itself. A temporary reduction in humidity may stop condensation, but the lifted film remains detached and can peel later. If moisture is trapped behind drywall or plaster, the visible bubble may flatten while the substrate remains wet, allowing stains, odor, or mold growth to develop.
Can I pop a wall bubble to drain it?
Do not pop a wall bubble automatically. A bubble near an outlet, switch, light, pipe, or soft ceiling can expose electrical and structural hazards. Photograph the defect, inspect from the surface, and remove only loose edges when safe. A professional should open wet, large, recurring, or contaminated areas.
Why is only one patch of wall bubbling?
One patch usually indicates a localized cause, such as a plumbing connection, window leak, cold bridge, contaminated repair area, or isolated coating defect. Compare the location with rooms above, exterior joints, fixtures, and weather patterns. A small surface defect can still mark a larger hidden moisture path.
Is bubbling paint worse than peeling paint?
Bubbling and peeling are different appearances of related adhesion failure. Bubbling indicates pressure or separation beneath the film, while peeling shows that the weakened film has lost enough bond to lift away. Peeling around a bubble often means the defective area extends beyond the visible raised section.
How long should I wait before repainting a repaired wall?
Wait until the water source is fixed, the substrate is dry relative to an unaffected area, and patching compound and primer have fully cured. A small repair commonly takes 2-3 elapsed days, while water-damaged drywall may require several days or longer. Product labels and moisture trends control the final timing.
Can high humidity make fresh paint bubble?
High humidity can contribute to bubbling by slowing evaporation, extending the coating’s soft period, and promoting condensation on cool walls. Humidity alone is not proof of the cause. Check the wall temperature, substrate dryness, ventilation, previous coating type, and whether the defect appears only after showers or weather changes.